Archive for January, 2012

Jan
31


Fact: I keep a dairy kitchen. That’s right – I have not bought meat for over 20 years. I don’t know how much a chicken even costs and I would have no idea how to prepare chicken, if I ever had the opportunity.

However I buy fish. Mostly salmon, tilipia, canned tuna and canned salmon and on the rare occasion a whole snapper. I only make it once a week and I must admit, that my list of “Fish Recipes” is limited. But last week, I went online, determined to find a new recipe. I saw one that caught my eye, tried it and decided it was a keeper. Not only did it look gorgeous (I happen to like green) but the spinach pesto kept the tilapia really moist.

You will notice that the blog post has two recipes. The “formal” recipe and then the “adapted” recipe!!

Spinach Pesto Tilapia (from www.about.com)

INGREDIENTS:

Pesto:

  • 3 cups baby spinach leaves, packed, about 3 ounces
  • 1/4 cup olive oil
  • 1/2 cup pecan halves
  • 1/3 cup fresh shredded Parmesan cheese
  • 2 medium cloves garlic, smashed and minced
  • salt and pepper
  • 8 tilapia fillets

INSTRUCTIONS:

Lightly butter a 9×13-inch baking dish. Heat oven to 400°
1. In a food processor, pulse the 3 cups of spinach leaves, 1/4 cup olive oil, pecan halves, Parmesan cheese, garlic, and 1/4 teaspoon salt until the mixture is a fine consistency.

2. Arrange remaining spinach leaves over the bottom of the baking dish.

3. Place a tilapia fillet on the bed of spinach and put about 1 tablespoon of the pesto mixture on the fillet. Spread lightly to cover most of the fillet. Repeat with remaining fillets and pesto, overlapping fish slightly as needed. Sprinkle lightly with salt and pepper.

4.Bake for 15 to 20 minutes, or until tilapia flakes easily with a fork.

ADAPTED VERSION: (according to Vicky…who didnt really read the recipe carefully till afterwards). Typical!! There is probably a good reason why I follow a blog called www.norcecipes.com!

1. Prepare the pesto (I even forgot the pecan halves and the parmesan cheese and it still tasted DELICIOUS)

love my cuisinart

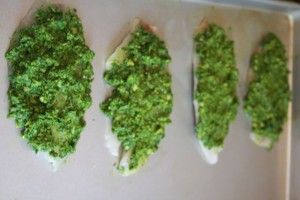
2. Spread the pesto on top of each piece of tilapia and place on a baking sheet

3. Bake at 400 degrees for 15 minutes

4. Here’s what the final product looked like, before I served it to my guests:

Sometimes I don’t follow a recipe and it still works!! In this case…I was lucky. The fish came out perfectly.

Happy Cooking…whether you follow the first recipe or the adapted recipe!!

Share this:
Share this page via Email Share this page via Stumble Upon Share this page via Digg this Share this page via Facebook Share this page via Twitter

, , , , , ,

Jan
29


What do you prefer……pancakes or french toast? It’s a hard question, don’t you think?  I don’t even know the answer to this question..I truly like both. I posted this question on twitter tonite and here’s the results: 8 people preferred french toast and 3 people preferred pancakes. Good thing this blog post is about French Toast!!

A few months ago, I came across a recipe called CRUNCHY FRENCH TOAST and I thought that it would be fun to try, seeing as I make the same type of  french toast ALL THE TIME.

The recipe is from a cookbook called Bubbies Brunch Cookbook by Ron Silver.  I only tried this recipe once but I would certainly like to try more from this cookbook. i.e Banana Walnut Pancakes. YUM.

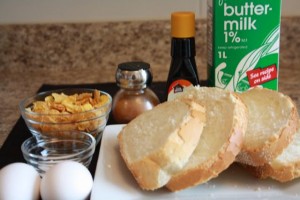
Here’s what you need:

INGREDIENTS:

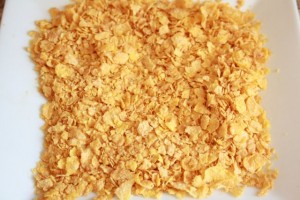
2 cups crushed cornflakes

1/2 teaspoon cinnamon

2 tablespoons sugar

4 extra large eggs

1/2 cup buttermilk

1/4 cup packed brown sugar

1/4 tsp vanilla extract

pinch of salt

8 thick slices of bread

butter for the griddle (or skillet)

METHOD:

1. Crush the cornflakes (I simply used my hands).

2. Mix the crushed cornflakes,1/4 tsp cinnamon and the sugar and put on a plate

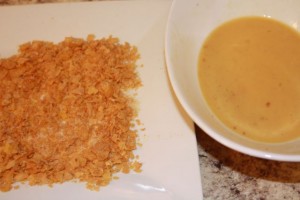
3. Whisk or use a mixer and beat the eggs until frothy. Add the buttermilk, brown sugar, salt. 1/4 tsp cinnamon. Beat for another minute.

4. Dip the slices one at a time into the egg mixture, turning to coat both sides.

5. Carefully place the slice onto a griddle or a skillet on medium heat. Flip over after to 2-3 minutes.

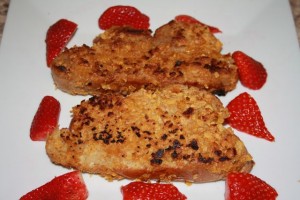
FINAL RESULT:


I think you will agree with me, that this is delicious. The addition of the crushed cornflakes really kicks it up a notch. I certainly know that I will be using this recipe again.

So, back to the original question: French Toast or Pancakes?

Can’t wait to hear your answers.

Share this:
Share this page via Email Share this page via Stumble Upon Share this page via Digg this Share this page via Facebook Share this page via Twitter

, , , , , ,

Jan
27


I simply love this show. Even though I am a foodie, I can still like design, right? The Interior Design Show which is being held at the Metro Toronto Convention this weekend is a show I won’t miss. This year, I am going twice. That’s how much I loved it. There is just so much to see, and so much to absorb that I really do want to walk thru it a second time.

Here’s a few things that caught my eye:

John should win a prize for hopping into the tub!!

This bathub from Stone Forest is brand new to Canada. It’s $31,000 and weights 2100 lbs. That’s one heavy bath.  This style of bath has been sold in the States for years, but for some reason it JUST got introduced to Canadians this year. My friend (who was born in Paris), told me that she grew up with this style of bath as apartments were small and this bath would still allow you to have a bath without demanding a lot of space.

Kudos to John (who was an exhibitor) for hopping into the bath to model for us. We all had a good laugh.

Next item that caught my eye:

Clever.

What caught my eye was the writing on the board, which said “first generation iPad”. HYSTERICAL. I love clever marketing. Congratulations to www.kinoguerin.com for making me smile!! (ps. they have a wicked business card too).
More:

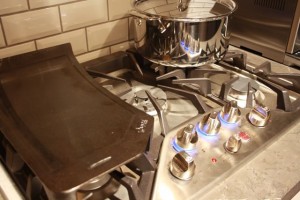
griddle!!

This magnificent stove top from GE Cafe, was being launched at the show. See the black griddle on the left? Isn’t that genius. I am sure there’s a few pancake loving families who will love this type of feature. I know I would!! GE Cafe continues to create appliances with all the bells and whistles. Worth dropping by their booth!!
I also fell in love with this wood table and light fixture.

There was also a futuristic chair that caught my eye. Can’t decide if I like it or I don’t like it but it certainly caught my eye!!

yes? no? maybe?

I really hope you get a chance to visit the Interior Design Show this weekend at the Metro Toronto Convention Centre.

Hours: Saturday Jan. 28th, 10 to 7 p.m and  Sunday Jan. 29th, 10 to 6 p.m

Tickets: $18 (online) $22 (onsite)

Share this:
Share this page via Email Share this page via Stumble Upon Share this page via Digg this Share this page via Facebook Share this page via Twitter

, , , ,

Jan
24


Fact: It’s winter and all I want to do is eat comfort food. I have a freezer full of soups and I wanted to diversify and make something different. Of course, twitter inspired me when I saw a tweet from @cookincanuck about a crockpot stew! Bonus Points: it’s VEGETARIAN.

I made one stew and I was immediately in crockpot heaven – so I went back and made another crockpot stew from her Cookin’ Canuck website.

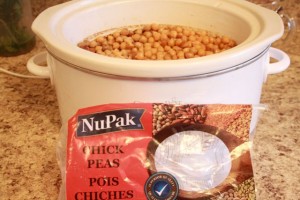
Believe it or not, I used dried chickpeas for both recipes which I have never done before. Generally I use canned chickpeas. But I wanted to reduce the sodium and find out if there was a difference. Indeed there WAS a difference…both in flavor and texture.

I should mention that I didnt exactly follow the recipe seeing as the original recipe called for canned chickpeas. I cooked the chickpeas first in the crockpot and then added the onion mixture. I leave it up to you if you want to use canned chickpeas or dried chickpeas.

Both stews were super easy to make and chock full of protein, fibre and other goodness. Not to mention a very very affordable dish.

Crockpot Gingered Chickpea with Spice Tomato Stew; (from the kitchen of Cookin’ Cancuk).

INGREDIENTS:

1 tablespoon olive oil

2 onions finely chopped

4 cloves of garlic, finely chopped

2 tablespoon minced fresh ginger (I used organic and again I really think it makes a difference)

2 tsp ground corriander

1 tsp corriander seeds

1 tsp salt

1/2 tsp black pepper

2 tsp balsamic vinegar

2 cups canned or fresh chopped tomotoes (I used canned)

2 cans of chickpeas (rinsed and drained) or 2 cups of dried chickpeas (previously cooked)

2 cups fresh spinach leaves.

METHOD:

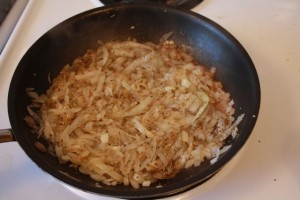
1. heat olive oil in a large skillet over medium heat. Add onions and cook, stirring until the onions begin to brown.

2. add garlic, ginger, ground coriander, coriander seeds, salt and pepper. Cook for 1 minute.

3. add balsamic vinegar and tomatoes. Bring the mixture to a boil.

4. spread the chickpeas in the bottom of the crockpot. Pour the tomato mixture over the chickpeas and mix well.

5. cover the crockpot and cook on low for 6 to 8 hours or on high for 3-4 hours

6. Just before serving, stir in spinach.

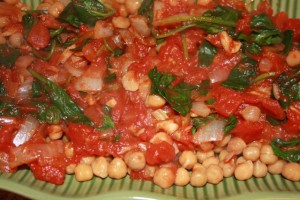
FINAL PRODUCT


RECIPE #2: Crockpot Chickpea Stew with Balsamic Onions (from the kitchen of Cookin’ Canuck)

INGREDIENTS:

2 medium onions, thinly sliced

1 tablespoon brown sugar

1 tsp dried oregano

1 tablespoon balsamic vinegar

1/2 tsp salt

2 cups chopped canned tomatoes

1/3 cup chopped kalmata olives.

2 cans chickpeas (I used 2 cups dried chickpeas)

1/3 cups crumbled feta cheese

1/4 fresh parsley, chopped

METHOD:

1. heat olive oil in a large skillet over medium heat. Add the onions and cook until softened. Stir in brown sugar. Cover and cook unitll the onions are golden brown (about 10 minutes)

2. add 1/4 cup water and oregano, cover the pan again and cook unitll the onions are deep golden brown (about 15 minutes).

3. stir in balsamic vinegar, salt and an additional 1/4 cup water. Cover the pan and cook until liquid is absorbed. Remove from heat.

4. Stir in tomatoes and kalamata olives

5. Pour the chickpeas into the bottom of a crockpot. Pour the onion mixture over the chickpeas. Cook on low heat for 5-6 hours or 3-4 hours on high heat

6. Garnish before serving, with crumbled feta cheese and chopped fresh parsley.

Who else loves their crockpot?

Share this:
Share this page via Email Share this page via Stumble Upon Share this page via Digg this Share this page via Facebook Share this page via Twitter

, , , , , ,

Jan
22


Can't stop staring at my eyelashes!!

I was introduced to Flirt Custom Lash Studio via twitter last week. I’m sure you are tired of me endlessly telling you how many great people I  meet on twitter – but it’s TRUE.

She tweeted that Flirt Custom Lash Studio was offering Eyelash Extensions to women who lived in the GTA on Sunday Jan 22nd. I replied back within seconds. Before I knew it, I was booked for a 4 p.m appointment. She has asked me to review their website for “pre appointment” instructions and of course I peeked around the website, seeing as I had no previous experience with eyelash extensions.

What’s ironic – is that two weeks ago at a dinner party, one of the guests mentioned how she had eyelash extensions before her wedding and even showed me the photos. I was super impressed so I knew that this was something I wanted to try.

Here’s my experience: I arrived promptly at 4 p.m at Blush Pretty Studio (313 Queen West..2nd floor). I took off my contact lenses and Sommer (the owner of Flirt Custom Lash Studio)  proceeded to do her magic with my eyelashes.

I was so relaxed that I could have fallen asleep but I was too busy talking to Sommer about twitter, social media, Xtreme Lashes, and more. The 45 minutes seemed to zip by.

Here is a great photo of Sommer doing her magic.

Sommer was extremely professional (ps she is Xtreme Lashes certified) and asked me if I was OK – if I had any questions – if I had any expectations – etc. Before I knew it ..I looked like this.

OMG

I honestly can’t believe how awesome this product is. I honestly don’t know why I havent done this before either.

All I know, is that I can’t stop staring in the mirror.

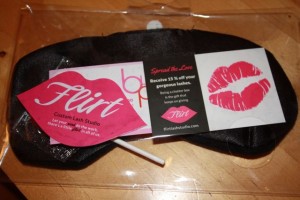
Oh yeah – I came home with a “after care packet”..so that I keep my eyelash extensions looking their best for as long as possible. (which I plan on doing, by the way)

My After Care Package!

Thanks to Flirt Custom Lash Studio for my beautiful eyelash extensions!!

For further info about Flirt Custom Lash Studio, please visit their website or call Sommer at 647 402 8894.

Share this:
Share this page via Email Share this page via Stumble Upon Share this page via Digg this Share this page via Facebook Share this page via Twitter

, , ,

Jan
20


If you like Crate and Barrel then you are going to LOVE CB2!!

CB2 has 10 stores throughout the United States, but as of Saturday, CB2 will have opened their first International store in Toronto!!

The cover of their catalogue reads: hello toronto and hello affordable mordern for apartment, loft and home.

They are right!!

I had a sneak preview today (lucky me) and I walked around saying to myself “I want”…”I want”…I want”!! Whether “I need”…is a different story!! Truth be told, my good friend gave me a $100 gift card for Crate and Barrel and now I know exactly where to go and what I want.

Want. In. A. Big. Way.

Want!

Want!

I. Want. This. Too!

No question this store will be popular amongst those who live in condos, homes, lofts and apartments!!  Plus, it will appeal to those seeking a great price point for FABULOUS home furnishings. I was super impressed and quickly called a few good friends who are ‘design mavens’ to encourage them to visit the store STAT.

Love.

This week, I am  in “design heaven” as not only did I get a chance to go to CB2 today, but I’m heading to the Interior Design Show on Thursday for my 3rd row in a row. I can’t say enough about this show. There’s aisles and aisles of the latest in design for appliances, furniture, fireplaces and more. It’s a show I won’t miss. So much eye candy – it’s not even funny.

If you like design: this is a show you should attend. I promise you, you won’t be disappointed. It features about 4,000 individual designers, studios, firms and companies and is Canada’s largest contemporary design show.

CB2…651 Queen St. West (south east corner of Bathurst and Queen)

Interior Design Show: Jan 26th – opening party. Jan 27th Professional Trade Day. Jan 28 General Admission (10-7 pm). Jan 29 General Admission (10 – 6 p.m). Metro Convention Centre.

Share this:
Share this page via Email Share this page via Stumble Upon Share this page via Digg this Share this page via Facebook Share this page via Twitter

, , , ,

Jan
19


Most of the tweet ups I attend are at restaurants, however this week I am hosting a Shabbat Tweet up in my apartment.  What does this mean? This means that all the guests are on twitter and they are all “foodies” in a big way plus 99% of the guests are Jewish.

The food served at this tweet up will be traditional Friday nite food except for the fact that my kitchen is vegetarian. (small detail). This means no one will be enjoying chicken soup, chopper liver or brisket.

I decided that the meal definitely required a potato knish. They are easy to make and everyone loves them.

What is a knish? Its basically puffed pastry with potato filling. I cheat and use a mix. Once we did a taste test between fresh mashed potatoes and the mix and no one could tell the difference. Therefore, I use the mix out of pure convenience.

My mom makes them to perfection. Little tiny bundles. Mine aren’t as  pretty and I hope she isn’t reading this, shaking her head and muttering “why didn’t she watch me in the kitchen?”.

POTATO KNISHES:

Ingredients:

1 package of puffed pastry

Mashed potatoes…(I made 2 servings according to the instructions on the side of the box)

METHOD:

1. Make the mashed potatoes according to the directions on the box. SEASON generously with salt and pepper

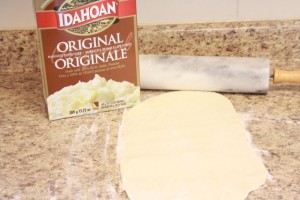
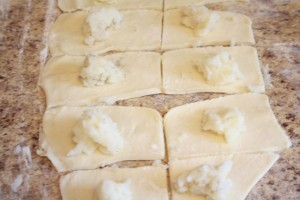
2. Roll out the dough and then cut into squares. Forgive me – but I don’t measure how big these squares should be. Fill with a tablespoon of mashed potatoes.

3. Shape into ????. I wish I could describe how to do this step but I can’t. It would have been brilliant of me to prepare a video of this step. One day – I promise!!

4. The goal is to make them into little bundles.

4. Egg wash each knish so they get a nice shine to them.

5. Bake at 350 degrees for 25 minutes. The final product should look like the first photo at the top left of the page.

Try eating knishes with sour cream.  I also love the fact that they freeze BEAUTIFULLY.

Can’t wait to serve them tomorrow at the Shabbat Tweet up.


Share this:
Share this page via Email Share this page via Stumble Upon Share this page via Digg this Share this page via Facebook Share this page via Twitter

, , , ,

Jan
17


I was having company over and wanted to make something different for dessert. Something I have never tried before. Within no time at all, I was googling recipes for Lemon Meringue Pie.

I looked at several recipes/blogs before deciding that I was going to use the recipe from the blog: Sweet as Sugar Cookies, which she found from Cookie Madness.

It seemed easy:

  1. Make a pie crust
  2. Make the lemon filling
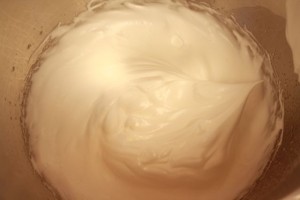
  3. Make the egg whites

Lemon Meringue Pie

Pie Crust:

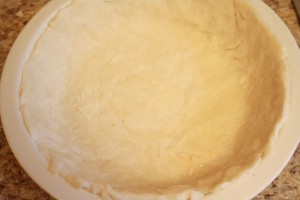
Most of the recipes said “prepared pie crust”. Naturally I wanted to make my own.

I used a recipe from  Suite 101 written by Donna Diegel.  Click for the recipe and her useful tips.

Egg Whites: ( recipe taken from Betty Crocker)

3 egg whites

1/4 tsp cream of tartar

6 tablespoons of sugar

1/2 tsp vanilla

METHOD:

Beat egg whites on high with an electric mixer till foamy. Beat in sugar , 1 tablespoon at a time. Continue beating till eggs are stiff and glossy. Beat in the vanilla.

LEMON FILING:

Ingredients:

1 1/4 cup sugar

1/8 tsp sgar

1/2 cup cold water

1 tablespoon lemon zest

1/2 cup lemon juice

4 egg yolks

1 tablespoon butter (at room temperature)

1 1/2 cup boiling water

METHOD

Combine sugar, cornstarch, salt in a saucepan.

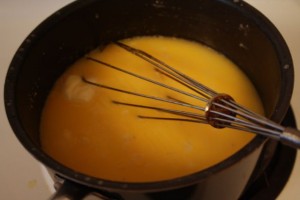
Whisk in 1/2 cup cold water, lemon zest and lemon juice. Blend thoroughly. Add the butter and whisk in 1 1/2 cups boiling water.

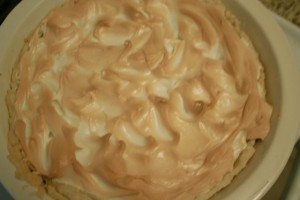
Set pan over medium heat and stir until mixture boils (about 7 minutes). Reduce heat and stir one more minute. Pour hot filling into pie crust, and top with meringue. Spread to the edges of the pie crust to create a seal and prevent shrinkage.

Bake in a preheated oven that at 350 degrees for 15-20 minutes and cool for two hours.

DO NOT (repeat – DO NOT) cover or it will WEEP. (I learned my lesson).

Making Lemon Meringue Pie,  was easy and not so easy! (does that make sense?). Did I make the pie crust too tough? did the lemon filling thicken enough? did the egg whites get stiff? I was a wreck.

However as each step was accomplished I was PROUD.

WOW – I just made the pie crust!

Wow – I just made the filling

WOW – I just made eggwhites!

Best part – wow – I DID IT. I DID IT.

I have to admit, that my stomach was in a knot for the full hour that I was preparing this recipe. I’m just not use to making crust, filling, and meringues. But it was worth it and I know that the next time I make this recipe it will get easier.

I finally served the pie and everyone enjoyed it but received some feedback that the pie crust was too tough. Good to know.

I would love to go to a pie crust 101 class!! Anyone else want to join me?

Disclosure: I am part of the Life Made Delicious Connector Program and I receive special perks as part of the affiliation with this group. The opinions on this blog are my own.

Share this:
Share this page via Email Share this page via Stumble Upon Share this page via Digg this Share this page via Facebook Share this page via Twitter

, , , , , , ,

Jan
15


The stores must see me coming. “Hey… Here Comes Vicky”.

Especially in stores like the Real Canadian SuperStore I think the Kitchen Department is BRILLIANT – so many fabulous products and with it – matching fabulous prices. I really should avoid this store but I love Joe Fresh and wanted to see what was coming out for Spring. While I was in there, I just HAD to check out the kitchen aisles, right? RIGHT!!

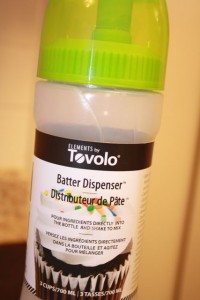
This is what caught my eye on a recent visit to my neighborhood SuperStore:

I could not resist buying this. After all – it was ONLY $5.

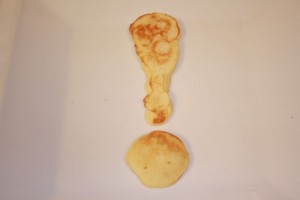
I also knew what I would be doing with it. I would be making pancakes with it and kicking it up a notch with funky creative designs. Therefore on Sunday morning I got up bright and early (like all good mothers – HA) and took out the Bisquick.

I made the batter, poured it into the dispenser and let my inner child out!

I was smiling as was my 12 year old daughter and it was one happy kitchen!!

I was having a blast. HA. Who knew that cooking would be so much fun. Now, my daughter is not a picky eater, but can you imagine what a picky 3 year old child would be like if their pancakes were served with funky shapes and designs!! I almost (Note: almost) wanted to borrow someones child to find out.

Bottom line: I love products like this. I made a fun quick breakfast in NO TIME at all that made everyone smile. Congratulations Tovolo for creating this product and to SuperStore for carrying it.

Cant wait to use this product more and create more fun breakfasts.

Disclosure: I am part of the Life Made Delicious Connector Program and I receive special perks as part of the affiliation with this group. The opinions on this blog are my own.

Share this:
Share this page via Email Share this page via Stumble Upon Share this page via Digg this Share this page via Facebook Share this page via Twitter

, , , , ,

Jan
12


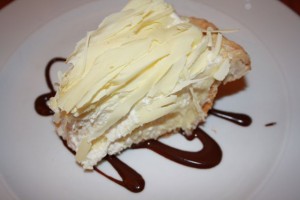
Coconut Cream Pie

I wrote a blog post entry in early December, called My Bucket List for 2012 ,and I’m pleased to announce that I can cross off one of the items. This week, I finally went to Scaramouche to try their famous coconut cream pie. Yay for Vicky!

I went with some twitter friends who are also foodies: @TorontoEats @candicebest @alyssaschwartz @nearafar. Turns out that  3 out of 5 of us, had not tried the coconut cream pie before. #interestingfact

Sadly I did not plan this evening very strategically as I had just had oral surgery at 3:30 and we were meeting at 630 p.m!! This means, that I could not enjoy  an appetizer or a main course or even a glass of wine, however I was permitted to eat coconut cream pie – seeing as it was a really soft food. Me. Smart.

The ever-so-professional, Dr. Jonathan Adam, who performed the procedure, knew that I was panicked about being able to eat the pie at 630 p.m. i.e would the freezing be gone? would I be able to chew? I had a few questions LOL. He was right – I managed a few forkfuls of the coconut cream pie with NO PROBLEM whats-so-ever. I practically shovelled it in. That’s how good the pie was.

Now, there is more that I want to share with you about the coconut cream pie. Here’s a cute story: When I was 13, I went to a camp called Wabikon (on Lake Temagami) and I had three great counsellors that year. One of those counsellors was Joanne Yolles. I had read a few years ago, that Joanne was a pastry chef who had created the EPIC COCONUT CREAM PIE AT SCARAMOUCHE. What a small world.

I wanted to track her down and sure enough one of my foodie friends connected the two of us. She was kind enough to meet  me last summer for a cup of coffee at Ezras Pound. I had not seen here in over 3 decades yet she looked exactly the same. Joanne walked me thru her career and I was just fascinated. What a career and what an incredible legacy she has created with this epic coconut cream pie that has been on the menu at Scaramouche for years and years and years and will continue to be on the menu for years and years and years.

Congratulations Joanne. You were a great camp counsellor and you are a phenomenal pastry chef.

Share this:
Share this page via Email Share this page via Stumble Upon Share this page via Digg this Share this page via Facebook Share this page via Twitter

, , , , ,