Aug
09

My New BFF: Kale Chips


I made kale chips a few times last year but seeing as I’m on this no carb diet..I’ve kicked it up a notch and have been making Kale Chips on a regular basis. I will be honest with you…I MISS real potato chips and I miss my relationship with popcorn. However I know that eating Kale Chips is a much healthier option for me and my body is saying thank you in a different way!!

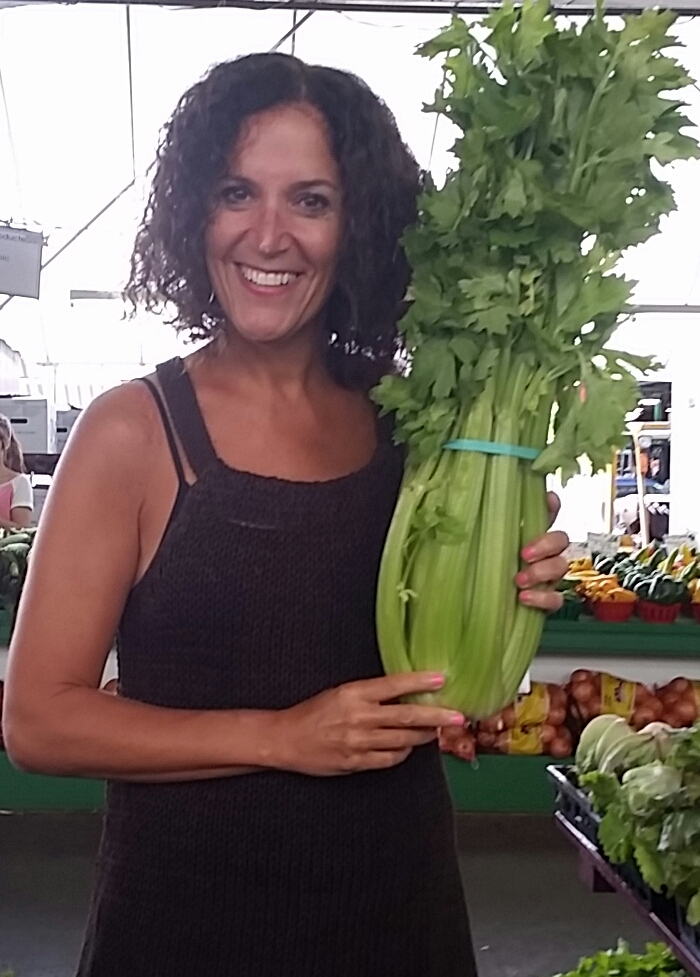
First step: Please go to a Farmers’ Market and buy your kale. Any Farmers’ Market will do. The stuff at the grocery store is OK but not nearly as beautiful as the kale you will see at a Farmers’ Market.

See what I mean?

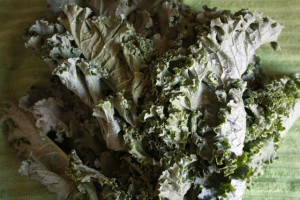
2. Step Two: Wash the Kale and dry it really really well. Seriously..this is important. PS I’m not good at this step and rushing thru it but I really shouldn’t it.

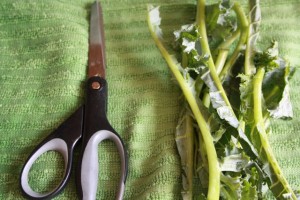
3. Step Three: Take scissors and clip the leaves from the stem. This was a brilliant tip I picked up somewhere and makes your life A LOT easier when making Kale Chips

Scissors are the best for doing this step

4. Step Three: Lay the kale on a baking pan. Sprinkle with salt  and drizzle with olive oil. Someone on twitter (oops I forgot who this was) suggested I try sesame oil and tamari sauce. I did and I liked it but I think I prefer just the salt and the olive oil recipe

5. Step Four: Bake in a preheated 350 degree oven for 8 minutes. Open the door and move the leaves around with a spatula. Close the door and continue to bake for another 3-5 minutes.

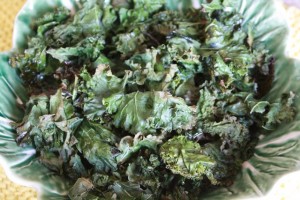
6. FINAL PRODUCT:

Healthy Healthy Healthy

I’m already to watch the last few days of the Olympics..I’ve got my snacks and my low carb beer. What more could I ask for? LOL


Share this:
Share this page via Email Share this page via Stumble Upon Share this page via Digg this Share this page via Facebook Share this page via Twitter

Aug
08

My Favorite Tofu Dish


I’m not in love with tofu but I know it’s a good source of protein for me. Plus I know that it will absorb any flavors I have hanging around my kitchen!! So I came up this recipe that I must say – is pretty good. Just for this occasion…I actually measured out the ingredients. You can thank me later.

This can be used as a side dish or as a main course with some rice. I even snack on it. It’s an unusual snack but don’t forget I’m on a carb free diet (still).

One more idea: you could add this sauce to a bowl of pasta. Last nite, I added it to these tofu noodles I have been buying. Needless to say – it’s a versatile sauce.

PEANUTTY  TOFU:

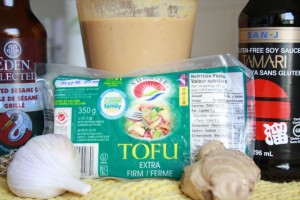
This is what you need:

Just a few ingredients that might already be hanging around your kitchen

Ingredients:

1/2 package of EXTRA FIRM tofu, cut up into small chunks

Sauce:

1 tablespoon grated garlic

1 tablespoon grated ginger (organic ..it makes a difference. Really)

1/4 cup natural peanut butter (again it makes a difference)

1 tablespoon rice wine vinegar

1 tablespoon toasted sesame oil

1 tablespoon tamari sauce

1 tsp honey

2 tablespoons of water (or more..depends how thick you like your sauce)

salt and pepper, to taste

METHOD

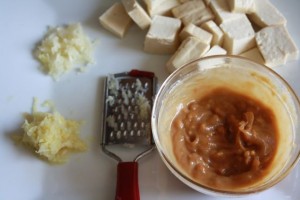
1. Prepare the sauce by adding all the ingredients together in a small bowl – stir, stir, stir

The addition of ginger is the secret to this sauce

2. Lightly sautee the ginger and the garlic in a frying pan

3. Add the chunks of tofu

4. Add the sauce – stir stir stir

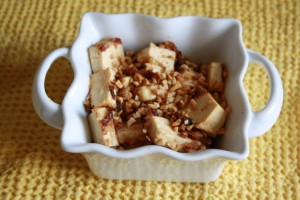
FINAL RESULT:

One pretty healthy (yet tasty) dish!!

Do you have a favorite tofu dish? Please don’t hesitate to share it with me!! (hint)


Share this:
Share this page via Email Share this page via Stumble Upon Share this page via Digg this Share this page via Facebook Share this page via Twitter

Aug
07

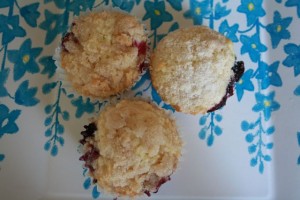
Blueberries were on sale (3 containers for $5) so I decided to test out three different blueberry muffin recipes.

Three Muffins from Three Different Recipes

One recipe has a crunchy topping on it, one recipe has freshly grated nutmeg and lemon zest in it, and one recipe is traditional. I think that all three recipes produced three tasty muffins and I would certainly make all three recipes again without hesitation. I don’t know about you but I l love anything with blueberries in it. Blueberry crisp is another one of my favorites. The blueberries turn all gooey when they are baking and make a lovely goo-ey filling.

I also wanted to share a little trick I learned when making muffins.  Try spraying the paper liners with Pam. You will notice that the liners peel off nicely from the muffins when you use Pam. Wish I knew where I learned this trick from but it’s a good one.

Recipe #1: To Die for Blueberry Muffins (taken from AllRecipes.com)

This is the recipe that has the crunchy topping on it.  Please pay attention to step #2. I almost goofed this part up.

Ingredients

  • 1 1/2 cups all-purpose flour
  • 3/4 cup white sugar
  • 1/2 teaspoon salt
  • 2 teaspoons baking powder
  • 1/3 cup vegetable oil
  • 1 egg
  • 1/3 cup milk
  • 1 cup fresh blueberries
  • 1/2 cup white sugar
  • 1/3 cup all-purpose flour
  • 1/4 cup butter, cubed
  • 1 1/2 teaspoons ground cinnamon

Directions

  1. Preheat oven to 400 degrees F (200 degrees C). Grease muffin tin or line with liners (and spray with Pam)
  2. Combine 1 1/2 cups flour, 3/4 cup sugar, salt and baking powder. Place vegetable oil into a 1 cup measuring cup; add the egg and enough milk to fill the cup. Mix this with flour mixture. Fold in blueberries. Fill muffin cups right to the top, and sprinkle with crumb topping mixture.
  3. To Make Crumb Topping: Mix together 1/2 cup sugar, 1/3 cup flour, 1/4 cup butter, and 1 1/2 teaspoons cinnamon. Mix with fork, and sprinkle over muffins before baking.
  4. Bake for 20 to 25 minutes in the preheated oven, or until done.

FINAL RESULT

If you like crumb-y topping ..then you will like this recipe

Recipe #2: Blueberry Muffins (taken from Canadian Living)

Super easy to make with super results.

Ingredients

  • 2 cups (500 mL) all-purpose flour
  • 2 tsp (10 mL) baking powder
  • 1/4 tsp (1 mL) salt
  • 1/2 cup (125 mL) butter, softened
  • 1 cup (250 mL) granulated sugar
  • 2 eggs
  • 3/4 cup (175 mL) milk
  • 1-1/2 cups (375 mL) blueberries

Preparation

In bowl, combine flour, baking powder and salt. In separate bowl, cream butter with sugar; beat in eggs one at a time. Gradually stir in milk (mixture may appear curdled). Make a well in centre of dry ingredients; pour in liquid and stir just until moistened. Gently fold in blueberries.

Spoon into large paper-lined or well-greased muffin cups, filling to top. Bake in 375°F (190°C) oven for 25 to 30 minutes or until tops are firm to the touch.

FINAL RESULT:

Easy (to make) and Tasty (to eat). Not a bad combo

Recipe #3: Blueberry Muffins (taken from the Food Network)

I actually bought a fresh nutmeg for this recipe!!

Ingredients

  • 2 1/2 cups unbleached all-purpose flour
  • 3/4 cup sugar (white or light brown) plus more for sprinkling on top of the muffins (I didn’t sprinkle any on my muffins)
  • 1 tablespoon baking powder
  • 1/8 teaspoon fine salt
  • Freshly grated nutmeg…(ha..I did this step)
  • 1/2 cup (1 stick) unsalted butter
  • 1 cup whole milk (had skim milk in the fridge and the recipe still worked)
  • 2 large eggs, at room temperature
  • 1 tablespoon finely grated lemon zest
  • 1/2 teaspoon pure vanilla extract
  • 1 1/2 cups fresh blueberries, rinsed and dried

Directions

Preheat the oven to 425 degrees F. Line a 12-muffin tin with cupcake liners and set aside.

Whisk the flour, sugar, baking powder, salt, and nutmeg together in a medium bowl; set aside.

Put the butter in a microwaveable-safe dish or measuring cup. Cover with plastic wrap and microwave until melted, about 30 seconds. (Alternatively melt the butter in a saucepan.) Whisk the milk, eggs, lemon zest, and vanilla with the butter.

Make a small well in the center of the dry ingredients. Pour wet ingredients into the well, then stir with a wooden spoon until the dry ingredients are moistened but still lumpy. Do not overmix the batter or your muffins will be dense. Gently stir in the blueberries. Divide the batter evenly into the muffin tin and sprinkle the tops generously with sugar.

Put the muffins in the oven and immediately reduce oven temperature to 375 degrees F. Bake until golden brown, about 25 minutes, rotating the pan halfway through the cooking. (Insert a toothpick into the center of a muffin to check if it is done. Toothpick should come out clean). Cool muffins in the pan on a rack for a couple minutes. Turn the muffins out of the pan and cool on the rack. Serve warm or at room temperature.

PS Don’t forget that the Wild Blueberry Festival is taking place at Evergreen Brickworks on Saturday Aug 3 from 8 a.m to 3 p.m. If you like blueberries…this will be the place to be!!

Share this:
Share this page via Email Share this page via Stumble Upon Share this page via Digg this Share this page via Facebook Share this page via Twitter

Aug
02

Seeing as I was a food sales rep, I had been to Alimento Fine Food Emporium before. They are owned by Grande Cheese and infact I was the sales rep at three of their locations!! This family run business knows cheese (can you say 140 varities?) Therefore,  I was eager to enjoy a dinner at Alimento and was delighted to have been invited to a wonderful evening so I could sample a few items from their menu.

The evening started off with this unique cocktail: I’m all about flavor so this drink really appealed to me. It was called the Rosmarino Dolce and basically its made with Brandy, Amaretto, Burnt Lemon Syrup, a Rosemary Sprig and Sparkling water.

A Perfect Summer Cocktail

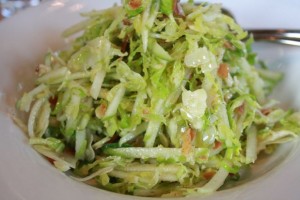
Starters included an amazing shaved brussel sprout dish which I keep meaning to try at home. What is it about this extra step that makes brussel sprouts taste better?

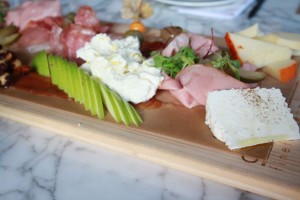
Then we enjoyed a charctuerie plate full of all the right things!! I gravitated towards the fresh cheese (about 3 times – to be honest). Ok – throw in an olive or two as well. Hee Hee.

What a selection!!

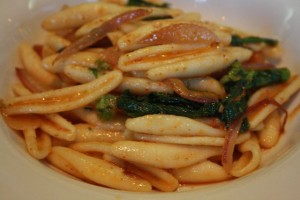
For my main course, I ordered a fusili dish. Clearly this is not the same pasta I am using at home!!

 I had to leave early so I didn’t get a chance to have dessert. However on the way home,  I did nibble on the pistachio cookie that was in my gift bag. Soon as I got home those cookies went directly into the freezer so I didn’t nibble any more of it!! (true story).

I encourage you to drop by Alimento ..it’s an ideal location to pick up a selection of cheeses, olives, or meat on your way home from work or to grab a drink or to sit down and enjoy a wonderful meal. It’s all about convenience and Alimento gets it!!

Alimento Fine Food Emporium: 522 King St West, Toronto, 416 362 0123


Share this:
Share this page via Email Share this page via Stumble Upon Share this page via Digg this Share this page via Facebook Share this page via Twitter

Jul
31

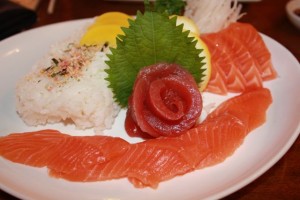
I was invited to a media dinner at Noka a few weeks ago. We tasted a selection of amazing specialty rolls and I was impressed enough to return in order to eat “Chirashi”. I have been eating Chirashi at Ichiban (in North York) for well over a decade and was curious to check out the Chirashi at Noka. I went on of of those nights when I had nothing in the fridge (sound familiar)?

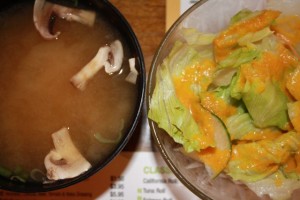
Our meal started off with a decent bowl of salad and miso soup. I appreciated the addition of some mushrooms in the miso soup and the salad was crisp with just enough dressing.

A great start to our meal.

Then the “main” attraction appeared at our table. If I were handing out Presentation Points…I would be giving this dish a 10/10. The chirashi  arrived with a bed of perfectly seasoned rice and 12 pieces of sashimi. I had called in advance to see if they would accommodate our needs: (no shrimp, eel etc) and the chef gave us exactly what we wanted: 8 pieces of salmon and 4 pieces of salmon. Bonus points to Noka for amazing customer service.

Stunning.

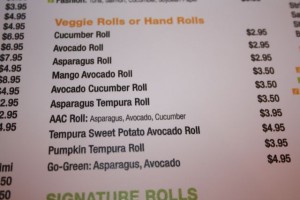
Speaking of “special requests” – if you are a vegetarian then you are going to love their selection of rolls. Check this out:

Impressive selection of Vegetarian Options

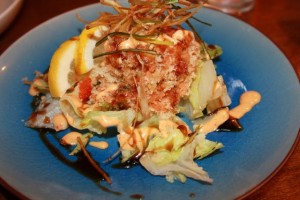
Seeing as I am on a carb free diet, I just nibbled on the chirachi (ie the fish) and ordered their Spicy Salmon Salad:

Spicy but Nice.

I really enjoyed it but then again I like spice and can understand why it’s a popular item on the menu.

Sadly I didn’t take a picture of the space but Noka is really inviting, clean and comfortable.  Seeing as there are so many sushi restaurants on Bloor St. – these small things make a difference. Not to mention that they have gluten free options available as well as gluten free sauces and salad dressings. Plus they are nut free and vegetarian friendly.

One more thing: they totally “get” social media. Super impressed to see them on twitter (@nokatoronto) and on facebook. On my way out I even noticed a contest that they are running on their facebook page.

Noka 513 Bloor West, Toronto 647 351 1188

Share this:
Share this page via Email Share this page via Stumble Upon Share this page via Digg this Share this page via Facebook Share this page via Twitter

Jul
29

Back in 1994, I ate at P.F. Chang’s in Las Vegas. See, I was a foodie even in 1994! I remember how impressed I was with their vegetarian options and can still remember ordering their famous Lettuce Wraps. (which are still on the menu). Now I don’t have to eat at P.F. Chang’s in the States anymore , as they have finally arrived in Canada! Just last week, they opened at Shops At Don Mills. I’m pleased to say…that they still have vegetarian options and now offer gluten free options as well.

Here were a few highlights of the evening.

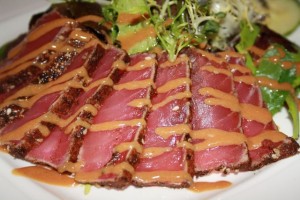
Would go back for this dish – in a heart beat

Described on the menu as: Sushi grade ahi tuna served with a spicy mustard vinaigrette on a bed of fresh mixed greens.

Described by my belly and taste buds: I want more.

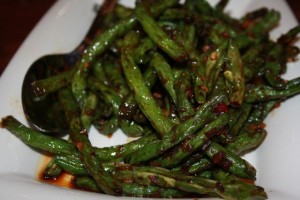
Not your average green beans

Described on the menu: Fresh green beans lightly battered and served with a tangy dip.

Described by my belly and taste buds: Goodness.

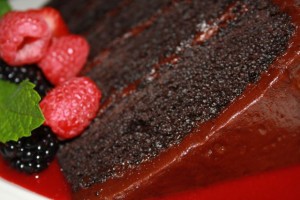
Dessert was epic. I’m not kidding. My eyes were popping out of my face.

Described on the menu: 6 rich layers of frosted chocolate cake topped with semi-sweet chocolate chips, served with fresh berries and raspberry sauce. Appropriately called: The Great Wall of Chocolate!!

Described by my belly and taste buds: There are no words.

Banana Spring Rolls

Described on the menu: 6 warm, crispy bits of banana served with coconut pineapple ice cream and drizzled with caramel and vanilla sauce.

Described by my belly and taste buds: Please take me back to P.F. Chang’s.

As you know, I’m on a carb free diet so I tried hard to just nibble my way thru the media dinner. I can’t wait to go back when I’m not on this diet and can really indulge.

I’m not kidding..it’s great to see this fabulous restaurant in Toronto. What a welcome addition to the already amazing selection of restaurants at Shops at Don Mills.

P.F. Chang’s can be found at Shops at Don Mills, 1090 Don Mills Road, 416 510 8838

Share this:
Share this page via Email Share this page via Stumble Upon Share this page via Digg this Share this page via Facebook Share this page via Twitter

Jul
27

Despite the rains and the clouds on Thursday afternooon, I headed down to Bandshell Park (at Exhibition Place) so I could enjoy Toronto’s Festival of Beer. I’m not a fan of crowds so I always go on the first day. It was a great move! Me. Smart.

What did I discover this year?

BEER: Seeing as I am on week #6 of  a no carb diet…the beer festival was the last place I should have been. Not to mention, I really really like beer. HOWEVER there is good news. I discovered Michelob Ultra. I only had 2 beer tickets and I used both tickets on this beer. I was thrilled that there was a beer that I could drink during the Festival. If you look closely in the photo you can see my GLASS souvenir beer mug. I love this new mug…so much better than the plastic that they use to give out.

See how happy I am?

I bumped into old friends, like Great Lakes Brewery and made new friends, like The Beer Academy!!

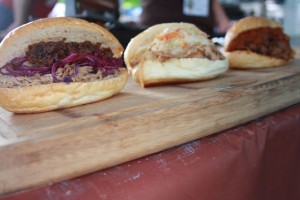
FOOD: Beer and Food go hand in hand. Don’t you think?  I was delighted to discover some new vendors this year: Fidel Gastro, Belly Busters, K-song Taco and the nicest guys called  Snoballandsons raising money for Prostrate Cancer. There was also quite a few food trucks as well.

Fidel Gastro

I had a snoball with SUGAR FREE syrup and I was in heaven. Not to mention it felt good to support this booth and help them raise some $$.

MUSIC: I never stay long enough to sit down and enjoy the music and stay till 11 pm. But as I walked around, I certainly did enjoy the music and made a mental note to myself to make sure that I could stay longer next year. I hear that the line up on Sunday is awesome. #justsayin’.

The Festival is sold out on Saturday but if you hurry and visit their website you can buy tickets for Sunday. Not to mention, that the weather is going to be perfect on Sunday. Go for it. You can thank me later.

Toronto Beer Festival, July 27-29, Bandshell Park, Exhibition Place


Share this:
Share this page via Email Share this page via Stumble Upon Share this page via Digg this Share this page via Facebook Share this page via Twitter

Jul
26

This is going to be a fun blog post as the theme will be a He Said/She Said perspective of our pedicures that we had at the Pillar and Post. I copied this idea from a wonderful food blog that I have been following that also has a he said/she said perspective called: Tips Are Included.

I think now would be a good time to ask you to please welcome my first guest blogger, Matt, as he shares with you his experience having his first spa pedicure at the Pillar and Post.

HE SAID:

My First Spa Experience (But Second Pedicure)

With little frame of reference, I have to say it was a great experience! Having my hot tired feet declawed, smoothed massaged and painted (clear – though I was offered a colour) was a great way to spend an hour on a lazy Sunday. Following a morning splash in  the Pillar and Post’s outside pool  – in the rain – and a half hour lying on a lounger when the sun returned, set me up for the guilty pleasure (for blokes anyway!) of a pedicure.

Never Been in One of These Robes Before!!

The seat had a built in massage ‘thing’, that I had never experienced before!  After a while, I turned it off and let the expert do her thing on my feet….. it was amazing. I’ll go back for sure!

SHE SAID:

I was delighted to enjoy a quick get away to Niagara on the Lake to  visit some relatives. Every year that I visit, I end up booking an appointment at the Pillar and Post as I’m in love with their outdoor pool. Just so you know, its the ONLY hotel property with an outdoor pool in Niagara on the Lake. This year, I was going to share the experience of the Pillar and Post with Matt, who had never been to a spa before. This was really going to be a special few hours!!

Sadly, the weather  was kinda crappy that day but that’s ok…we still enjoyed the pool WHILE IT WAS RAINING. I mean it……it was peaceful to be out there while it rained. We didn’t mind at ALL.

Look carefully and you can see the rain drops in the pool!!

After a dip in the pool, it was mandatory  to visit  the outdoor hot springs. I totally love this oasis that they have created. Not your average hot tub – that’s for sure.

Then we chilled in the “quiet room” as we waited for our matching pedicure session. It was interesting to note that there were lots of other couples relaxing in white robes as well. It was clear we weren’t the only couple enjoying a spa day!!

Finally it was our turn for our matching pedicure appointments. I was introduced to a new line of vegan friendly polish called “sparitual” and was given an extremely professional and thorough pedicure. No complaints at all.

FINAL RESULT: VERY HAPPY FEET.

As for the service at the Pillar and Post: I have to say that everyone we encountered was friendly and courteous. Special mention to their front desk manager, Shane Howard and Ludmila at the 100 Fountain Spa, who went out of their way for me. Plus the guy at the pool who brought us towels and even hid them under a lounge chair so they would be dry!

We will certainly be returning to the Pillar and Post again!! It was great to hang out with my boyfriend in a spa and enjoy a few hours of pure relaxation and pampering.

Pillar and Post, 48 John St. West, Niagara on the Lake, 1 888 669 5566

Share this:
Share this page via Email Share this page via Stumble Upon Share this page via Digg this Share this page via Facebook Share this page via Twitter

Jul
25

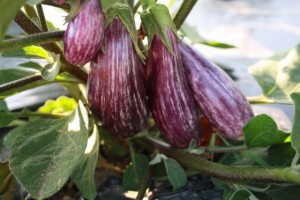
In the last 6 weeks, I have been fortunate enough to attend two media tours to visit a variety of farms. One tour was organized by Farm Food Care and the other tour was organized by Farmers Feed Cities. Both tours were amazing and have been thinking about visiting more farmers and eating local. Therefore, on my way back from Collingwood, I stopped by Cookstown Greens to see their farm. Caroline and Simon Ffrench were all too happy to give us a tour and teach us about their unbelievable operation. Just take a look at these photos. These images say a lot!!

Stunning!

Black Tomatoes!!

Beauties.

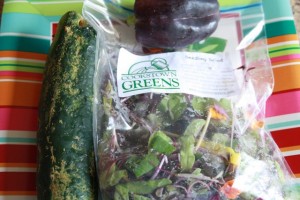
On our way out, we received a beautiful bag of goodies. These vegetables were truly appreciated as I’m still on a low carb diet and it meant that I would have a beautiful lunch today!!

Salad Ingredient

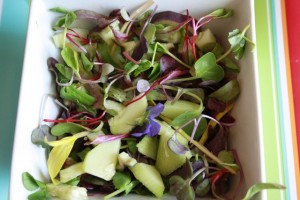
Cookstown Greens Seedling Salad ( may contain: daikon and burgundy radish, popcorn pea, chickpea, chard, red cabbage seedlings and edible flower petals). I also chopped the beautiful cucumber and the purple green pepper into the salad. Trust me – this was not your average summer.

I did not need to add toasted nuts or feta cheese. My salad was going to taste amazing without any additional ingredients. The only thing I needed was a dressing. (which I make without using a formal recipe. Sorry)

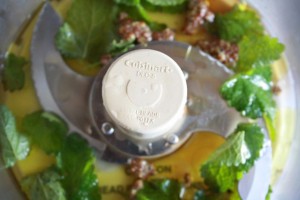
Salad Dressing Ingredients:  Lemon Balm (from Cookstown Greens), olive oil, balsamic vinegar, a bit of honey, a bit of grainy mustard and then I whizzed up all the ingredients in the Cuisinart.

I love homemade dressings.

End Result: A stunning, TASTY salad.

Cookstown Greens Inspired Lunch

For more info about Cookstown Greens, please visit their website.

To find their products in retail stores click here and to find their farmer market locations please click here.

Ps I think  Ontario Table  would be proud of me for having a LOCAL lunch. You too can have a LOCAL lunch. (hint hint) For more info about her quest for everyone to eat local, please check out her website here.


Share this:
Share this page via Email Share this page via Stumble Upon Share this page via Digg this Share this page via Facebook Share this page via Twitter

Jul
22

I have been reading tweets about canning from @foodie411 @SarahBHood and from Bumpercrop for the last few years. I was even inspired enough to buy the jars last year but instead of canning they now sit on my windowsill with a variety of dried beans in them.

But things have now changed.  I successfully “canned” last week after being given a lesson by @OntarioTable. (are you doing a happy dance for me?)  I was fortunate enough to meet Lynn Ogryzlo (the author of Ontario Table)  at the Farmers Feed Cities media event last week. A part of the tour  was a canning lesson from Lynn!! Clearly this was a highlight of the day for me.

The next day, I ran out to Canadian Tire to buy more jars and then went right to work. Goal:  to “can”peaches. This is what I did:

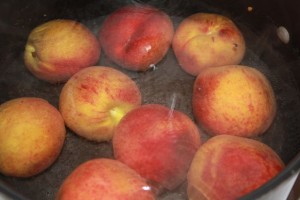
1. I boiled the peaches, and then took the skins off.

Step One

2. I sliced them as nicely as I could. (I’m being honest..some slices were not as pretty as I anticipated).

Peaches. Sliced.

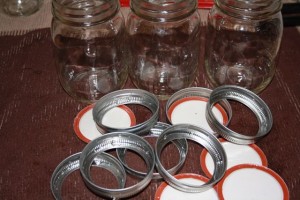
3. I then boiled the jars and the lids.

4. I made a simple syrup…2 cups boiling water to 1 cup of sugar. Stir and voila you have simple syrup.

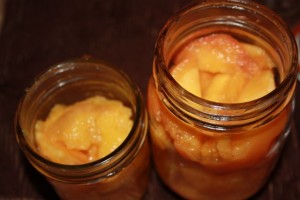
5. I placed the peaches into the jars and then filled up the jars with the simple syrup. (leaving a bit of  room at the top).

6. I wiped the rim of the jar with a clean cloth. This is an important step!!

Final Results!!

7. I sealed the jars with the lids.

8. I dipped the jars into a big pan of boiling water that had some gizmo at the bottom to prevent the jars from cracking. Lynn told us that if you wrap the jars with a clean tea towel that it will also do the trick. The jars boiled for 10 minutes.

9. I removed the jars and tightened the jars even more. I then took a deep breath as I waited to hear the “popping” sound that would ensure a “proper seal”.

10. I went on twitter to tweet as I wasn’t sure if  I “canned correctly”. i.e I was nervous about the popping sound and I was nervous if I boiled the jars long enough. I was thrilled to receive some supportive tweets from @Foodie411 @SarahBHood @ATasteofWorld and @FoodandHome.

Infact, Lynn was kind enough to call me just like a personal 1-800 help line!!

I am super excited to continue my “canning career” and try chutneys, relishes, pickles and more.

Feel free to send recipes, canning blogs, and tips!! (hint, hint)

Share this:
Share this page via Email Share this page via Stumble Upon Share this page via Digg this Share this page via Facebook Share this page via Twitter