Posts Tagged ‘Recipe’

Sep
27


You might not know this, but I have a dairy kitchen and haven’t prepared meat for over 20 years. This is one of the reasons why I post so many salad recipes!! I truly do love eating salads and when I have guests over that don’t eat dairy or wheat….then it’s a great opportunity for me to try out new recipes!!  The menu included: tuna burgers (see previous post), kale salad, napa cabbage salad with lemon pistachio vinaigrette, sesame tofu, and dessert. A perfect combo of protein and vegetables.

Will be making this again!!

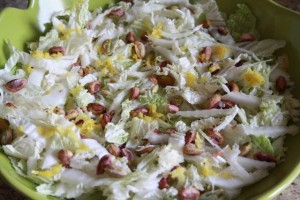
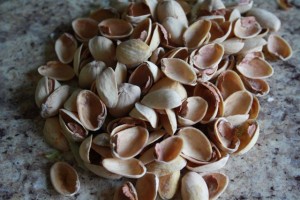
I have made napa cabbage salads before but  always with an asian vinaigrette. This recipe appealed to me as it WAS TOTALLY different. My only complaint was I had to shell the pistachios as I didn’t have time to find them unshelled. Not the end of the world.

proof that I unshelled each and every pistachio for this recipe!

Napa Cabbage Salad with Lemon Pistachio Vinaigrette (taken from AllRecipes.com)


Ingredients

  • 1 teaspoon lemon zest
  • 1 tablespoon lemon juice
  • 1 tablespoon pistachio oil….I used good old olive oil as I was too lazy to buy another oil
  • 3 cups thinly sliced napa cabbage
  • 2 cups thinly sliced romaine lettuce leaves …oops forgot to mix in romaine lettuce even though I had some in the fridge
  • 1/4 cup chopped fresh Italian flat-leaf parsley….
  • 1 tablespoon finely sliced fresh basil
  • 1/8 teaspoon kosher salt
  • 1/8 teaspoon freshly ground black pepper
  • 2 tablespoons chopped pistachios (I used more)

Directions

  1. In a small bowl, whisk together lemon zest and lemon juice. Slowly drizzle in the pistachio oil, whisking constantly, until the dressing is mixed well.
  2. In a large bowl, toss together the sliced napa cabbage, sliced romaine lettuce, parsley and basil. Mix in the dressing, salt and pepper. Gently toss until dressing is distributed evenly. Top with chopped pistachios. Enjoy!

This recipe was super easy and super tasty. I can’t wait to make it again.

Happy Cooking!!

Share this:
Share this page via Email Share this page via Stumble Upon Share this page via Digg this Share this page via Facebook Share this page via Twitter

, , , , ,

Sep
23


When I was growing up, my mom made salmon burgers. But I’m not crazy about the smell of canned salmon so I started to make tuna burgers. They are easy to make, nutritious (I think) and freeze beautifully. Here’s the recipe.

INGREDIENTS:

4 tins of tuna

4 eggs

2 cups of breadcrumbs (preferably real breadcrumbs. I always seem to have some in my freezer. I’m normal. I swear)

parsley

salt and pepper

a chunk of red onion

DIRECTIONS:

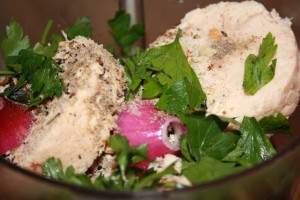
1. Take all the ingredients and whiz them up in a food processor.

Oh how I love my Cuisinart Food Processor

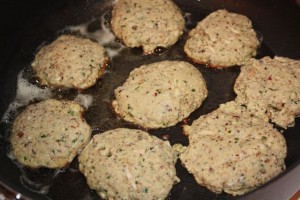
2. Shape into patties

3. Drop into a frying pan with a bit of oil.


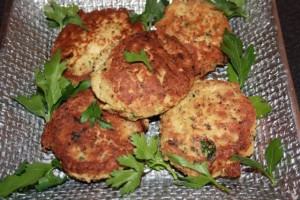
FINAL PRODUCT

Ta Da

I’m going to serve these yummy tuna burgers with an assortment of condiments: mango chutney, Maille mustard, jalepeno jelly, and more. I collect condiments. Did you know?

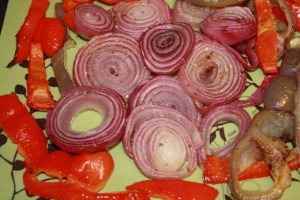
I will also be serving them along side some roasted organic veggies that were graciously delivered by Fresh City Farms. I was blown away with the flavor of these vegetables. What a difference it makes. Can’t wait to share these veggies with my guests:

Other items I will be serving include a kale salad with curry sesame seeds and a lemon pistachio napa cabbage salad. Promise to post those two recipes on Wednesday so make sure you come back to www.momwhoruns.com!!

Happy Cooking!!
Share this:
Share this page via Email Share this page via Stumble Upon Share this page via Digg this Share this page via Facebook Share this page via Twitter

, , , , , ,

Sep
18


For some reason I’ve never made a pavlova before.  But my friend assured me, that it’s super easy to make so I tried it. I searched online (for a change) to find a recipe  (thanks AllRecipes.com) and before you know it my Kitchen Aid was on full blast whipping up egg whites. What I didn’t know, is that it takes A LOT OF  TIME TO BAKE. This is not at all like making cookies!! However it’s worth it.
Here’s the recipe: (taken from AllRecipes.com)

Ingredients

  • 3 egg whites
  • 1 pinch salt
  • 1 cup white sugar
  • 1 tablespoon cornstarch
  • 1 teaspoon lemon juice
  • 1 1/4 cups heavy whipping cream
  • 1/2 cup confectioners’ sugar
  • 1 pint fresh strawberries

Directions

  1. Preheat oven to 300 degrees F (150 degrees C). Line a sheet pan with parchment paper. Draw a 9 inch circle on the parchment. An easy way to do this is to draw around the outside of a 9 inch pan with a pencil. (I skipped this step)
  2. In a large bowl, beat egg whites on high speed until soft peaks form. (be patient, be patient) Add 3/4 cup of the sugar gradually, while continuing to whip. Make sure sugar is completely dissolved. Mix together the remaining 1/4 cup sugar with the cornstarch; lightly fold into meringue with lemon juice.
  3. Spread a layer of meringue to fit circle on parchment, approximately 1/4 inch thick. With remainder of mixture, pipe or spoon swirls around the edges to form a shallow bowl shape.
  4. Bake at 300 degrees F (150 degrees C) for 1 hour. Turn off oven, but leave meringue in oven for an additional 30 minutes. When cool, the meringue should be hard on the outside, and slightly moist on the inside.
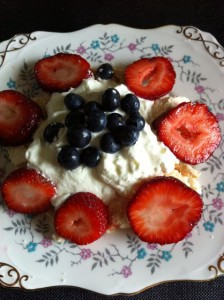
  5. In a large bowl, combine the cream and half a cup of confectioners sugar, and whip until thickened. Decorate with fruit of your choice; strawberries are excellent.

I’m not kidding. A pavlova is a crowd pleaser. Can’t believe I’ve never made it before!!
Happy Baking.

Share this:
Share this page via Email Share this page via Stumble Upon Share this page via Digg this Share this page via Facebook Share this page via Twitter

, , , , ,

Sep
11


Lately  I have been enjoying a lot of salads. One of my favorite salads is a Caesar salad as sometimes I’m just too tired to chop up a million vegetables. All I need is some romaine lettuce, and I’m good to go. Well not exactly, I need a fabulous caesar salad dressing too. My friend gave me one years ago, but decided to go on line to the Food Network to see if I could find test out another dressing. (or two)

DRESSING #1 courtesy of Trish Magwood, Party Dish

Ingredients

Roasted Garlic

  • 1 head roasted garlic (see below)
  • 1 tablespoon vegetable oil

Dressing

  • 2 cloves garlic
  • 2 anchovy fillet
  • 2 tablespoons capers, drained and rinsed
  • 1/2 teaspoon Dijon mustard
  • 1 tablespoon lemon juice
  • 1/4 teaspoon Worcestershire sauce
  • 1/4 cup  vegetable oil
  • 2 tablespoons low fat mayonnaise
  • 1/4 teaspoon freshly ground black pepper
  • 1 head romaine lettuce, chopped
  • 1/4 cup freshly grated or shaved parmesan

Directions

Roasted Garlic

  1. Preheat oven to 375 degrees F (190 C).
  2. Slice stem end off garlic. Place on a sheet of aluminum foil. Drizzle with the oil. Wrap garlic and place on a baking sheet. Bake for 35-45 minutes or until softened. This can be done ahead up to one day ahead. Let cool.

Dressing

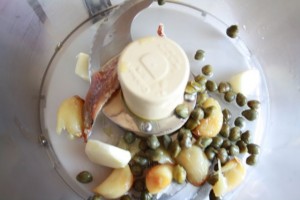
  1. In the bowl of a food processor, pulse roasted garlic, raw garlic, anchovies and capers.
  2. Process until finely minced. Add Dijon mustard, lemon juice and Worcestershire sauce. With motor running, slowly drizzle in vegetable oil and finish with mayonnaise to achieve a creamy consistency.

Whizzzzzzzzz

  1. Season with black pepper and salt if needed, to taste.
  2. In a large bowl, tear lettuce into bite size pieces, Add dressing, croutons, and cheese to the bowl, and toss well
  • 1/2 cup Miracle Whip
  • 2 tablespoons olive oil
  • 1/4 cup freshly grated Parmesan cheese (about 1 ounce/30 g)
  • 1 hard-cooked Omega-3 egg
  • 2 tablespoons freshly squeezed lemon juice
  • 1 tablespoon balsamic vinegar
  • 2 large garlic cloves, crushed and minced
  • 1 teaspoon honey or granulated sugar
  • 1/2 teaspoon Dijon mustard
  • 1/2 teaspoon Worcestershire sauce
  • 1/2 teaspoon anchovy paste (optional)
  • 1/8 teaspoon freshly ground black pepper

Directions:

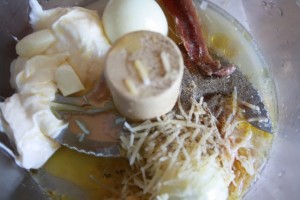
Whiz all ingredients in a food processor. (how easy could that get).

whizzz me up too please

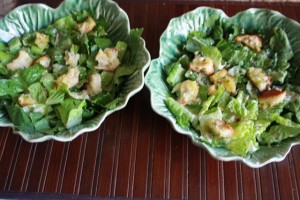
FINAL RESULT:

two awesome dressings…two awesome salads.

SUMMARY:

In my humble opinion, I liked the first recipe better. There was something about the texture of the egg in the second dressing that didn’t have the same appeal to me.

However to be honest, I really really prefer the recipe I have been using for years: (courtesy of my friend Sherry)

3 tablespoons olive oil, 1 tablespoon red wine, 1 garlic clove, 1 tablespoon parmesan, 1/4 tsp salt. 1/4 tsp pepper, 1/3 tsp dry mustard, 1 anchovy.

No need for a million ingredients!!

Enjoy your salad everyone!!

Share this:
Share this page via Email Share this page via Stumble Upon Share this page via Digg this Share this page via Facebook Share this page via Twitter

, , , , , ,

Sep
03


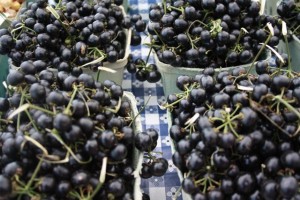
In the past, I’ve made crisps, crumbles and cobblers. Now I can add  “BUCKLE” to that list as I just made my very first Huckleberry Buckle. That’s right,…I used the huckleberries that I picked up at the Ottawa Farmers’ Market.

There is a probably a reason why you don’t see this fruit very often.

After a lot of research on the internet, I selected a recipe from AllRecipes.com.

I am not going to tell you that this recipe was a winner, infact the final result was HORRIFIC.!! I  actually spit out the huckleberry and so did others. Trust me…I like almost everything. It’s hard for me to remember the last time I spit out food. But this FRUIT is not very likeable. It’s not sour, i’ts not sweet., it’s just FOUL. The buckle was a hit though. I would certainly use this recipe again but would use raspberries or blueberries instead.

INGREDIENTS:

2 1/2 cups Hucklberries

1/4 cup sugar

1/2 cup boiling water

1 cup flour

1 tsp baking powder

1/4 tsp salt

1/4 cup of butter

3/4 cup of sugar

1/2 cup milk

1 tbsp butter

Method:

Preheat oven to 375 degrees

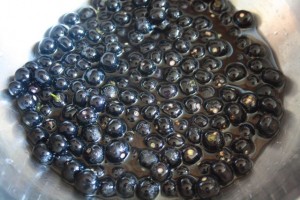
Place the huckleberries in a bowl and add the boiling water and sugar. (I then drained it after 10 minutes due to a readers comment on allrecipes).

Huckleberries, water, sugar…so far so good

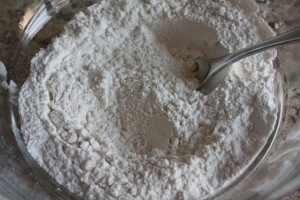
Grab another bowl, and mix the flour, baking powder and salt.

Flour, baking powder, salt….easy enough

Grab yet one more bowl and cream the butter and sugar.

Take the flour mixture and add it to the butter/sugar mixture. Then stir in the milk. The mixture will be thick and lumpy.

Spread the batter into a greased pan. (I used a pie plate) Pour the huckleberrie mixture ontop of the batter. Dot with remaining butter. (I dotted it with a bit of batter too for “visual appeal”)

Bake in a preheated oven for 45-50 minutes. I read another comment that suggested to place a pan underneath your pie plate in the event that it bubbles over. Great advice. Oh how I love comments that are posted on the internet.

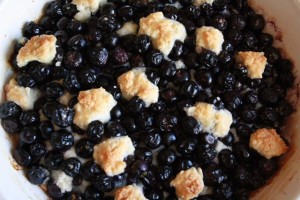
FINAL RESULT

Looks can be deceiving.

PS I had another 2.5 cups of huckleberries left and I threw them out. Won’t be buying this fruit anytime in the near future but will certainly be baking another buckle again with another type of berry!! Stay tuned

Share this:
Share this page via Email Share this page via Stumble Upon Share this page via Digg this Share this page via Facebook Share this page via Twitter

, , , , ,

Aug
23


I’ve made a ton of blueberry crisps, mixed fruit crumbles but have never made a peach cobbler before. So I decided to try a recipe and it was so good that I made it two times in one week. That’s how easy it was to make and that’s how delicious it was.

I don’t know about you but I kind of like recipes that don’t require any heavy duty equipment. This recipe is one of them. You just need a few bowls…one for the topping and one for the flour mixture. I didn’t even have buttermilk on hand but made my own and the recipe worked!! Yay for the internet.

Here’s a winning recipe from the Food Network.

Ingredients

 Filling:

  • 4 cups peeled and sliced fresh peaches (blanch in boiling water for 30 seconds to remove the skins)
  • 3/4 cup brown sugar
  • 1 teaspoon cinnamon
  • 1 teaspoon vanilla
  • 1 tablespoon flour

Cobbler

  • 1 cup flour
  • 1 teaspoon baking powder
  • 1/2 teaspoon baking soda
  • 3 tablespoons brown sugar
  • 4 tablespoons unsalted butter, cut into small pieces
  • 2/3 cup buttermilk
  • 1 tablespoon brown sugar, for topping
  • Whipped cream (which would have been nice but I didn’t have it…nor did I have ice cream which also would have been nice)

Directions

Preheat the oven to 425 degrees F.

Generously butter a 1 1/2-quart shallow baking dish. (I sprayed it with Pam)

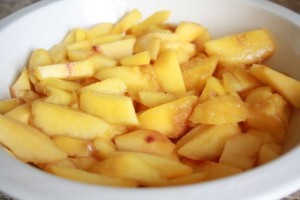
Place the sliced peaches in the dish.

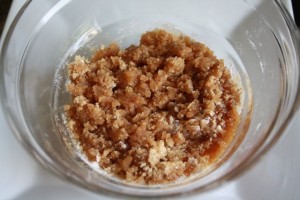
Sprinkle with brown sugar, cinnamon, vanilla, and flour. Mix gently and spread over the peaches. Bake for 10 minutes.

Sprinkle this on top of the peaches!!

Meanwhile combine all dry ingredients for cobbler crust in a bowl. Cut in the butter with a pastry cutter or your fingers, to make the texture like coarse crumbs. Add buttermilk and stir to form a soft dough.

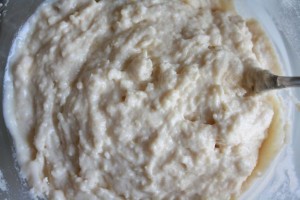
Soft Dough

Remove fruit from oven and drop rounded spoonfuls of dough on top. Sprinkle with last tablespoon of brown sugar and return to oven.

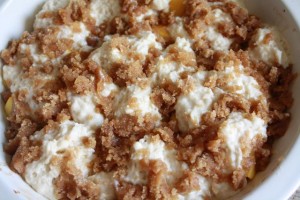
Right before it went into the oven – it looked like this!

Bake until fruit is bubbly and crust topping is golden brown, about 20 minutes. Serve warm with whipped cream (which I didn’t have nor did I have icecream. Don’t sweat – everyone will still love it).

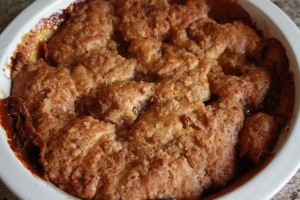
FINAL PRODUCT

Peach Cobbler.

Share this:
Share this page via Email Share this page via Stumble Upon Share this page via Digg this Share this page via Facebook Share this page via Twitter

, , , ,

Aug
09


I made kale chips a few times last year but seeing as I’m on this no carb diet..I’ve kicked it up a notch and have been making Kale Chips on a regular basis. I will be honest with you…I MISS real potato chips and I miss my relationship with popcorn. However I know that eating Kale Chips is a much healthier option for me and my body is saying thank you in a different way!!

First step: Please go to a Farmers’ Market and buy your kale. Any Farmers’ Market will do. The stuff at the grocery store is OK but not nearly as beautiful as the kale you will see at a Farmers’ Market.

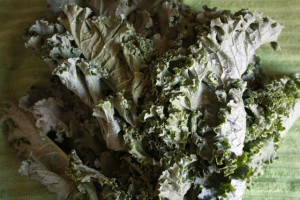
See what I mean?

2. Step Two: Wash the Kale and dry it really really well. Seriously..this is important. PS I’m not good at this step and rushing thru it but I really shouldn’t it.

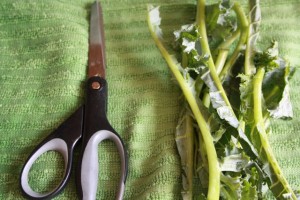
3. Step Three: Take scissors and clip the leaves from the stem. This was a brilliant tip I picked up somewhere and makes your life A LOT easier when making Kale Chips

Scissors are the best for doing this step

4. Step Three: Lay the kale on a baking pan. Sprinkle with salt  and drizzle with olive oil. Someone on twitter (oops I forgot who this was) suggested I try sesame oil and tamari sauce. I did and I liked it but I think I prefer just the salt and the olive oil recipe

5. Step Four: Bake in a preheated 350 degree oven for 8 minutes. Open the door and move the leaves around with a spatula. Close the door and continue to bake for another 3-5 minutes.

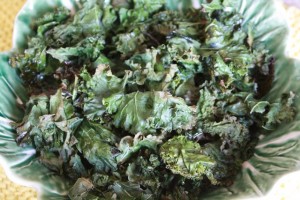
6. FINAL PRODUCT:

Healthy Healthy Healthy

I’m already to watch the last few days of the Olympics..I’ve got my snacks and my low carb beer. What more could I ask for? LOL


Share this:
Share this page via Email Share this page via Stumble Upon Share this page via Digg this Share this page via Facebook Share this page via Twitter

, , , , , ,

Aug
08


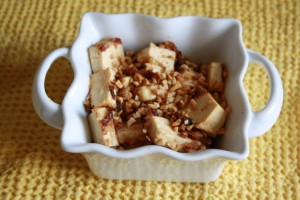
I’m not in love with tofu but I know it’s a good source of protein for me. Plus I know that it will absorb any flavors I have hanging around my kitchen!! So I came up this recipe that I must say – is pretty good. Just for this occasion…I actually measured out the ingredients. You can thank me later.

This can be used as a side dish or as a main course with some rice. I even snack on it. It’s an unusual snack but don’t forget I’m on a carb free diet (still).

One more idea: you could add this sauce to a bowl of pasta. Last nite, I added it to these tofu noodles I have been buying. Needless to say – it’s a versatile sauce.

PEANUTTY  TOFU:

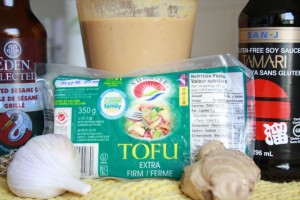
This is what you need:

Just a few ingredients that might already be hanging around your kitchen

Ingredients:

1/2 package of EXTRA FIRM tofu, cut up into small chunks

Sauce:

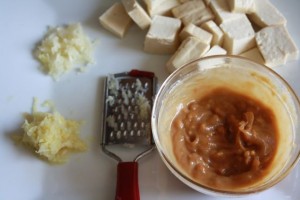
1 tablespoon grated garlic

1 tablespoon grated ginger (organic ..it makes a difference. Really)

1/4 cup natural peanut butter (again it makes a difference)

1 tablespoon rice wine vinegar

1 tablespoon toasted sesame oil

1 tablespoon tamari sauce

1 tsp honey

2 tablespoons of water (or more..depends how thick you like your sauce)

salt and pepper, to taste

METHOD

1. Prepare the sauce by adding all the ingredients together in a small bowl – stir, stir, stir

The addition of ginger is the secret to this sauce

2. Lightly sautee the ginger and the garlic in a frying pan

3. Add the chunks of tofu

4. Add the sauce – stir stir stir

FINAL RESULT:

One pretty healthy (yet tasty) dish!!

Do you have a favorite tofu dish? Please don’t hesitate to share it with me!! (hint)


Share this:
Share this page via Email Share this page via Stumble Upon Share this page via Digg this Share this page via Facebook Share this page via Twitter

, , , , ,

Aug
07


Blueberries were on sale (3 containers for $5) so I decided to test out three different blueberry muffin recipes.

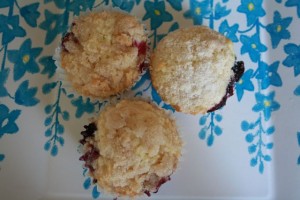
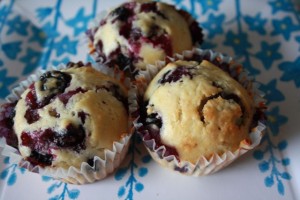
Three Muffins from Three Different Recipes

One recipe has a crunchy topping on it, one recipe has freshly grated nutmeg and lemon zest in it, and one recipe is traditional. I think that all three recipes produced three tasty muffins and I would certainly make all three recipes again without hesitation. I don’t know about you but I l love anything with blueberries in it. Blueberry crisp is another one of my favorites. The blueberries turn all gooey when they are baking and make a lovely goo-ey filling.

I also wanted to share a little trick I learned when making muffins.  Try spraying the paper liners with Pam. You will notice that the liners peel off nicely from the muffins when you use Pam. Wish I knew where I learned this trick from but it’s a good one.

Recipe #1: To Die for Blueberry Muffins (taken from AllRecipes.com)

This is the recipe that has the crunchy topping on it.  Please pay attention to step #2. I almost goofed this part up.

Ingredients

  • 1 1/2 cups all-purpose flour
  • 3/4 cup white sugar
  • 1/2 teaspoon salt
  • 2 teaspoons baking powder
  • 1/3 cup vegetable oil
  • 1 egg
  • 1/3 cup milk
  • 1 cup fresh blueberries
  • 1/2 cup white sugar
  • 1/3 cup all-purpose flour
  • 1/4 cup butter, cubed
  • 1 1/2 teaspoons ground cinnamon

Directions

  1. Preheat oven to 400 degrees F (200 degrees C). Grease muffin tin or line with liners (and spray with Pam)
  2. Combine 1 1/2 cups flour, 3/4 cup sugar, salt and baking powder. Place vegetable oil into a 1 cup measuring cup; add the egg and enough milk to fill the cup. Mix this with flour mixture. Fold in blueberries. Fill muffin cups right to the top, and sprinkle with crumb topping mixture.
  3. To Make Crumb Topping: Mix together 1/2 cup sugar, 1/3 cup flour, 1/4 cup butter, and 1 1/2 teaspoons cinnamon. Mix with fork, and sprinkle over muffins before baking.
  4. Bake for 20 to 25 minutes in the preheated oven, or until done.

FINAL RESULT

If you like crumb-y topping ..then you will like this recipe

Recipe #2: Blueberry Muffins (taken from Canadian Living)

Super easy to make with super results.

Ingredients

  • 2 cups (500 mL) all-purpose flour
  • 2 tsp (10 mL) baking powder
  • 1/4 tsp (1 mL) salt
  • 1/2 cup (125 mL) butter, softened
  • 1 cup (250 mL) granulated sugar
  • 2 eggs
  • 3/4 cup (175 mL) milk
  • 1-1/2 cups (375 mL) blueberries

Preparation

In bowl, combine flour, baking powder and salt. In separate bowl, cream butter with sugar; beat in eggs one at a time. Gradually stir in milk (mixture may appear curdled). Make a well in centre of dry ingredients; pour in liquid and stir just until moistened. Gently fold in blueberries.

Spoon into large paper-lined or well-greased muffin cups, filling to top. Bake in 375°F (190°C) oven for 25 to 30 minutes or until tops are firm to the touch.

FINAL RESULT:

Easy (to make) and Tasty (to eat). Not a bad combo

Recipe #3: Blueberry Muffins (taken from the Food Network)

I actually bought a fresh nutmeg for this recipe!!

Ingredients

  • 2 1/2 cups unbleached all-purpose flour
  • 3/4 cup sugar (white or light brown) plus more for sprinkling on top of the muffins (I didn’t sprinkle any on my muffins)
  • 1 tablespoon baking powder
  • 1/8 teaspoon fine salt
  • Freshly grated nutmeg…(ha..I did this step)
  • 1/2 cup (1 stick) unsalted butter
  • 1 cup whole milk (had skim milk in the fridge and the recipe still worked)
  • 2 large eggs, at room temperature
  • 1 tablespoon finely grated lemon zest
  • 1/2 teaspoon pure vanilla extract
  • 1 1/2 cups fresh blueberries, rinsed and dried

Directions

Preheat the oven to 425 degrees F. Line a 12-muffin tin with cupcake liners and set aside.

Whisk the flour, sugar, baking powder, salt, and nutmeg together in a medium bowl; set aside.

Put the butter in a microwaveable-safe dish or measuring cup. Cover with plastic wrap and microwave until melted, about 30 seconds. (Alternatively melt the butter in a saucepan.) Whisk the milk, eggs, lemon zest, and vanilla with the butter.

Make a small well in the center of the dry ingredients. Pour wet ingredients into the well, then stir with a wooden spoon until the dry ingredients are moistened but still lumpy. Do not overmix the batter or your muffins will be dense. Gently stir in the blueberries. Divide the batter evenly into the muffin tin and sprinkle the tops generously with sugar.

Put the muffins in the oven and immediately reduce oven temperature to 375 degrees F. Bake until golden brown, about 25 minutes, rotating the pan halfway through the cooking. (Insert a toothpick into the center of a muffin to check if it is done. Toothpick should come out clean). Cool muffins in the pan on a rack for a couple minutes. Turn the muffins out of the pan and cool on the rack. Serve warm or at room temperature.

PS Don’t forget that the Wild Blueberry Festival is taking place at Evergreen Brickworks on Saturday Aug 3 from 8 a.m to 3 p.m. If you like blueberries…this will be the place to be!!

Share this:
Share this page via Email Share this page via Stumble Upon Share this page via Digg this Share this page via Facebook Share this page via Twitter

, , , , , , ,

Jul
19


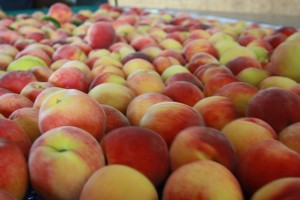
On Wednesday I had the opportunity to spend an incredible day with Farmers Feed Cities. We started off the tour with a visit to Quiet Acre Farms in Niagara on the Lake, where we had an up close and personal visit with their peach orchards.

Peaches, Peaches, Peaches!!

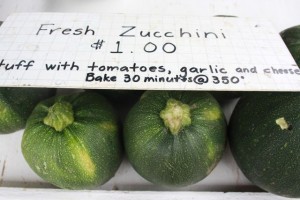
But what caught my attention were these round zucchini at their roadside stall.

Bought Two. What was I thinking?

It was exactly the type of inspiration that I needed to get back me into the kitchen, seeing as I have done ZERO cooking for the last month. Have you noticed my blog posts (recently) have been about every topic except recipes? Well that has all changed. This trip really inspired me.

STUFFED ZUCCHINI RECIPE

Ingredients:

1 round zucchini

1/2 a container grape tomatoes, cut in half

small chunk of feta cheese

8 black olives (I like Unico ripe oil cured…in a jar)

1/2 onion, chopped finely

1 garlic clove, minced finely

Italian seasoning

METHOD

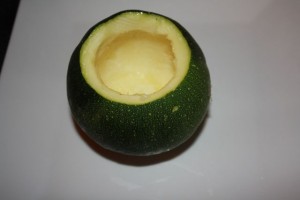
1. Slice the top off the zucchini and scoop out the inside.

step one

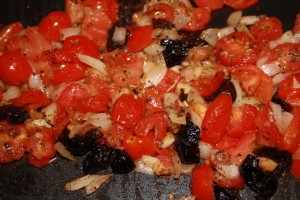
2. Fry the onions and garlic till aromatic . Then add the grape tomotoes, olives, italian seasoning till everything is kinda soft.

Oh So Good.

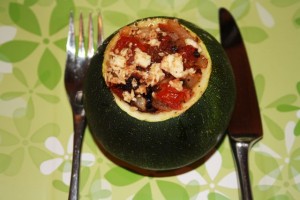
3. Stuff into the hollow space of the zucchini. Top with some crumbled feta. Bake on a baking sheet in a 375 degree oven for 30 minutes. Voila…dinner.

Perfect for My No Carb Diet

Please note that I’m on a no carb diet, otherwise I probably would have added some bread crumbs to this recipe.

If you see these round zucchinis at a farmers market – please pick some up!! You won’t find these in a grocery store. I promise you. For more information about farmers markets, please click here.

Upcoming Blog Post: Canning Peaches!! Stay tuned.


Share this:
Share this page via Email Share this page via Stumble Upon Share this page via Digg this Share this page via Facebook Share this page via Twitter

, , , , , ,