Posts Tagged ‘Recipe’

Jun
20


The other nite, @HorriblePeanut sent me a photo of what he made for dinner. (only because I asked!!). He had prepared cod and kale. I asked him how he prepared the kale and he replied “with veggie stock – er, Knorr”. I then realized that this would be a good time to do a blog post called How to Make Your Own Vegetable Stock!! 

Oh How I Love This Stock!!

Here’s what you need:

Ingredients:
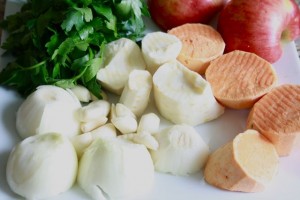
2 carrots, peeled and chopped*
2 onions, peeled and chopped*
1 parsnip, peeled and chopped*
1 apple, cut in half
1 whole head of garlic, peeled (no chopping necessary0
1 sweet potato peeled and chopped*
and bunch of parsley

*:no one is going to see the vegetables so it doesn’t have to be pretty looking!! BONUS

Feel free to add celery, apples, bay leaves, zucchini, etc.a

INSTRUCTIONS

1. Boil water in a saucepan (please forgive me, I did not measure the quantity)
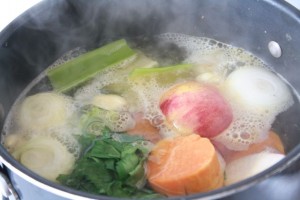
2. Add all the ingredients listed above. Cover the pan with a lid.

A Rough Chop is Just Fine!!

3. Season with salt and pepper
4. Reduce heat and simmer for 30 minutes.

5. Strain the vegetables

Voila…beautiful aromatic vegetable stock. By all means play around with this recipe: add celery, add bay leaves (which I did by the way) or  add zucchini. Just don’t add anything bitter like broccoli or green pepper.

I like to freeze this soup is small ziploc containers so I can use it whenever a recipe calls for vegetable stock. It will make a HUGE difference and you won’t be buying any powdered soup stock anymore.

Happy Cooking (even if its 30 degrees outside)!!

By the way: I grew up in a household with a product called Croyden House. (kosher fake chicken stock poweder)  My mom used it on EVERYTHING. (as still does). I promised myself when I moved out that I would never buy a jar of that stuff and guess what? I haven’t.


 

Share this:
Share this page via Email Share this page via Stumble Upon Share this page via Digg this Share this page via Facebook Share this page via Twitter

, , , , , , , ,

May
24


Do you make a particular “meal” every single week? No matter what? That’s not usually the case for me. I’m the type of person who wakes up and says “what do I feel like eating today” vs “today is Monday, which means tonites pasta nite”.

However I have make an exception for Friday nite. For the last few years, I have been making this dish every Friday nite. No. Matter. What. I love this dish: it’s healthy, easy to make and  cheap as beans (no pun intended).

I make a dish called “cholent” which is basically a bean stew that  many Jewish households make every Sabbath. My version is a little different as it’s a vegetarian version. For the official definition of cholent please click on this wikepdia link. I should add that I did not grow up with this dish. I was only introduced to it as an adult but quickly fell in love with it.

Here’s my recipe.

VEGETARIAN CHOLENT

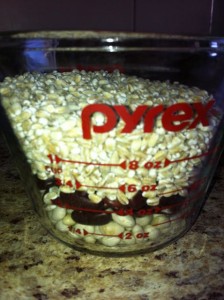
1 cup of mixed beans (kidney, navy, barley)

3 types of beans...

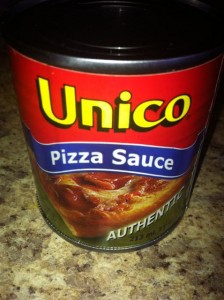
1 can of pizza sauce (that’s right, pizza sauce)

4-5 cups of water

salt and pepper (generous amounts….don’t be shy)

2 fried onions

INSTRUCTIONS:

1. Rinse beans and drain well.

2. Place all ingredients into a crockpot

3. 24 hours later you will have an awesome healthy meal that will feed four people easily

Note: feel free to add a smokey bbq sauce or any other sauce that you might have hanging around your fridge.

One more piece of advice: If you don’t have a crockpot, please consider buying a cheap one. It’s SO worth it. There is nothing like making a meal in ONE POT that you can leave on the counter and find out that the next day, your meal is ready. Trust me.

Happy Cooking.

Share this:
Share this page via Email Share this page via Stumble Upon Share this page via Digg this Share this page via Facebook Share this page via Twitter

, , , , , ,

Apr
25


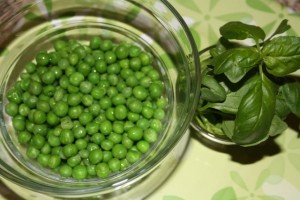
It’s Spring(well at least sometimes it feels like Spring) and I’m in the mood to cook with bright green vegetables!! This recipe is based on a standard pesto recipe but instead of JUST using basil, the recipe includes a cup of green peas. I was intrigued so I tried it. You will notice that it’s  slightly sweeter and has a different texture. I think it’s a keeper. (not all recipes are keepers by the way).

GREEN PEA PESTO (from AllRecipes.com)

  • 1 cup frozen peas (I used Jolly Green Giant)
  • 3 tablespoons grated Parmesan cheese
  • 2 cloves garlic, minced
  • 1 teaspoon lemon juice
  • 1/2 cup chopped fresh basil
  • ground black pepper to taste
  • 2 tablespoons extra-virgin olive oil

Directions

  1. Bring a small saucepan of water to a boil; add the peas and cook until softened. Drain.
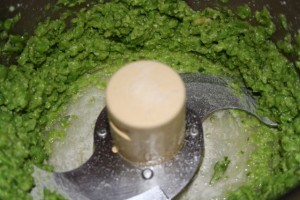
  2. Blend the peas, Parmesan cheese, garlic, lemon juice, basil, and pepper in a blender; while the it blends, stream the olive oil into the mixture.

    Love My Cuisinart

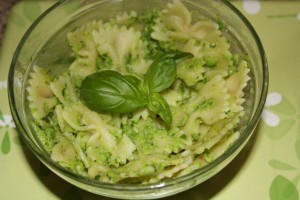
    Final Product

    Happiness!!

    Disclosure: I am part of the Life Made Delicious Blogger program and I receive special perks as part of my affiliation with this group. The opinions on this blog are my own.


Share this:
Share this page via Email Share this page via Stumble Upon Share this page via Digg this Share this page via Facebook Share this page via Twitter

, , , , , ,

Apr
22


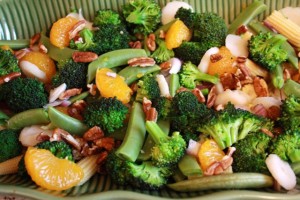
This is one Healthy Salad

Last week, I made a Lemon Poppy Seed Loaf  from the Rose Reisman Brings Home Light Cooking Cookbook. While making the loaf, I decided to flip thru the cookbook to look at other recipes that I had tried and liked, but had not made for many many years. Sure enough, pg 56 was circled. I can’t believe I don’t make this salad more often. It’s a winner.

I ‘m attracted to this recipe as it’s crunchy and colorful and went perfectly with the rest of the meal which included: salmon, roasted squash, a green salad and rice.

I don’t know about you, but there’s something about broccoli salads that I enjoy. I have a feeling it’s due to the emerald color of the broccoli that it obtains after it’s perfectly steamed. I’m also a huge fan of another broccoli salad that I use to make that includes grapes and sunflower seeds. Stay tuned for more salad recipes (and the lemon poppy seed loaf recipe as well).


Broccoli, Snow Pea and Baby Corn Salad with Orange Dressing

Ingredients:

2 cups chopped broccoli florets

1 cup snow peas, cut into pieces

1/2 cup sliced red onion

3 cups torn lettuce (I’ve never used lettuce before – just so you know)

half  of a medium red pepper, sliced

3/4 cup drianed mandarin orange sections

1/2 cup sliced water chestnuts

1 can of drained baby corn cobs

1 tablespoon raisins

1 tablespoon chopped walnuts (or pecans)

DRESSING:

3 tablespooons olive oil

3 tablespoons frozen orange juice concentrate, thawed

1 1/2 teaspoons red wine vinegar

1/2 teaspoon crushed garlic

4 teaspoons lemon juice

1 teaspoon sugar

METHOD

1. Steam or microwave broccoli and snow peas just until tender crisp. Drain and rinse with cold water. Pat dry. Place in a serving bowl

2. Add onion, red pepper, lettuce, oranges, water chestnuts, baby corn, raisins and walnuts

3. Dressing: in small bowl, mix oil, orange juice, vinegar, garlic, lemon juice and sugar. Pour over salad and toss well

ENJOY

P.S. Rose Reisman Brings Home Light Cooking is a wonderful cookbook full of healthy recipes and is definitely a keeper!! Proof:  I moved in September and this cookbook did not end up in the garage sale.

Share this:
Share this page via Email Share this page via Stumble Upon Share this page via Digg this Share this page via Facebook Share this page via Twitter

, , , , ,

Apr
19


I’ve blogged before about “Desserts with Two Ingredients”  but I challenged myself to think of more desserts that had only two (or 3) ingredients and I did it!!

My busy brain thought of  these two recipes that are  super easy, and tasty desserts. Well to be honest, one recipe I thought of myself and the other recipe I found on the Life Made Delicious website.  The first recipe I have been enjoying since I was a kid. (thanks Mom!!)

Here’s the recipes. (I won’t keep you in suspense much further).

Chocolate Covered Bananas

Ingredients:

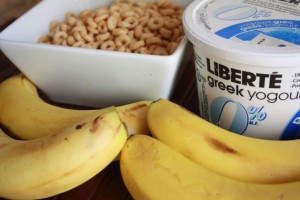
Two ingredients! Could life get any better?

1 cup of melted chocolate chips

3-4 bananas

Method

1. melt the chocolate chips

2. dip bananas into the melted chocolate

3. place on a plate that has been lined with wax paper.

4. insert a wooden stick or steal a plastic stick from those molds!!

5. freeze

FINAL PRODUCT

Cheerio Covered Bananas

Ingredients:

Oops..this recipe has 3 ingredients!!

plain yoghurt

bananas

Cheerios

Method:

1. dip banana into yogurt (I used Liberte yogurt because I’m a huge fan these days of this product)

2. place the banana on a plate lined with waxed paper

3. sprinkle Cheerios on top (do not roll into a plate of Cheerios – sprinkle!!)

4. insert a wooden stick

5. freeze

FINAL RESULT:

I bet know these desserts will be a hit. Who said desserts had to be cakes or pies or tarts or cookies?

Enjoy!!

Disclosure: I am part of the Life Made Delicious Blogger program and I receive special perks as part of my affiliation with this group. The opinions on this blog are my own.

Share this:
Share this page via Email Share this page via Stumble Upon Share this page via Digg this Share this page via Facebook Share this page via Twitter

, , , , , ,

Apr
05


Passover starts tonite at sundown which means a lot of Jewish people will be having Matza Balls in their chicken soup. I actually make them all year round but that’s another story. I usually make them from a mix but for this blog entry, I decided to kick it up a notch and make them from scratch.

What’s the difference – you ask?

  • From a Box: it has nasty ingredients (ie monisodium glutamate) but it’s convenient and they pretty much always turn out right.
  • From Scratch: no nasty ingredients but it takes almost twice as long to make
In the event you want to do you own comparison. Here’s what I did.
The Mix Method (otherwise known as “From the Box”).

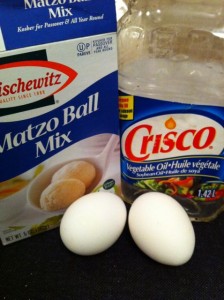
Simple Ingredients

INGREDIENTS:
a) the box (please buy matza ball mix and NOT matza soup and ball mix)
b) 2 eggs
c) 2 tsp vegetable oil
METHOD: (according to the recipe on the side of the box)
a) mix 1 packet with 2 eggs and 2 tsp vegetable oil in a small bowl
b) put in the fridge for 15 minutes
c) boil a pot of water
d) make balls (small..not golf balls but more like the size of large marbles)
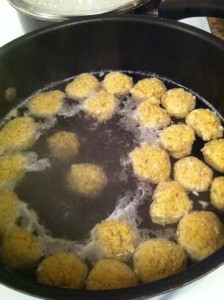
e) place into boiling water and COVER

Lifted up the cover for the photo!!

e) reduce heat and simmer for 20 minutes
FROM SCRACH Recipe (taken from Food.Com)

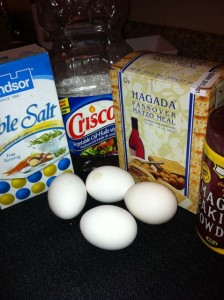
INGREDIENTS:

1 cup matza meal

1 tsp baking powder (may be omitted during Passover)

2 tsp of salt

4 eggs

4 tsp vegetable oil

METHOD

a) mix eggs and vegetable oil in a small bowl

b) mix baking powder and matza meal in another bowl

c) mix wet ingredients into dry ingredients but do not overmix

d) put the mixture in the fridge for an hour

e) boil a pot of water

f) make small balls (again not the size of golf balls more like large the size of a large marble!!)

g) place balls into boiling water, COVER and simmer for 40 minutes. (do not touch – yes – that’s right – do not touch)

RESULTS:

It was a no brainer – the matza balls from the recipe tasted “real” vs “salty”. As for the texture – both were light and fluffy.

Not sure I will be buying the mix again. It’s SO much healthier to make my own.

By the way – its worth googling a few matza ball recipes online. Each one was different i.e one recipe even called for club soda.

Happy Passover and for those who celebrate Easter – Happy Easter.


Share this:
Share this page via Email Share this page via Stumble Upon Share this page via Digg this Share this page via Facebook Share this page via Twitter

, , , ,

Jan
31


Fact: I keep a dairy kitchen. That’s right – I have not bought meat for over 20 years. I don’t know how much a chicken even costs and I would have no idea how to prepare chicken, if I ever had the opportunity.

However I buy fish. Mostly salmon, tilipia, canned tuna and canned salmon and on the rare occasion a whole snapper. I only make it once a week and I must admit, that my list of “Fish Recipes” is limited. But last week, I went online, determined to find a new recipe. I saw one that caught my eye, tried it and decided it was a keeper. Not only did it look gorgeous (I happen to like green) but the spinach pesto kept the tilapia really moist.

You will notice that the blog post has two recipes. The “formal” recipe and then the “adapted” recipe!!

Spinach Pesto Tilapia (from www.about.com)

INGREDIENTS:

Pesto:

  • 3 cups baby spinach leaves, packed, about 3 ounces
  • 1/4 cup olive oil
  • 1/2 cup pecan halves
  • 1/3 cup fresh shredded Parmesan cheese
  • 2 medium cloves garlic, smashed and minced
  • salt and pepper
  • 8 tilapia fillets

INSTRUCTIONS:

Lightly butter a 9×13-inch baking dish. Heat oven to 400°
1. In a food processor, pulse the 3 cups of spinach leaves, 1/4 cup olive oil, pecan halves, Parmesan cheese, garlic, and 1/4 teaspoon salt until the mixture is a fine consistency.

2. Arrange remaining spinach leaves over the bottom of the baking dish.

3. Place a tilapia fillet on the bed of spinach and put about 1 tablespoon of the pesto mixture on the fillet. Spread lightly to cover most of the fillet. Repeat with remaining fillets and pesto, overlapping fish slightly as needed. Sprinkle lightly with salt and pepper.

4.Bake for 15 to 20 minutes, or until tilapia flakes easily with a fork.

ADAPTED VERSION: (according to Vicky…who didnt really read the recipe carefully till afterwards). Typical!! There is probably a good reason why I follow a blog called www.norcecipes.com!

1. Prepare the pesto (I even forgot the pecan halves and the parmesan cheese and it still tasted DELICIOUS)

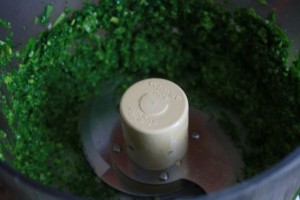
love my cuisinart

2. Spread the pesto on top of each piece of tilapia and place on a baking sheet

3. Bake at 400 degrees for 15 minutes

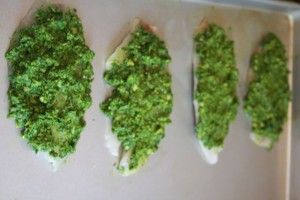
4. Here’s what the final product looked like, before I served it to my guests:

Sometimes I don’t follow a recipe and it still works!! In this case…I was lucky. The fish came out perfectly.

Happy Cooking…whether you follow the first recipe or the adapted recipe!!

Share this:
Share this page via Email Share this page via Stumble Upon Share this page via Digg this Share this page via Facebook Share this page via Twitter

, , , , , ,

Jan
24


Fact: It’s winter and all I want to do is eat comfort food. I have a freezer full of soups and I wanted to diversify and make something different. Of course, twitter inspired me when I saw a tweet from @cookincanuck about a crockpot stew! Bonus Points: it’s VEGETARIAN.

I made one stew and I was immediately in crockpot heaven – so I went back and made another crockpot stew from her Cookin’ Canuck website.

Believe it or not, I used dried chickpeas for both recipes which I have never done before. Generally I use canned chickpeas. But I wanted to reduce the sodium and find out if there was a difference. Indeed there WAS a difference…both in flavor and texture.

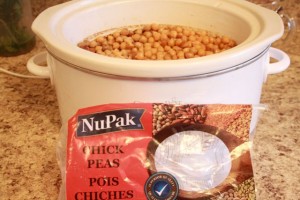
I should mention that I didnt exactly follow the recipe seeing as the original recipe called for canned chickpeas. I cooked the chickpeas first in the crockpot and then added the onion mixture. I leave it up to you if you want to use canned chickpeas or dried chickpeas.

Both stews were super easy to make and chock full of protein, fibre and other goodness. Not to mention a very very affordable dish.

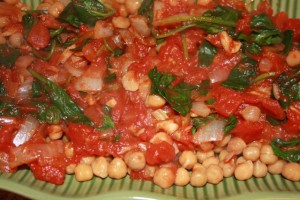
Crockpot Gingered Chickpea with Spice Tomato Stew; (from the kitchen of Cookin’ Cancuk).

INGREDIENTS:

1 tablespoon olive oil

2 onions finely chopped

4 cloves of garlic, finely chopped

2 tablespoon minced fresh ginger (I used organic and again I really think it makes a difference)

2 tsp ground corriander

1 tsp corriander seeds

1 tsp salt

1/2 tsp black pepper

2 tsp balsamic vinegar

2 cups canned or fresh chopped tomotoes (I used canned)

2 cans of chickpeas (rinsed and drained) or 2 cups of dried chickpeas (previously cooked)

2 cups fresh spinach leaves.

METHOD:

1. heat olive oil in a large skillet over medium heat. Add onions and cook, stirring until the onions begin to brown.

2. add garlic, ginger, ground coriander, coriander seeds, salt and pepper. Cook for 1 minute.

3. add balsamic vinegar and tomatoes. Bring the mixture to a boil.

4. spread the chickpeas in the bottom of the crockpot. Pour the tomato mixture over the chickpeas and mix well.

5. cover the crockpot and cook on low for 6 to 8 hours or on high for 3-4 hours

6. Just before serving, stir in spinach.

FINAL PRODUCT


RECIPE #2: Crockpot Chickpea Stew with Balsamic Onions (from the kitchen of Cookin’ Canuck)

INGREDIENTS:

2 medium onions, thinly sliced

1 tablespoon brown sugar

1 tsp dried oregano

1 tablespoon balsamic vinegar

1/2 tsp salt

2 cups chopped canned tomatoes

1/3 cup chopped kalmata olives.

2 cans chickpeas (I used 2 cups dried chickpeas)

1/3 cups crumbled feta cheese

1/4 fresh parsley, chopped

METHOD:

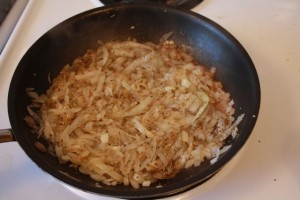
1. heat olive oil in a large skillet over medium heat. Add the onions and cook until softened. Stir in brown sugar. Cover and cook unitll the onions are golden brown (about 10 minutes)

2. add 1/4 cup water and oregano, cover the pan again and cook unitll the onions are deep golden brown (about 15 minutes).

3. stir in balsamic vinegar, salt and an additional 1/4 cup water. Cover the pan and cook until liquid is absorbed. Remove from heat.

4. Stir in tomatoes and kalamata olives

5. Pour the chickpeas into the bottom of a crockpot. Pour the onion mixture over the chickpeas. Cook on low heat for 5-6 hours or 3-4 hours on high heat

6. Garnish before serving, with crumbled feta cheese and chopped fresh parsley.

Who else loves their crockpot?

Share this:
Share this page via Email Share this page via Stumble Upon Share this page via Digg this Share this page via Facebook Share this page via Twitter

, , , , , ,

Jan
17


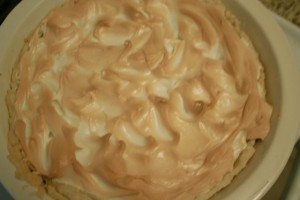
I was having company over and wanted to make something different for dessert. Something I have never tried before. Within no time at all, I was googling recipes for Lemon Meringue Pie.

I looked at several recipes/blogs before deciding that I was going to use the recipe from the blog: Sweet as Sugar Cookies, which she found from Cookie Madness.

It seemed easy:

  1. Make a pie crust
  2. Make the lemon filling
  3. Make the egg whites

Lemon Meringue Pie

Pie Crust:

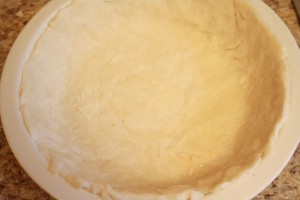
Most of the recipes said “prepared pie crust”. Naturally I wanted to make my own.

I used a recipe from  Suite 101 written by Donna Diegel.  Click for the recipe and her useful tips.

Egg Whites: ( recipe taken from Betty Crocker)

3 egg whites

1/4 tsp cream of tartar

6 tablespoons of sugar

1/2 tsp vanilla

METHOD:

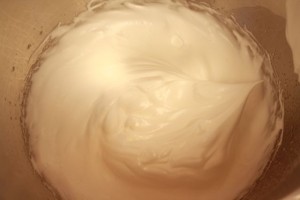
Beat egg whites on high with an electric mixer till foamy. Beat in sugar , 1 tablespoon at a time. Continue beating till eggs are stiff and glossy. Beat in the vanilla.

LEMON FILING:

Ingredients:

1 1/4 cup sugar

1/8 tsp sgar

1/2 cup cold water

1 tablespoon lemon zest

1/2 cup lemon juice

4 egg yolks

1 tablespoon butter (at room temperature)

1 1/2 cup boiling water

METHOD

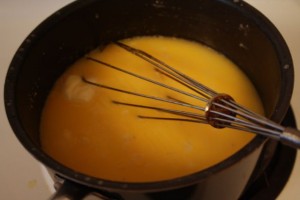
Combine sugar, cornstarch, salt in a saucepan.

Whisk in 1/2 cup cold water, lemon zest and lemon juice. Blend thoroughly. Add the butter and whisk in 1 1/2 cups boiling water.

Set pan over medium heat and stir until mixture boils (about 7 minutes). Reduce heat and stir one more minute. Pour hot filling into pie crust, and top with meringue. Spread to the edges of the pie crust to create a seal and prevent shrinkage.

Bake in a preheated oven that at 350 degrees for 15-20 minutes and cool for two hours.

DO NOT (repeat – DO NOT) cover or it will WEEP. (I learned my lesson).

Making Lemon Meringue Pie,  was easy and not so easy! (does that make sense?). Did I make the pie crust too tough? did the lemon filling thicken enough? did the egg whites get stiff? I was a wreck.

However as each step was accomplished I was PROUD.

WOW – I just made the pie crust!

Wow – I just made the filling

WOW – I just made eggwhites!

Best part – wow – I DID IT. I DID IT.

I have to admit, that my stomach was in a knot for the full hour that I was preparing this recipe. I’m just not use to making crust, filling, and meringues. But it was worth it and I know that the next time I make this recipe it will get easier.

I finally served the pie and everyone enjoyed it but received some feedback that the pie crust was too tough. Good to know.

I would love to go to a pie crust 101 class!! Anyone else want to join me?

Disclosure: I am part of the Life Made Delicious Connector Program and I receive special perks as part of the affiliation with this group. The opinions on this blog are my own.

Share this:
Share this page via Email Share this page via Stumble Upon Share this page via Digg this Share this page via Facebook Share this page via Twitter

, , , , , , ,

Dec
04


Let’s talk about soup. Every one loves soup right? Seriously, have you ever met someone who doesn’t like soup?

I’ve been enjoying a variety of soups from the Moosewood cookbooks for the last two decades. In particular:

  • Split Pea
  • Russian Cabbage Borsht
  • Creamy Squash (New Recipes From Moosewood)
  • Armenian Lentil
  • Potato Leek (New Recipes from Moosewood)
  • Minestrone

However sometimes (only sometimes) I’m short on time and want to make a soup that’s really quick. Guess what? I found a soup that takes NO TIME at all and its delicious. Once again, I found it on the internet (thanks to FoodLoversWebsite)

Here’s the recipe for Spicy Tomato Soup (which I modified a lot cause I bought the wrong can of tomatoes)

INGREDIENTS:

1 tablespoon oil

1 tablespoon butter

1 1/2 cups minced onion

3-4 cloves of garlic cloves

1/2 tsp salt

1 tsp dill

lots of ground black pepper

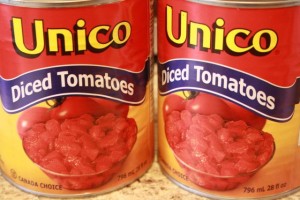
12 oz crushed tomato concentrate (I bought canned diced tomatoes by accident)

2 cups water

1 tablespoon honey

1 tablespoon of mayo or sourcream (I used milk)

2 medium sized tomatoes, diced

INSTRUCTIONS:

1. Heat olive oil and butter in a saucepan.

2.Add onion, garlic, salt, dill, black pepper and stir till onions are translucent (about 6-8 minutes)

3. Add canned tomatoes, water and honey

4. Cover and simmer over low heat for 20-30 minutes.

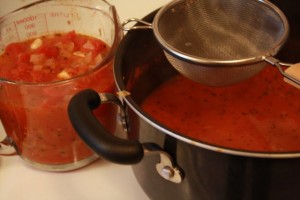
Because I screwed up buying the wrong tomatoes, I then took a sieve and separated the tomato chunks from the liquid.

Then I took the solids, whizzed it in the Cuisinart while slowly adding the liquids. To make it creamy – I added a touch of milk.

Voila

I love soup. In fact my freezer is full of soups at the moment. I crave soup during the winter – don’t you? What’s your favourite soup? Would love to know.

Share this:
Share this page via Email Share this page via Stumble Upon Share this page via Digg this Share this page via Facebook Share this page via Twitter

, , , , , ,