Posts Tagged ‘Recipe’

Nov
27


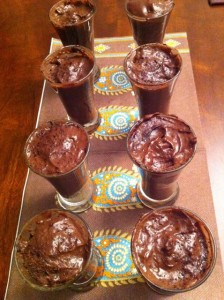
Recently I was having guests over for dinner and thought that I would make chocolate pudding for dessert. I’ve made chocolate pudding before and it’s always a hit. I even remember making it in “home economics” a thousand years ago – in fact it’s the only thing i remember making in that class!!

I searched online (of course ) for a recipe and after reading thru a few recipes  I found  “the winner” (as I call it). Its from overthehillandonaroll. By the way – this blog has some kick-ass photos and recipes. Worth taking a peek at (in my humble opinion).

Here is the recipe…which by the way, will not take more than 10 minutes to prepare.

CHOCOLATE PUDDING:

Ingredients:

2/3 cup white sugar

1/3 cup unsweetened dutch process cocoa (I bought Ghirardelli –  spent a few extra $$ but thought it would make a difference)

1/4 cup cornstarch

1/4 tsp salt

2 1/2 cups whole milk

4 large egg yolks

2 tablespoons unsalted butter

1 tsp vanilla

4 ounces bittersweet chocolate

DIRECTIONS:

1. Whisk egg, sugar, cocoa, cornstarch and salt in a medium saucepan.

2. Whisk in milk, taking care to dissolve the cornstarch.

3. Whisk in egg yolks.

4. Put the saucepan over medium heat and whisk constantly (and I mean constantly) till the first large bubble spurts. This takes about 8 minutes.

5. Reduce heat to low, and whisk one more minute.

6. Remove from heat and immediately pour thru a sieve into a bowl.

7. Add butter, vanilla and bittersweet chocolate and stir till smooth

8. Place plastic wrap onto the surface so that a film doesnt appear, chill for 3 hours (or up to 3 days).

Before serving, shave a few sprinkles of chocolate on top or add real whipped cream for additional “wow factor”.

Hope you get a chance to try this recipe soon.  It’s so EASY and so GOOD.

GO FOR IT – try it – you will like it!!

Share this:
Share this page via Email Share this page via Stumble Upon Share this page via Digg this Share this page via Facebook Share this page via Twitter

, , , , , , , ,

Nov
17


Everytime I have guests, I receive a lot of compliments about my salads. I use to think that the secret to a great salad is to make homemade dressing but lately I’ve been thinking that there is a lot more to it.

So I decided to ask my twitter friends (tweeps) “what’s your secret to making a great salad” and here’s what they wrote:

@MuskokaRx Broccoli @yyzsportsmedia fresh ingredients @mominc toasted nuts. Or goat cheese. Any cheese really, now that I think of it  @IraKates building flavours @Upaya_Naturals Our #raw sprouted croutons @SharonDV Bacon @ChickyMara crisp cold lettuce. Great dressing. Everything is better with croutons @TheBumpercrop local greens, grainy mustard @Winemakersboots vinegar and something cool like Montrefort cheese and Bizjak pears @Table17 Bacon @foodNURD I’m a big fan of adding candied walnuts/pecans to salads. Great texture/flavour contrast @elisecooks Dry Greens! Something crunchy. Something fruity. The right ratio of salad to dressing @Forkin_Healthy very clean, organic mixed greens. Fruit and cheese too. Maybe nuts or seeds. But clean spun is #1….and it rhymes!

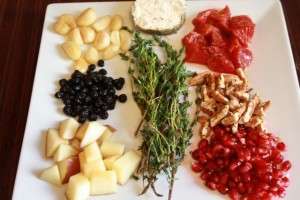
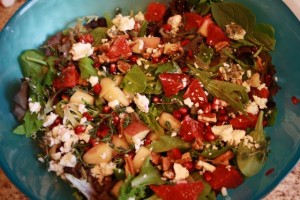
I then took some of the above advice and  made a plate of goodies that I was going to add to a bowl of plain mixed greens. I prepared: chopped apple, pomegranate seeds, dried blueberries, pecans, herbed goat cheese, fresh thyme, blood oranges and roasted dried garlic (that I recently discovered).

Here’s the result:

I will be serving this for dinner Friday Nite and I have no doubt that it will be inhaled. In the event you are wondering what type of dressing I am going to use – please visit again – as I will be blogging about dressings in the near future. Please also take a minute to visit Life Made Delicious for more great salad recipes.

Disclosure: I am part of the Life Made Delicious Connector Program and I receive special perks as part of the affiliation with this group. The opinion on this blog are my own.

Share this:
Share this page via Email Share this page via Stumble Upon Share this page via Digg this Share this page via Facebook Share this page via Twitter

, , , , , , , ,

Nov
01


GInger Maple Vinaigrette

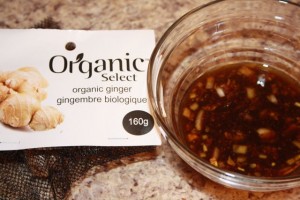
I have been in love with organic ginger for the last year. It all started when I was visiting Kensington Market and stopped by the Urban Herbivore. It was one of those cold winter days and I wanted some thing healthy and HOT, so I ordered some organic ginger tea. I watched them grind up the fresh ginger and then add some hot water. I loved this drink so much that I went out and bought some fresh organic ginger and then made the drink at home!

Often I just didn’t have organic ginger available and bought the normal ginger from the grocery store. Let me tell you – ITS NOT THE SAME. I will now ONLY buy organic ginger. I love how intense the flavor is – it’s not even on the same planet as the non organic ginger.

Lets discuss: organic vs non organic:

organic: stronger flavor, less water, you need less, costs more, not available at your local grocery store

non organic: flavor is not as strong, you need more, costs less,

The brand I usually pick up has a lovely recipe on the back and I FINALLY decided to try it. (took me long enough).

Here’s what you need for Ginger Maple Vinaigrette:

2 inch piece of organic ginger chopped

1 med organic garlic clove, minced

1 med shallot, minced

2 tablespoons maple syrup

2 tablespoons dijon mustard

3 tablespoons balsamic vinegar

1 cup olive oil

METHOD:

In a blender combine all the ingredients except olive oil and blend until smooth.

On the lowest setting, pour olive oil until emulsified. Adjust taste with salt and pepper. Use as a dressing or marinade and store for up to 2 weeks in a refrigerator.

I encourage everyone to:  a) pick up some organic ginger b) try the above dressing c) or try making fresh ginger tea.

Funny, as I type this blog post I’m thinking of ginger ice cream, ginger cookies, gingerbread latte, dipped ginger in chocolate. Who else has any ideas what to make with ginger?

Share this:
Share this page via Email Share this page via Stumble Upon Share this page via Digg this Share this page via Facebook Share this page via Twitter

, , , , , , ,

Oct
27


As always, I was on the internet browsing through tastespotting and came across a recipe for Sweet Potato Falafels.  The recipe appealed to me for the following reasons:

  • It only required 5 ingredients: corriander, cumin, sweet potatoes, sesame seeds, chick pea flour
  • It didn’t require a ton of work
  • Sweet Potatoes are in season (I think – can anyone confirm this for me)
  • It would appeal to vegans

The only downsize was the fact that chick pea flour is not something I have in my pantry and required a trip to the bulk store. Not the end of the world  – happy to support my local health food store.

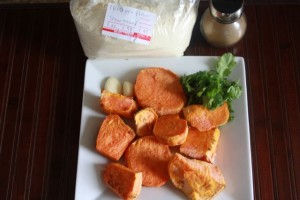
Here’s what you need:

Ingredients

2 medium sized sweet potato

1 1/2 tsp ground corriander (I used a handful of fresh – well washed)

1 1/2 tsp cumin

1 cup chick pea flour

1/2 a lemon

sesame seeds

Method:

1. Bake the entire sweet potato in the oven at 425 degress and bake till soft (app. 45 min). Let cool and then scoop out the insides of the sweet potato. (note: I peeled them, sliced them, and then baked them)

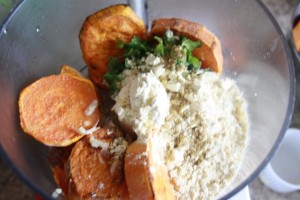
2. When they are soft, put the sweet potato in a Cuisinart and add the chickpea flour, corriander, cumin and the juice of the lemon.  Pulse till smooth. (note: this could be done with a fork)

Oh how I love my cuisinart!!
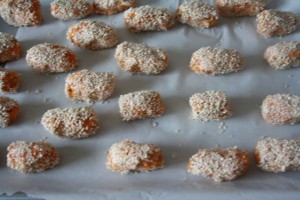
3. Roll them in your hands and shape them into small, thick logs. (best way to describe it).

5. Once shaped, roll them in sesame seeds.

6. The original recipe says to bake them – but I felt like frying them (me. bad). So I fried them in a small amount of oil till lightly browned.

I intended on baking them - and then changed my mind. It happens!!
Final Product:

One Word. Yummy.

There was a suggestion to serve them with tzaziki but you could dip them into any of your fav condiments or even eat them plain.

Hope you like this recipe as much as I did.  Many thanks to the honeycomb blog for posting this on tastespotting and to 101cookbooks who originally posted this recipe in 2009.

Happy Cooking.

Share this:
Share this page via Email Share this page via Stumble Upon Share this page via Digg this Share this page via Facebook Share this page via Twitter

, , , , ,

Oct
18


My mom has been making pita chips for years and then I got into the habit of making them too. It’s such a great alternative to eating a tortilla chip plus they are simple to make and freeze well. (always important for freezer junkies like me)

Ingredients:

Pita

1/4  cup melted butter or margarine

2 cloves of garlic (minced)

chopped parsley

Method:

1. Take scissors and cut the pita into triangles. Open up the triangles and lay them flat on a baking sheet (lined with parchment paper).

scissors make it really really easy!! (hint)

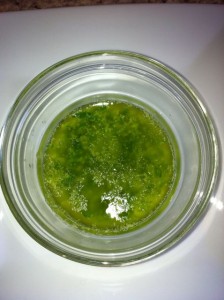
2. Melt the butter, and add the parsley and chopped garlic

Love the smell of butter, parsley and garlic

3. Take a brush and start painting the pita triangles – liberally or not so liberally!!

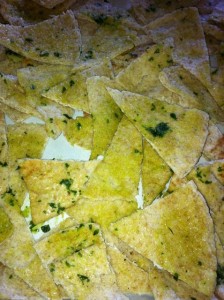
Ready for the oven!!

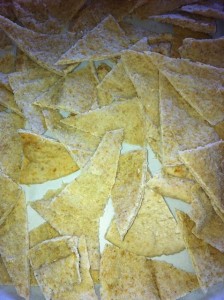
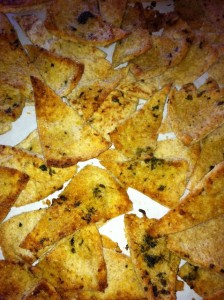
4. Bake in a preheated 325 F oven for 20 minutes till slightly brown and crispy.

Pita Chips!!

These Pita Chips go perfectly with hummus. Speaking of hummus…have you ever made your own? Stay tuned for that recipe!!

Happy Cooking!!

Share this:
Share this page via Email Share this page via Stumble Upon Share this page via Digg this Share this page via Facebook Share this page via Twitter

, , , ,

Aug
11


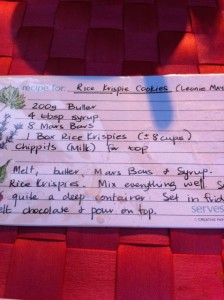
I was at my friends house for dinner last nite, and she pulled out her recipe box with some of her favorite recipes. I was certainly intrigued by this one recipe that seemed to fit my requisites for dessert: quick and easy!!

recipe cards- remember these?

The hardest part of the recipe was actually finding the Mars bars!! I am a sales rep and was visiting my account, Fiesta Farms and they didnt have them. Next stop – Lady York and again they didn’t have any. Finally I just stopped off at a Shell Station!!

Here’s what you need:

8 cups Rice Krispies

8 Mars bars

200 grams of butter

4 tablespoons of Golden Syrup

milk chocolate chippits

METHOD:

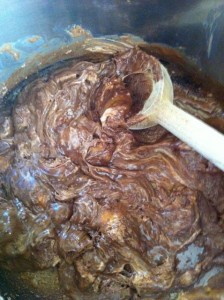
1. Melt the Mars bars in a large pot over low heat with the butter and the golden syrup.

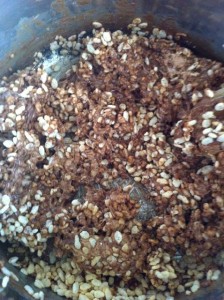
2. Add the rice crispies. Mix. (this is the hardest part ..my poor arms.)

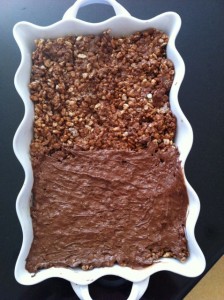
3. Spread into a large pyrex or serving dish.

4. Melt the chippits and then spread on top. I decided that it was sweet enough and didnt need the extra step so I only did half of the pan.

5. Set in the fridge.

ENJOY. ENJOY. ENJOY.

Share this:
Share this page via Email Share this page via Stumble Upon Share this page via Digg this Share this page via Facebook Share this page via Twitter

, , , , ,

Aug
09


I received this salad recipe via email from a mom in the school yard back in 2007. The email was printed and has been in my “recipe binder” (do you have one of those? or am I the only one!!) and it’s a keeper. Promise you – this salad is a real winner.

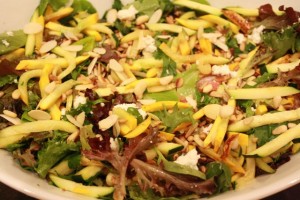
I like this salad as it has the perfect combination of nuts, cheese, greens and  I love that the zucchini is slightly sauteed.

It’s called ANTIPASTI SALAD.

Ingredients:

Mixed Greens

3 zucchini – unpeeled, julienned

2 tomatoes – finely diced

1 small red onion – finely chopped

1/2 crumbled feta

1/4 cup toasted almonds

1/4 cup toasted sunflower seeds

1/4 cup pistachios

1/4 cup toasted pine nuts

Instructions:

1. Place mixed greens in a large salad bowl

2. Heat frying pan. Add oil and lightly sautee the zucchini till tender (but not soft). Place the zucchini in the fridge to cool.

3. Heat another frying pan. Add nuts (all 4 varieties) and toast till aromatic.

4. Add the zucchini, the toasted nuts and the crumbled feta to the mixed greens.

Dressing:

2 cloves of garlic

1/4 cup red wine vinegar

1/4 cup olive oil

salt and pepper

Instructions:

Add the garlic into a cuisinart. Then add the olive oil, red wine vinegar and the salt and pepper. The cuisinart really emulsifies the ingredients and your end result will be a much better dressing.

Add the dressing to the salad and toss.

ENJOY.

PS if you are looking for a website with more great recipes – check out Life Made Delicious!

Disclosure: I am part of the Life Made Delicious Connector Program and I receive special perks as part of the affiliation with this group. The opinion on this blog are my own.

Share this:
Share this page via Email Share this page via Stumble Upon Share this page via Digg this Share this page via Facebook Share this page via Twitter

, , , , ,

Jul
28


I discovered this recipe in 2008 on the Oprah website and have been using it ever since. This dish is truly packed with flavor because you cook the quinoa in carrot juice and not water. Plus the addition of nutmeg gives it a certain punch.

Healthy and Flavorful....A Winning Combo

I also love this recipe because it contains all the right elements for a perfect side dish:

  • you just need a few ingredients
  • it’s got a ton of flavor
  • there’s just a few steps i.e its’ easy to make
  • oh so healthy

Ingredients:

1 cup of quinoa, rinsed

1/4 tsp olive oil (I didn’t measure but I’m sure I used more)

1/2 cup chopped onion

1/2 cup chopped celery

1/2 cup chopped zucchini

2 cups of bottled carrot juice  (I used Bolthouse)

1/2 tsp nutmeg

1/4 tsp salt

1/4 tsp pepper.

Instructions:

Heat a saucepan, and toast the quinoa. Transfer to a bowl. Set aside.

Heat a frying pan, and add olive oil. Add onion, celery, and zucchini. Cook till the vegetables are soft.

Stir in the carrot juice. Bring to a low boil. Stir in the quinoa, nutmeg, salt and pepper. Cover and simmer until liquid has been absorbed and quinoa is tender. About 25 – 30 minutes.

NOTE:  I put the quinoa and the carrot juice in the rice cooker!! It works brilliantly. Here’s  a picture of my beloved rice cooker.

The Rice Cooker Cooks All Sorts of Grains!! (including quinoa)

Share this:
Share this page via Email Share this page via Stumble Upon Share this page via Digg this Share this page via Facebook Share this page via Twitter

, , , , ,

Jun
21


Tonite, I came home from work and wanted to make a quick dinner. However I had not gone grocery shopping (even though I visit 10 grocery stores a day…don’t ask). I did however, find frozen salmon, fresh broccoli and some rice in the pantry.

Before I continue, I need to give credit to two bloggers who inspire me weekly!!   1. Whats On My Plate and 2. No Recipes. (you will soon see why…keep reading)

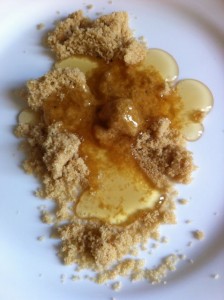
Here’s what I did with the salmon USING NO RECIPE. (which is sometimes the best way to cook).

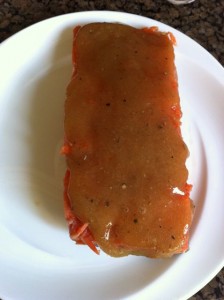
1. Take some honey and brown sugar and put it on a plate:

2. Mix the honey and brown sugar together then shmeer it on the salmon:

step two!!

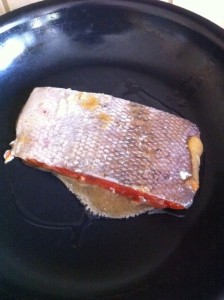
3. Place the salmon upside down onto a hot frying pan (ie the brown sugar-ed side)

Step Three!! How Easy.

4. It will bubble and become dark and this is good!!! Finish off in a pre heated 400 degree oven for another 10 minutes till its cooked in the middle.

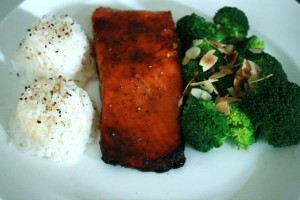
END RESULT: this is WHATS ON MY PLATE using NO RECIPE!!! What a great dinner for a Tuesday nite, when I was tired and hungry and didn’t have a lot in my fridge.

Thanks to @norecipes and @wonTONfm for inspiring me.

Share this:
Share this page via Email Share this page via Stumble Upon Share this page via Digg this Share this page via Facebook Share this page via Twitter

, ,

Jun
16


This recipe is called “Magic Pie” and indeed it’s MAGICAL. No fuss – no muss.

Here’s what you need:

Ingredients:

1/2 pkg frozen chopped broccoli, thawed and drained…Note: I used fresh broccoli (I slightly steamed the florets)

1 cup shredded swiss cheeese

1 can corn, drained

4 eggs

1 1/2 cups milk

2/3 cups Bisquick

salt and pepper to taste

dash of nutmeg

Preparation:

1. Lightly grease a 10 inch quiche  pan or deep dish serving dish. Pre heat oven to 375 F

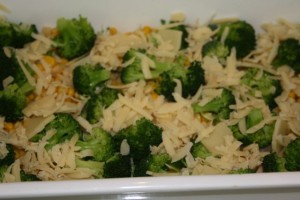
2. Sprinkle broccoli, cheese, corn and onion evenly in prepared pan.

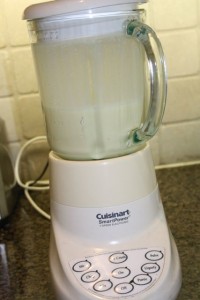
3. In blender, mix eggs, milk, bisquick, and seasonings on high for one minute

4. Pour over broccoli mixture.

5. Bake in a 375 degree oven for 1 hour.

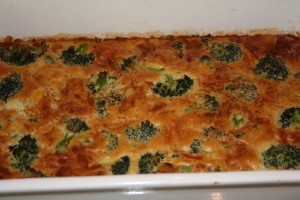
This is the end result.

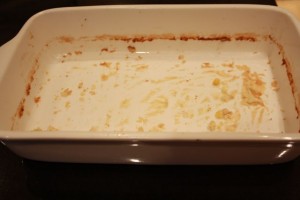
Actually THIS IS THE END RESULT…(ha ha)

Hope you enjoy this magical recipe as much as I do.

Disclosure: #1. I am part of the Life Made Delicious Connector Program and I receive special perks as part of the affiliation with this group. The opinion on this blog are my own.

Share this:
Share this page via Email Share this page via Stumble Upon Share this page via Digg this Share this page via Facebook Share this page via Twitter

, , , ,