Posts Tagged ‘Recipe’

Jun
07


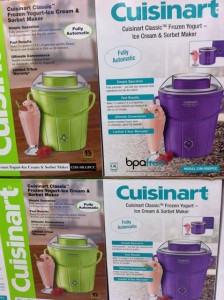
I will admit it, I own too many kitchen appliances. I need another one like another navel. BUT…the bright colors WERE CALLING MY NAME (Cuisinart knows how to get my attention) and I just had to have one when I saw this Cuisinart Ice Cream Maker at Costco for $49.99.

Purple or Green!!

I was reading so many tweets last year from @kalofagas last summer about his ice cream making adventures that I’m almost ready to blame him!!  But I won’t. He truly inspired me and as a result I’m now making FRESH ICE CREAM.  A huge thank you to to @kalofagas for his inspirational tweets.

Here’s how easy it is:

RECIPE FOR FRESH STRAWBERRY ICE CREAM (taken from the manual)

2 cups fresh strawberries, stemmed and sliced

3 tablespoons freshly squeezed lemon juice

1 cup sugar, divided

1 cup whole milk – well chilled

2 cups heavy cream – well chilled

1 tsp pure vanilla extract

STEP ONE:

Combine the strawberies, with 1/2 cup of sugar and the lemon juice. Let sit for about two hours. Strain the berries, reserving the juices. Mash or pureee the strawberries (I used a blender for this step).

STEP TWO:

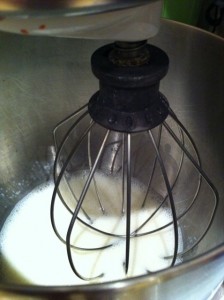
Use a mixer and on low speed, combine the milk and the remaining sugar until the sugar is dissolved, about 1 -2 minutes. Stir in heavy cream, reserved juice, mashed strawberries and vanilla.

Pretty Easy...

STEP THREE:

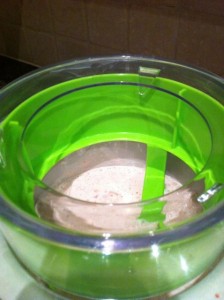
Pour the mixture into the freezer bowl of  the Cuisinart – and press a button.

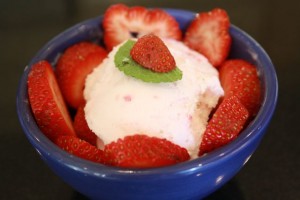
Twenty five minutes later…. I have unbelievable creamy fresh strawberry ice cream.

Not bad eh?

Hope you visit your local Costco soon – so you too can buy a Cuisinart Classic Frozen Yogurt – Ice Cream and Sorbet Maker.

I can’t wait to experiment with flavors: Coffee, Ginger, Rhubarb, Lemon, Watermelon,….It’s going to be a delicious summer!

PS Can someone now inspire me to use the Cuisinart Yogurt Machine that has been sitting in my basement (in a box) for the last year?


Share this:
Share this page via Email Share this page via Stumble Upon Share this page via Digg this Share this page via Facebook Share this page via Twitter

, , , , , ,

Jun
01


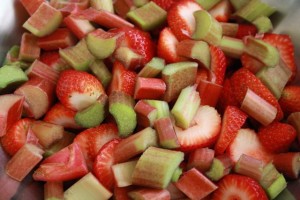
I’m in the mood for sharing some more of my favorite recipes. Now that rhubarb is appearing in grocery stores,  I thought I would share this recipe for “Best Ever Rhubarb Crisp” that I have been using since 2009.  It’s Star Tested by Susan Sampson! The article actually says “adapted from the 1983 Toronto Star Cookbook by Jim White.

Ingredients

1 1/2 lbs (7oo grams) rhubarb diced into 1/2 inch pieces (about 6 cups) ****

3/4 cup sugar

1/4 cup flour

1/2 tsp cinnamon

Topping:

1 cup all purpose flour

3/4 cup packed brown sugar

1/2 cup rolled oats

1/2 cup melted butter

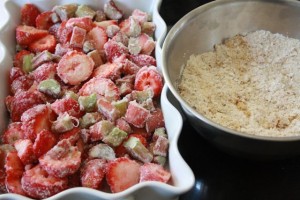
Preparation: In a large bowl, toss rhubarb, sugar, flour and cinnamon. Transfer to a lightly greased 8 inch square baking pan

For the toppping: In a a bowl, toss together flour, sugar, and oats. Drizzle in butter. Mix well with a fork. Sprinkle over rhubarb mixture.

Bake in a preheated 375 degree oven for 30 minutes.

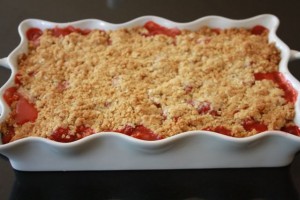
END RESULT:

The Star is right..it's the best rhubarb crisp.

***for some reason (probably cause I didnt have enough rhubarb), I used a combo of strawberries AND rhubarb. For this blog entry I used a 1 lb container of strawberries and one cup of rhubarb. It’s still delicious. No one in my family is complaining.

Happy Baking!

Share this:
Share this page via Email Share this page via Stumble Upon Share this page via Digg this Share this page via Facebook Share this page via Twitter

, , , , , ,

May
18


Pea and Basil Soup

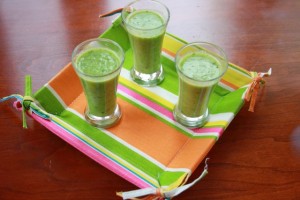
As I was running the Toronto Half Marathon, I couldn’t help but notice (when I wasn’t staring at the pavement), that everything was a spectacular color of green. The trees, the shrubs, the grass…do you know what I mean? It really is pretty out there at the moment.
Looking at all those shades of green for over 2 hours, made me want to make something green. So I did.

Here’s a quick and easy recipe for Pea and Basil Soup that I found on the the Food Network website.

2 tablespoons olive oil

1 tablespoon butter

1 small onion, diced

1 clove garlic, minced

1 tsp salt

1/2 tsp freshly ground pepper

4 1/2 cups frozen peas

3/4 cup chopped basil leaves

2 cups chicken broth (I used  1 cup fresh vegetable stock and 1 cup water)

2 cups cream (I chose not to add cream seeing as I’m lactose intolerant)

4-6 very thin slices of fresh mozzarella cheese (oops didnt have this on hand)

1/4 cups diced roasted red bell peppers (jarred is fine…oops didnt have this either).

Directions:

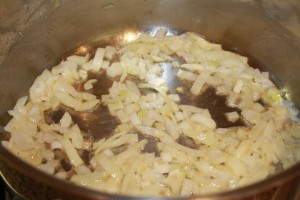
Place a medium soup pot over medium heat. Add the olive oil, butter, onions, garlic, salt and pepper.

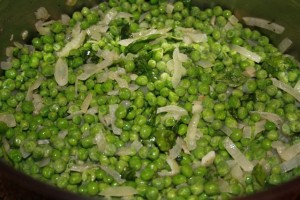
Cook until the onions are soft and translucent, about 5 minutes. Add the peas and basil and heat until the peas are thawed.

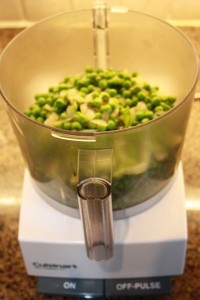
Place the pea mixture in a blender. (I used a Cuisinart). Add one cup of the chicken broth and pulse until pureed, adding more broth if necessary.

Used a Cuisinart instead of the blender.

Return the pureed mixture to the pot. Stir in the remaining chicken broth and cream. Return the pan to pan medium heat and cook until hot but not boiling. Garnish with mozarella and the roasted red peppers. (I chose to eliminate this step).

I love soups that are vibrant green (like this soup) to serve in the spring or the summer.

I bet it would be delicious served cold too.

Are you cooking green foods at the moments? fiddle heads perhaps? or asparagus? Do share.

Disclosure: I am part of the Life Made Delicious Connector Program and I receive special perks as part of the affiliation with this group. The opinion on this blog our my own.

Share this:
Share this page via Email Share this page via Stumble Upon Share this page via Digg this Share this page via Facebook Share this page via Twitter

, , , , ,

Apr
14


Next week is Passover (April 18 -26) so our house will be free of bagels (see last post) and full of matza. I’m not exactly a fan of this holiday but that’s another post in itself.

Here’s a favorite meal that we make throughout the week. It’s simple to make and delicious too.

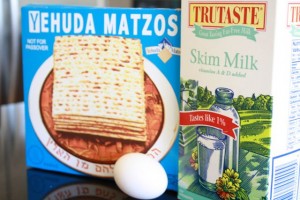
All you need is three ingredients:

For one portion –  1 egg, 2 pieces of matza and 1/4 cup of milk (you could add more if you wanted). I used skim milk as it’s all I had -but 2% or homo would probably be even better.

three simple ingredients

Step One:

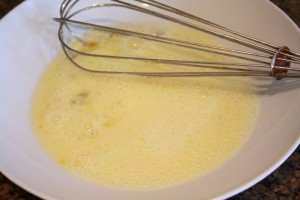
Whisk the milk and the egg. (simple)

Step Two:

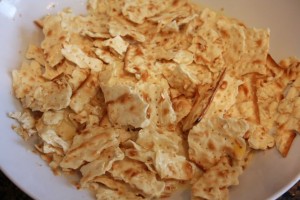
Crush the matza and immerse in the milk mixture.

Step Three:

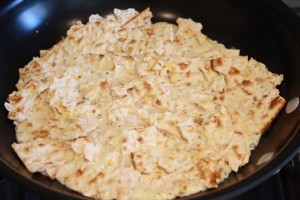
Put the mixture into a heated frying pan (that has been coated with a little oil)

Step Four:

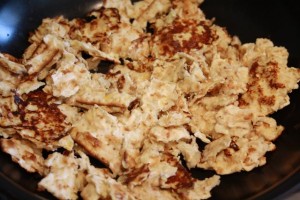
Move the pieces around every once in a while so the matza gets burnt-looking. Does that make sense?

End result with look like this:

Step Five:

Enjoy with sour cream, jam, or cream cheese. (which is why this dish is so yummy).

NOTE: The traditional name for this dish is MATZA BREI (pronounced br-i).

My friend tells me she has never ever used milk. She just wets the matza with water. We laughed as I had never  heard of just using water!!

As for finding matza: it’s in every grocery store from coast to coast.

To all my Jewish Readers…Happy Passover.

Share this:
Share this page via Email Share this page via Stumble Upon Share this page via Digg this Share this page via Facebook Share this page via Twitter

, , , ,

Mar
02


It wasn’t suppose to become a cookie challenge, however after I posted “My Fav. Chocolate Chip Cookie Recipe” on twitter, I received a tweet from @livwu that said the following:

@momwhoruns Anna Olson’s Chewy Chocolate Chip Cookie is my fave http://bit.ly/9GU6Wc try it!

So I clicked on the link and said “hmm…I think I might try this recipe. Why not?”.

Here’s the recipe in the event you don’t feel like clicking on the link:

Anna Olson’s Chewy Chocolate Chip Cookie:

3/4 cup butter

1/4 cup granulated sugar

1 cup brown sugar

1 egg

2 tsp vanilla extract

1 tsp baking soda

2 tsp corn starch

1/2 tsp salt

2 cups flour

8 oz bittersweet chocolate cut into chunks

Instructions:

1. Preheat oven to 350 F.

2. Cream butter and sugars together untill smooth. Add egg and vanilla extract and blend in.

3. Stir in, flour, cornstarch, baking soda and chocolate chunks

4. Drop by tablespoons on to a greased baking sheet and bake 8 to 10 minutes and golden around the edges

5. Let cool

I gave one chocolate chip cookie from Recipe #1 and one chocolate chip cookie from recipe #2 – to my daughter, her friend and her friends dad (he picked up his daughter at exactly the right time). Everyone was happy – both cookies were delicious but indeed recipe #2 has a slight edge.

Thanks to my twitter friend for sharing this recipe for me. I hope I meet her IRL (in real life) one day soon.

Happy Baking – once again.

PS… Are there any other chocolate chip cookie recipes I should try. I’m ready for the challenge.

Share this:
Share this page via Email Share this page via Stumble Upon Share this page via Digg this Share this page via Facebook Share this page via Twitter

, , , ,

Mar
01


I’ve been using this recipe for years and years. I don’t know exactly how many years but well before email as the article says to MAIL in recipe requests not email them!!
This recipe was from a column in the Toronto Star  that was called Fare Exchange and was written by Mary McgGrath. It was submitted by Lynne Anne Anfield of Cherry Valley. I have no doubt in my mind that I’ve been using this recipe for well over 10 years. It’s the only chocolate chip cookie recipe I have ever used. I’m pretty loyal to baking recipes that work!! The cookies are soft and gooey – just like they should be. (in my humble opinion).
Lynne Anne’s Best Ever Chocolate Chip Cookies

1 cup butter

1/2 cup shortening

1 cup granulated sugar

1/2 cup brown sugar

2 eggs

2 tsp vanilla

2 cups of all purpose flour

1 tsp baking soda

2 cups chocolate chips

Instructions: Preheat oven to 375 degrees F.

Cream together butter and shortening. Gradually add sugars, creaming well. Beat in eggs and vanilla. In a separate bowl, combine flour and baking soda. Blend into creamed mixture. Stir in chocolate chips. Chill dough for a few minutes. Drop by spoonfuls on to a lightly greased baking sheet. Bake at 375 for 8 to 10 minutes or until golden brown and the edges and slightly undercooked in the centre. Let stand on sheet for 3-5 minutes. Remove cookies from baking sheet and set on a wire rack to finish cooling.

PS I am a huge believer in the following kitchen gadget. I spray it with Pam and use it when I bake cookies so that they come out nice and round.

Happy Baking!!

Share this:
Share this page via Email Share this page via Stumble Upon Share this page via Digg this Share this page via Facebook Share this page via Twitter

, , , , ,

Feb
07


I grew up in a family that loved apples. I grew up eating McIntosh, Granny Smith, Empire, Cortland and even Russet apples.

My love for apples continues…it’s a quick healthy snack and apples can be turned into healthy desserts too. (keep reading)

Recently I became aware that the McIntosh Apple is celebrating it’s 200th anniversary in style!!

The Ontario Apple Growers will be hosting the  Winter Apple Ball! This event  is going to take place on Monday Feb 21 from 11 – 2 at the Westin Harbour Castle in the Metropolitan Ballroom.

For further info click on the link. All the info about this fabulous event will be there.

In honour of the McIntosh Apples’ birthday, I decided to make baked apples for dessert tonite.

I think my family is kinda tired of yoghurt and blueberies with sprinkled granola.

Here’s how simple the recipe is:

INGREDIENTS:

Apples (I used McIntosh but I’m sure this would work with other varieties. Infact other varieties might work better)

butter or margarine (a few tablespoons)

cup brown sugar (a few tablespoons)

cinnamon

pecans and walnuts (optional)

(sorry I didn’t measure…I grew up in a kitchen that didn’t measure anything. My mom is awesome though).

RECIPE:

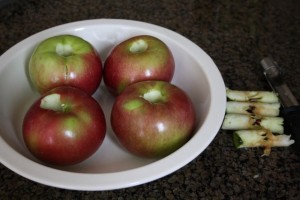
1. Core apples (simple..well kinda. LOL) I have a apple corer to assist with this step.

step #1

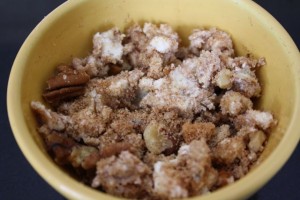
2. Mix the butter, brown sugar and cinnamon (nuts are optional)

Step #2

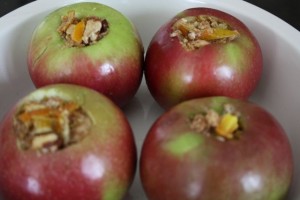
3. Stuff the apples with the mixture.

Step #3

4. Bake in a preheated 350 degree oven for 40 minutes

VOILA…a dessert that barely took 5 minutes of preparation, required barely any ingredients and is YUMMY.

If you notice in the photos, there’s little bits of orange sticking out. A few years ago, I brought back from Israel, dried orange peel from an incredible store called Eden Teva. I’ve been storing it in my freezer and every once in a while I add it to a few dishes that I make for color and flavor.

Happy 200th Anniversary to the McIntosh Apple!!

Share this:
Share this page via Email Share this page via Stumble Upon Share this page via Digg this Share this page via Facebook Share this page via Twitter

, , , , , , , , ,

Jan
20


This recipe could NOT be easier.

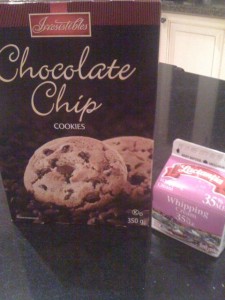
All you need is two ingredients – whipped cream (the real stuff not the one in the can) and the cheapest chocolate cookies you can find.

Two Products. How Easy Is That?

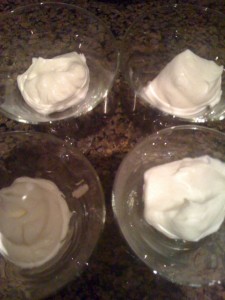
First Step: Whip the whipped cream

(you don’t need a photo, right?)

Second Step: Place a dollop of whipped cream in a serving dish. I like these miniature martini glasses for this recipe but you could use anything.

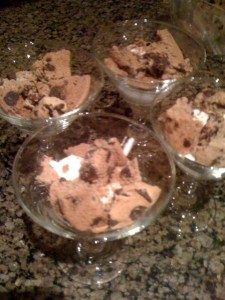
Third Step: Break up a chocolate chip cookie (you could experiment and break up two cookies too) and place it on top of the whipped cream

(almost done)

Fourth Step: Add another dollop of whipped cream. Then grate chocolate for an “added touch”

Ta - Da!!

Voila.

The End.

(ps your family/guests will LOVE this dessert. Promise)

Share this:
Share this page via Email Share this page via Stumble Upon Share this page via Digg this Share this page via Facebook Share this page via Twitter

, , , , , ,

Nov
28


It’s that time of year again, when my family inhales consumes latkes. Trust me, I’m not complaining. I love latkes. Everyone does! Here’s the recipe that I have been using for close to 20 years. It’s adapted from Still Life with Menu Cookbook by Molly Katzen.

The reason I prefer this recipe is due to her secret trick: you parboil the pototoes.

Let’s start from the beginning K?

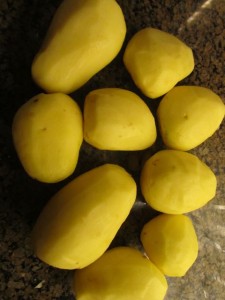
(my mom would be proud that I really tried hard to get peel off ALL of the skin!

9 yellow potaotes – peeled

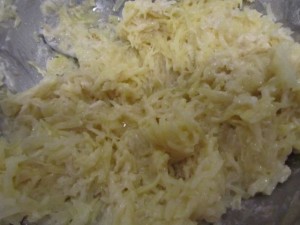
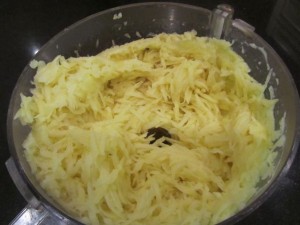
the cusinart does a great job of grating - no fuss, no muss

Grate them in a cusinart. (or by hand)

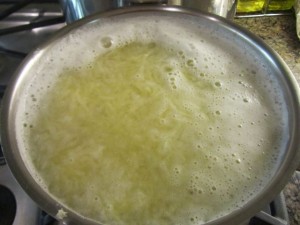
Then, take the grated potatoes and put them in boiling water and par boil for 10 minutes.

RINSE under cold water – (this takes a bit of time cause you want the potatoes to be cool for the next step) and squeeze out the excess water.

Place the grated par boiled potatoes in a bowl, along with 4 eggs and 3/4 flour, and salt.

Last step..simple eh?

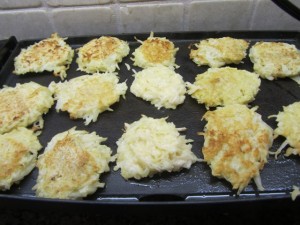
Place dollops of  the mixture on a heated griddle with vegetable oil. I love using my griddle for latkes for two reasons 1. you  dont have to use a lot of oil 2. you  get to make a lot of latkes at a time.

so simple...I swear.

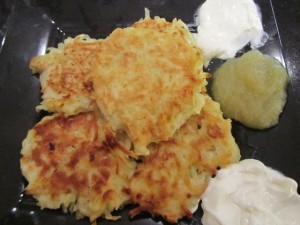
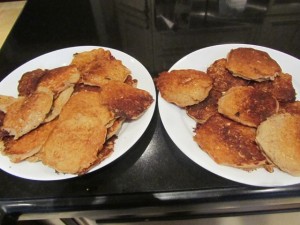
FINISHED RESULT..

ready to be inhaled...with sour cream or applesauce.

I love Chanuka don’t you?

For those of you looking for last minute gifts, please check out this guest blog entry I wrote for Everything Mom.

Happy Chanuka and Happy Cooking.

Share this:
Share this page via Email Share this page via Stumble Upon Share this page via Digg this Share this page via Facebook Share this page via Twitter

, , , , , ,

Oct
18


I have been using the same pancake recipe for a long long time and everyone has been happy.

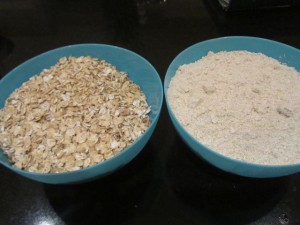
But last weekend, I was in Ottawa at the Landsdowne Farmers Market and came across a vendor (Castor River Farms) selling oats, oat flour, and other grains. I stopped and noticed a recipe for oatmeal pancakes. I was intrigued so I purchased oats and the oat flour that I needed for the recipe.

Oats and Oat Flour

I returned home and made the oatmeal pancakes for dinner. Actually I made two batches. One batch was made with the FRESH oats from the vendor at the farmers market and one batch was made with the Quaker Oats bag from my pantry.

I asked three people to tell me which one was the one with the FRESH OATS…two out of three got it right.The texture was chewier, the pancake was denser and all in all it was better tasting pancake.

Oatmeal Pancakes

I love taste tests…we have compared real oreos vs. fake oreos, organic milk vs. non organic milk and now the oatmeal pancakes. The kids think I’m nuts. (but in a good way).

Here’s the recipe for Oatmeal Pancakes:

1 1/2 cups of freshly rolled oats

2 cups of milk (dairy, soy or almond)

1 cup oat flour

1 tbsp maple syrup or honey

1/2 tsp sea salt

1 tsp cinnamon

1 tbsp baking powder

1 egg, beaten

1/4 oil

Let oats and milk sit for at least 10 minutes. Mix ingredients 3-7 together, then add to oatmeal mixture. Add egg and oil and mix well. Makes 10-12 pancakes. Note: They are very filling

This recipe is from Castor River Farms, 2696 9th Line road, Metcalfe.

They are a regular vendor at the Ottawa Landsdowne Farmers Market where I will be returning, to buy more oats!!

Happy Pancakes!!

Share this:
Share this page via Email Share this page via Stumble Upon Share this page via Digg this Share this page via Facebook Share this page via Twitter

, , , , ,