Posts Tagged ‘Pinterest’

Jul
13


I read a blog post this week from Glimmer Life and had a good chuckle when I read the following line:  “I basically designed my whole house around inspirational pics on Pinterest”. I left a comment on her facebook page that my entire menu is curated from Pinterest. Seriously.

Here’s a few recipes I tried last week that I found on Pinterest!

Pesto Salmon and Italian Vegetables in Foil Packets (click here for the original recipe by www.cookingclassy.com

1 lb of trimmed and washed Green Beans

4 pieces of Salmon

Pesto (I made my own – click here for an easy recipe)

Directions:

1. Cut tin foil into 4 large squares.

2. Take a handful of green beans and place it in the middle of the square.

3. Take the salmon and place it on top of the green beans.

3. Spread the pesto over the salmon.

4. Wrap the packet up and bake in a 350 degree oven for 30 minutes

FINAL

dinner - salmon

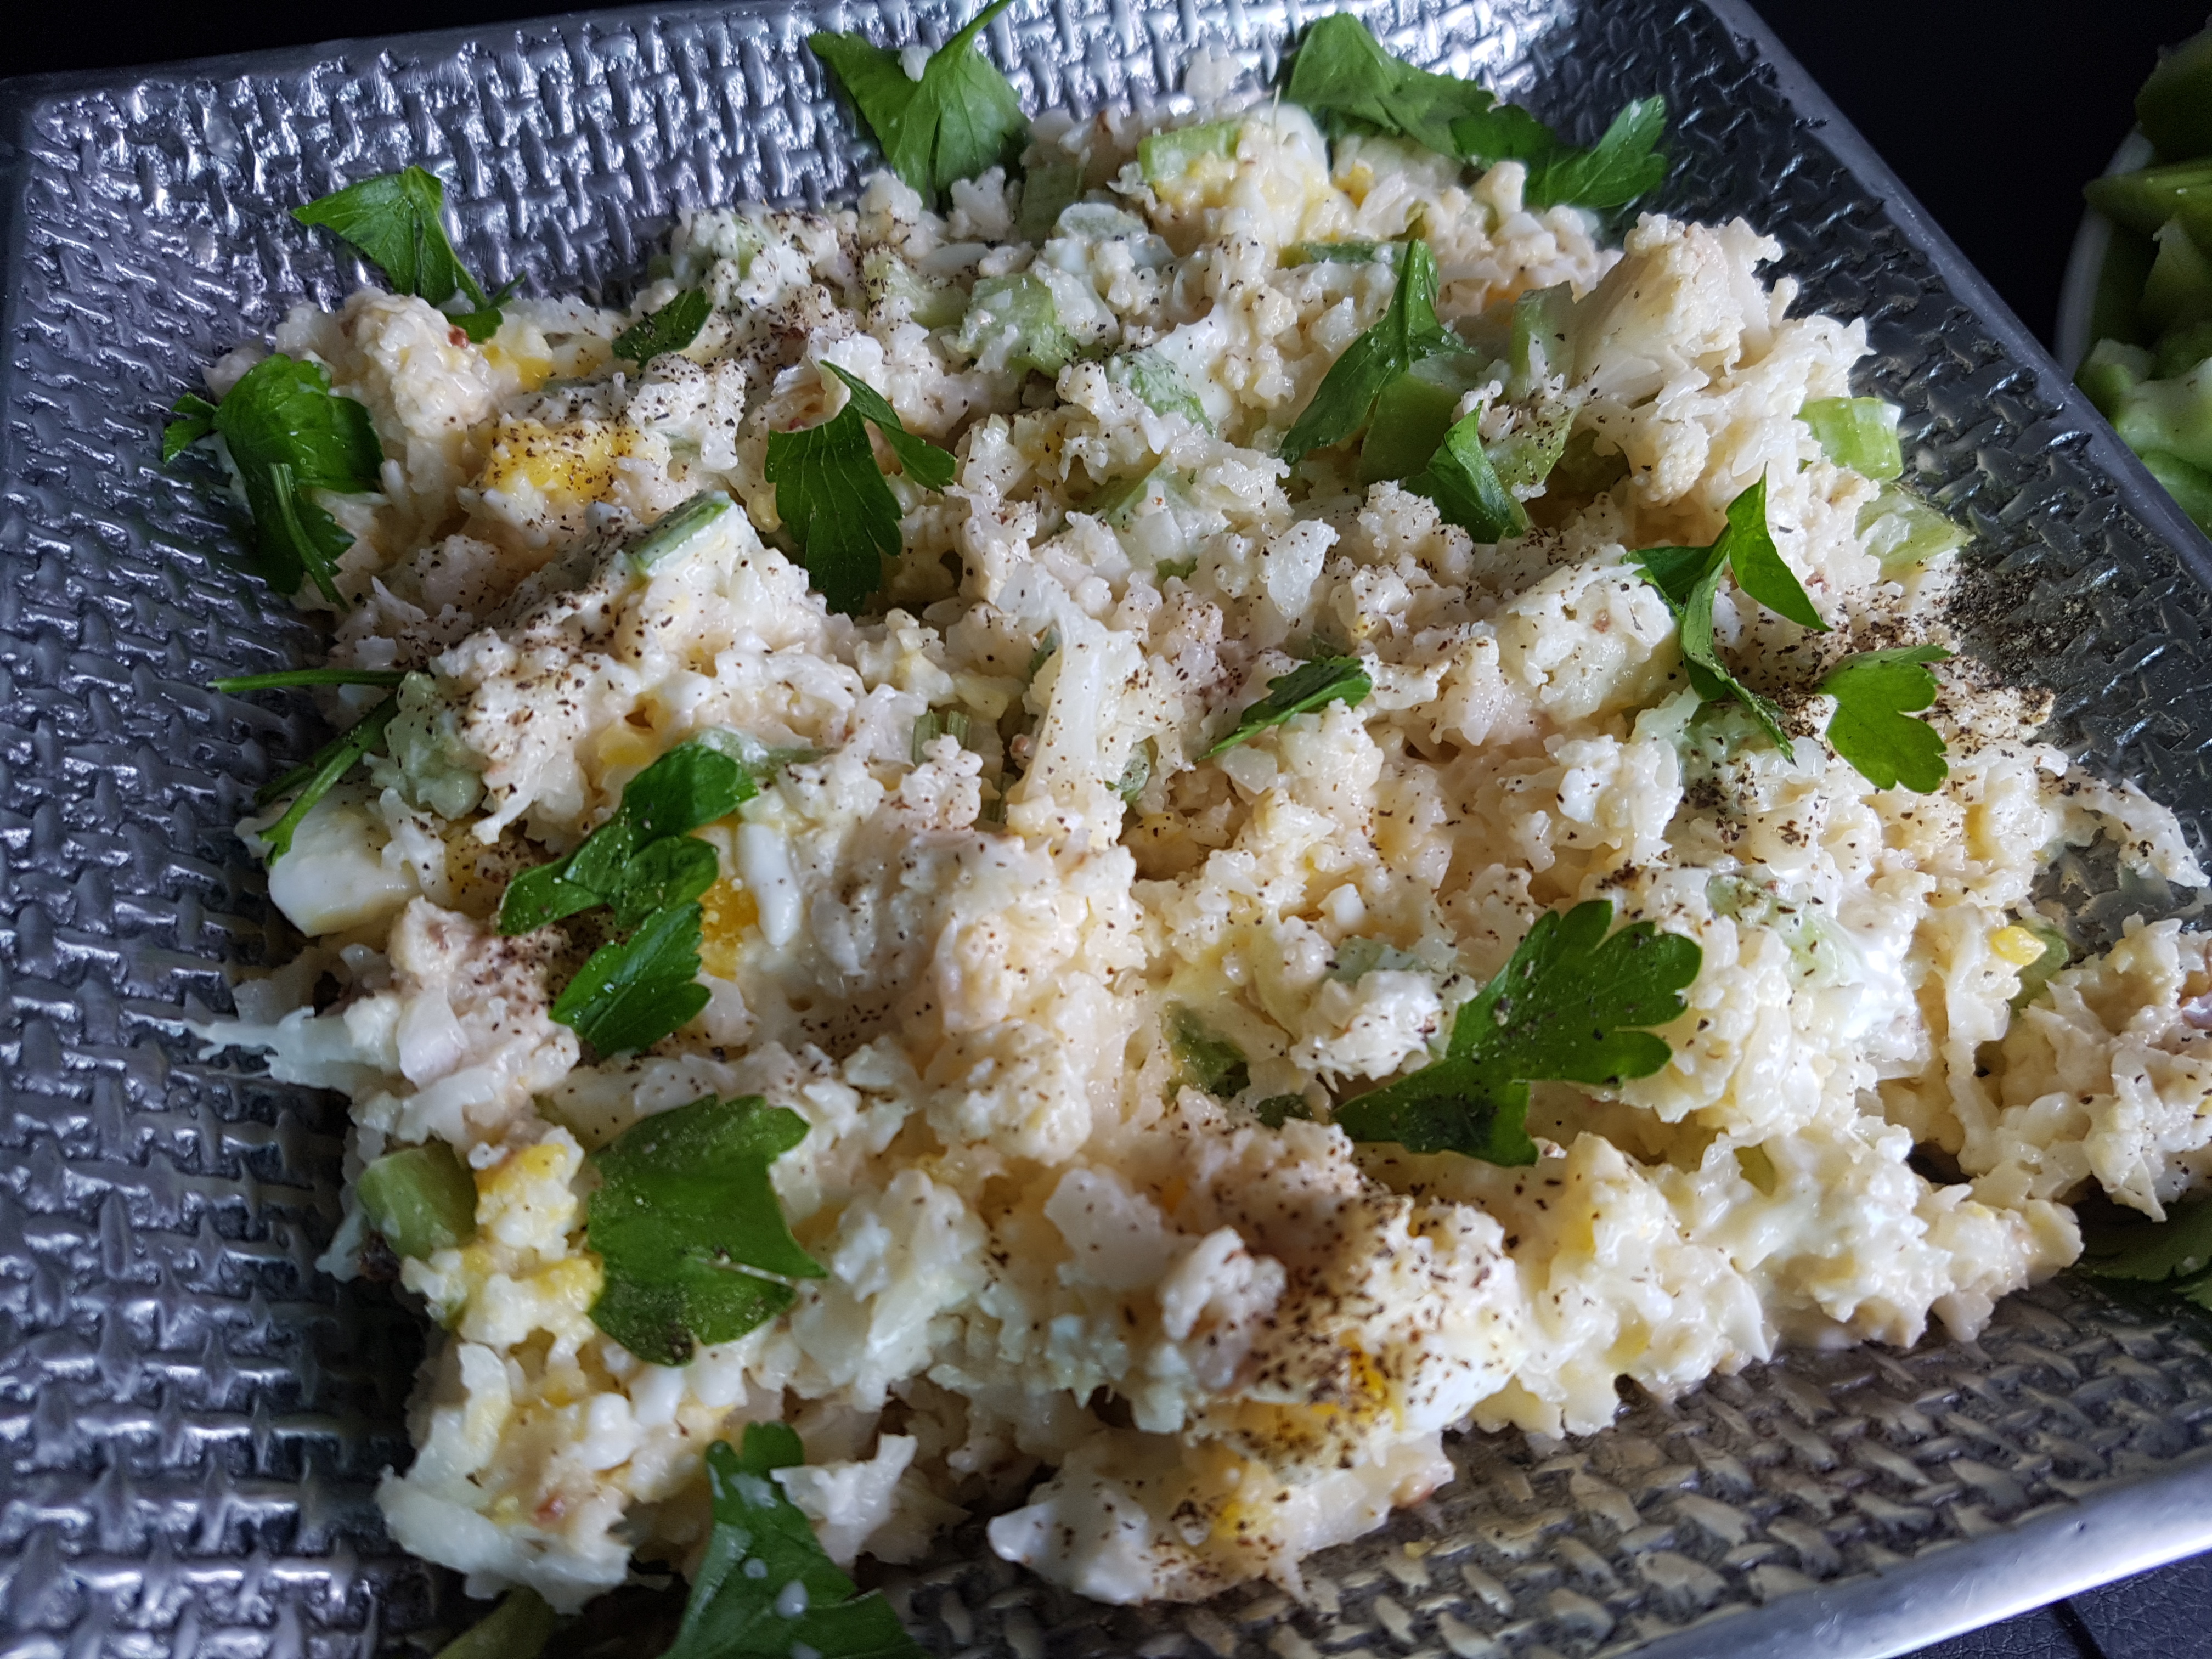
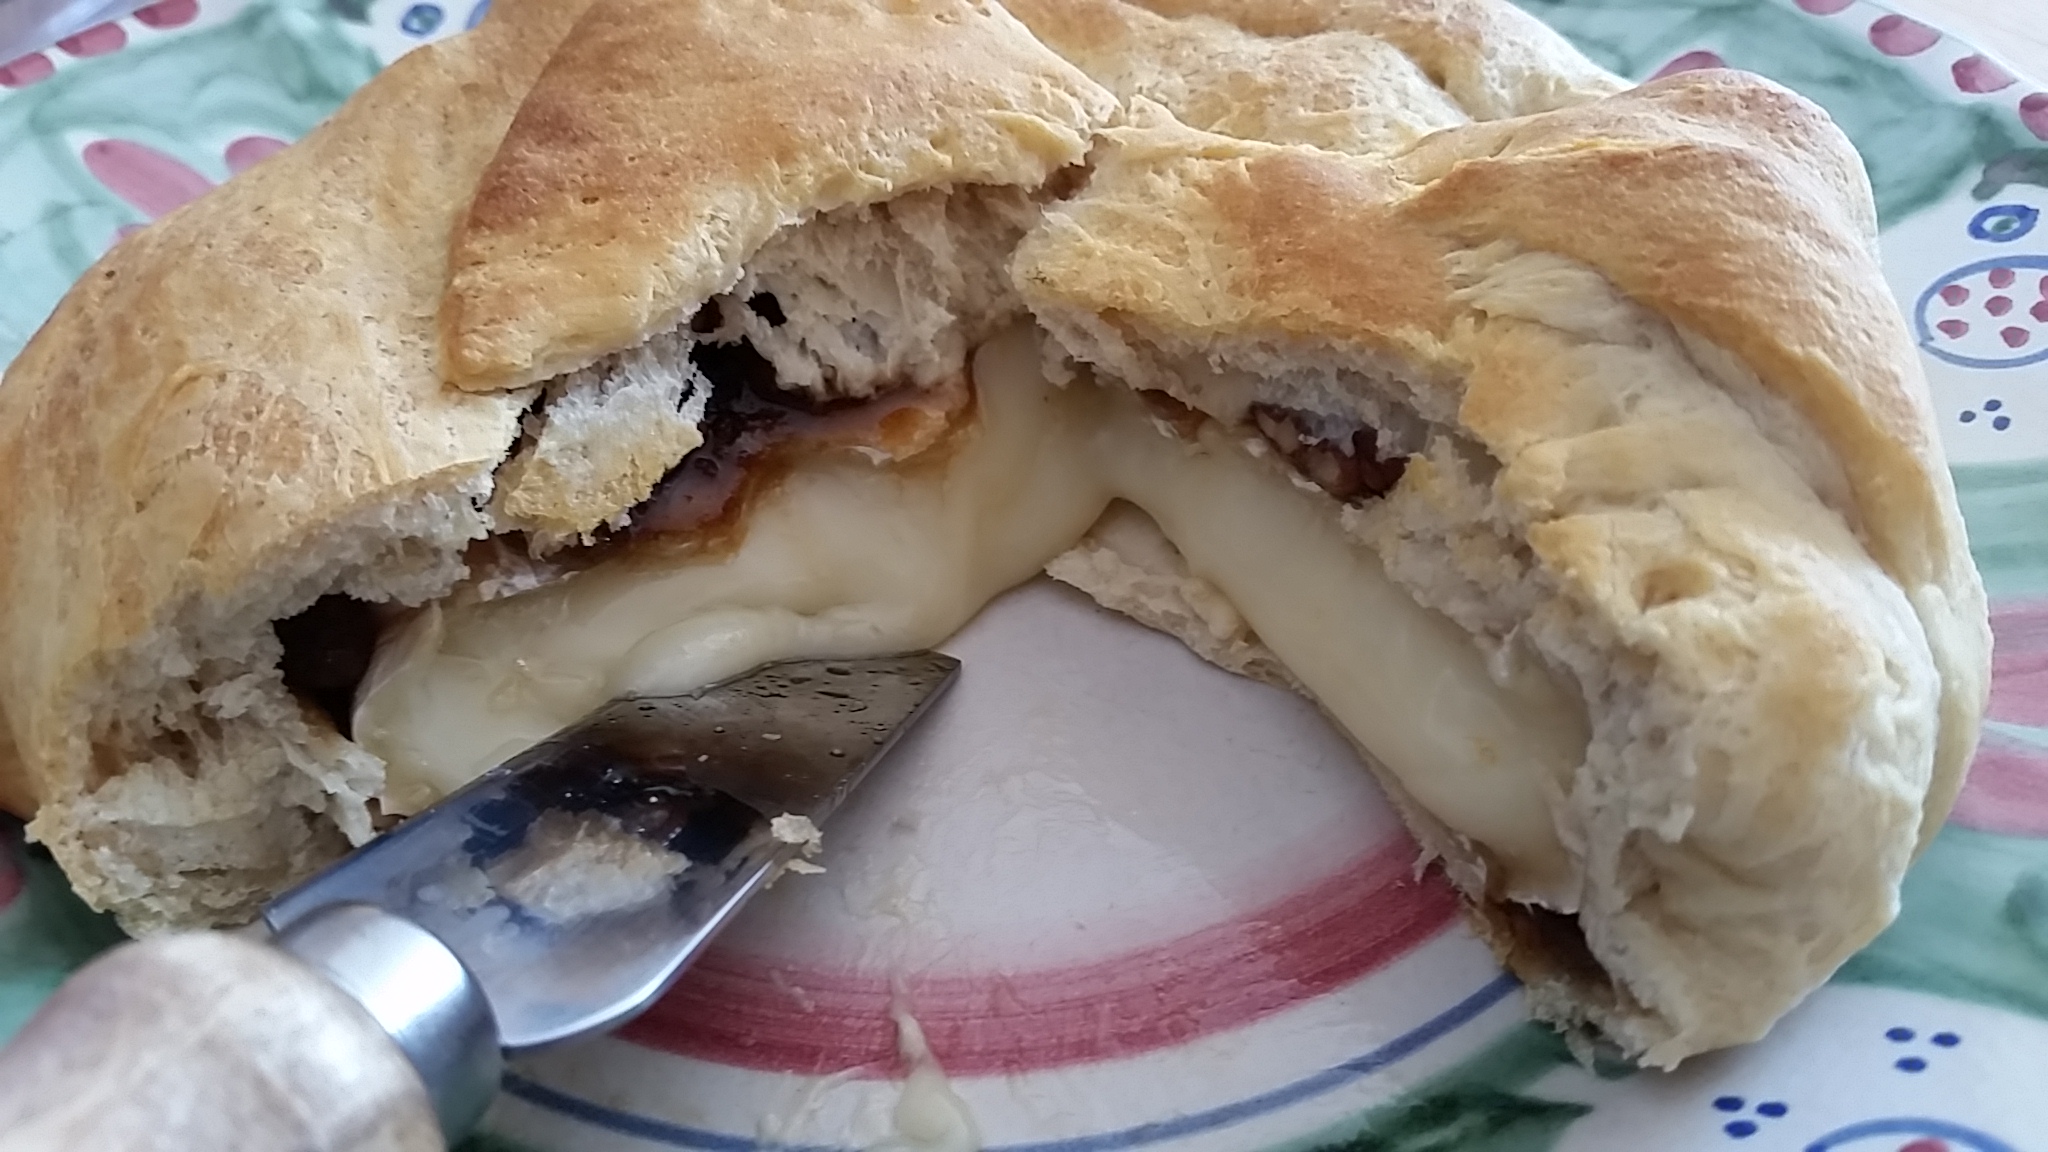
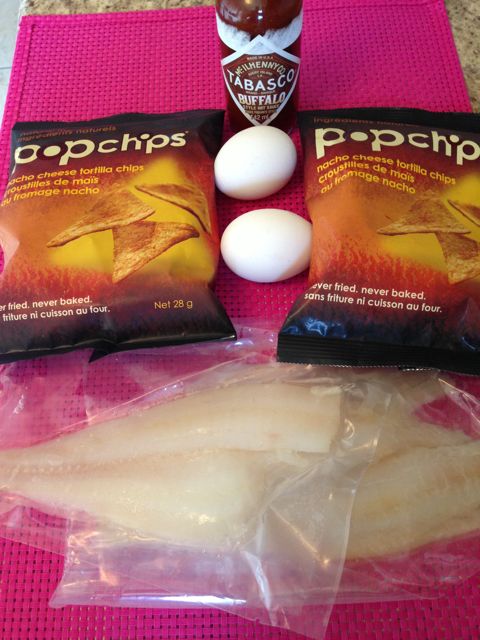
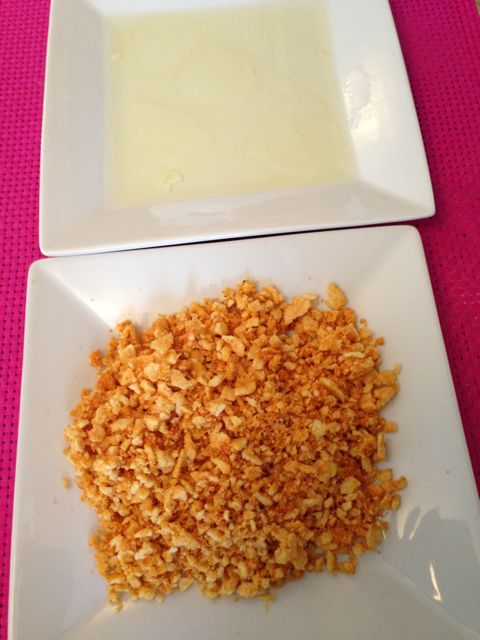
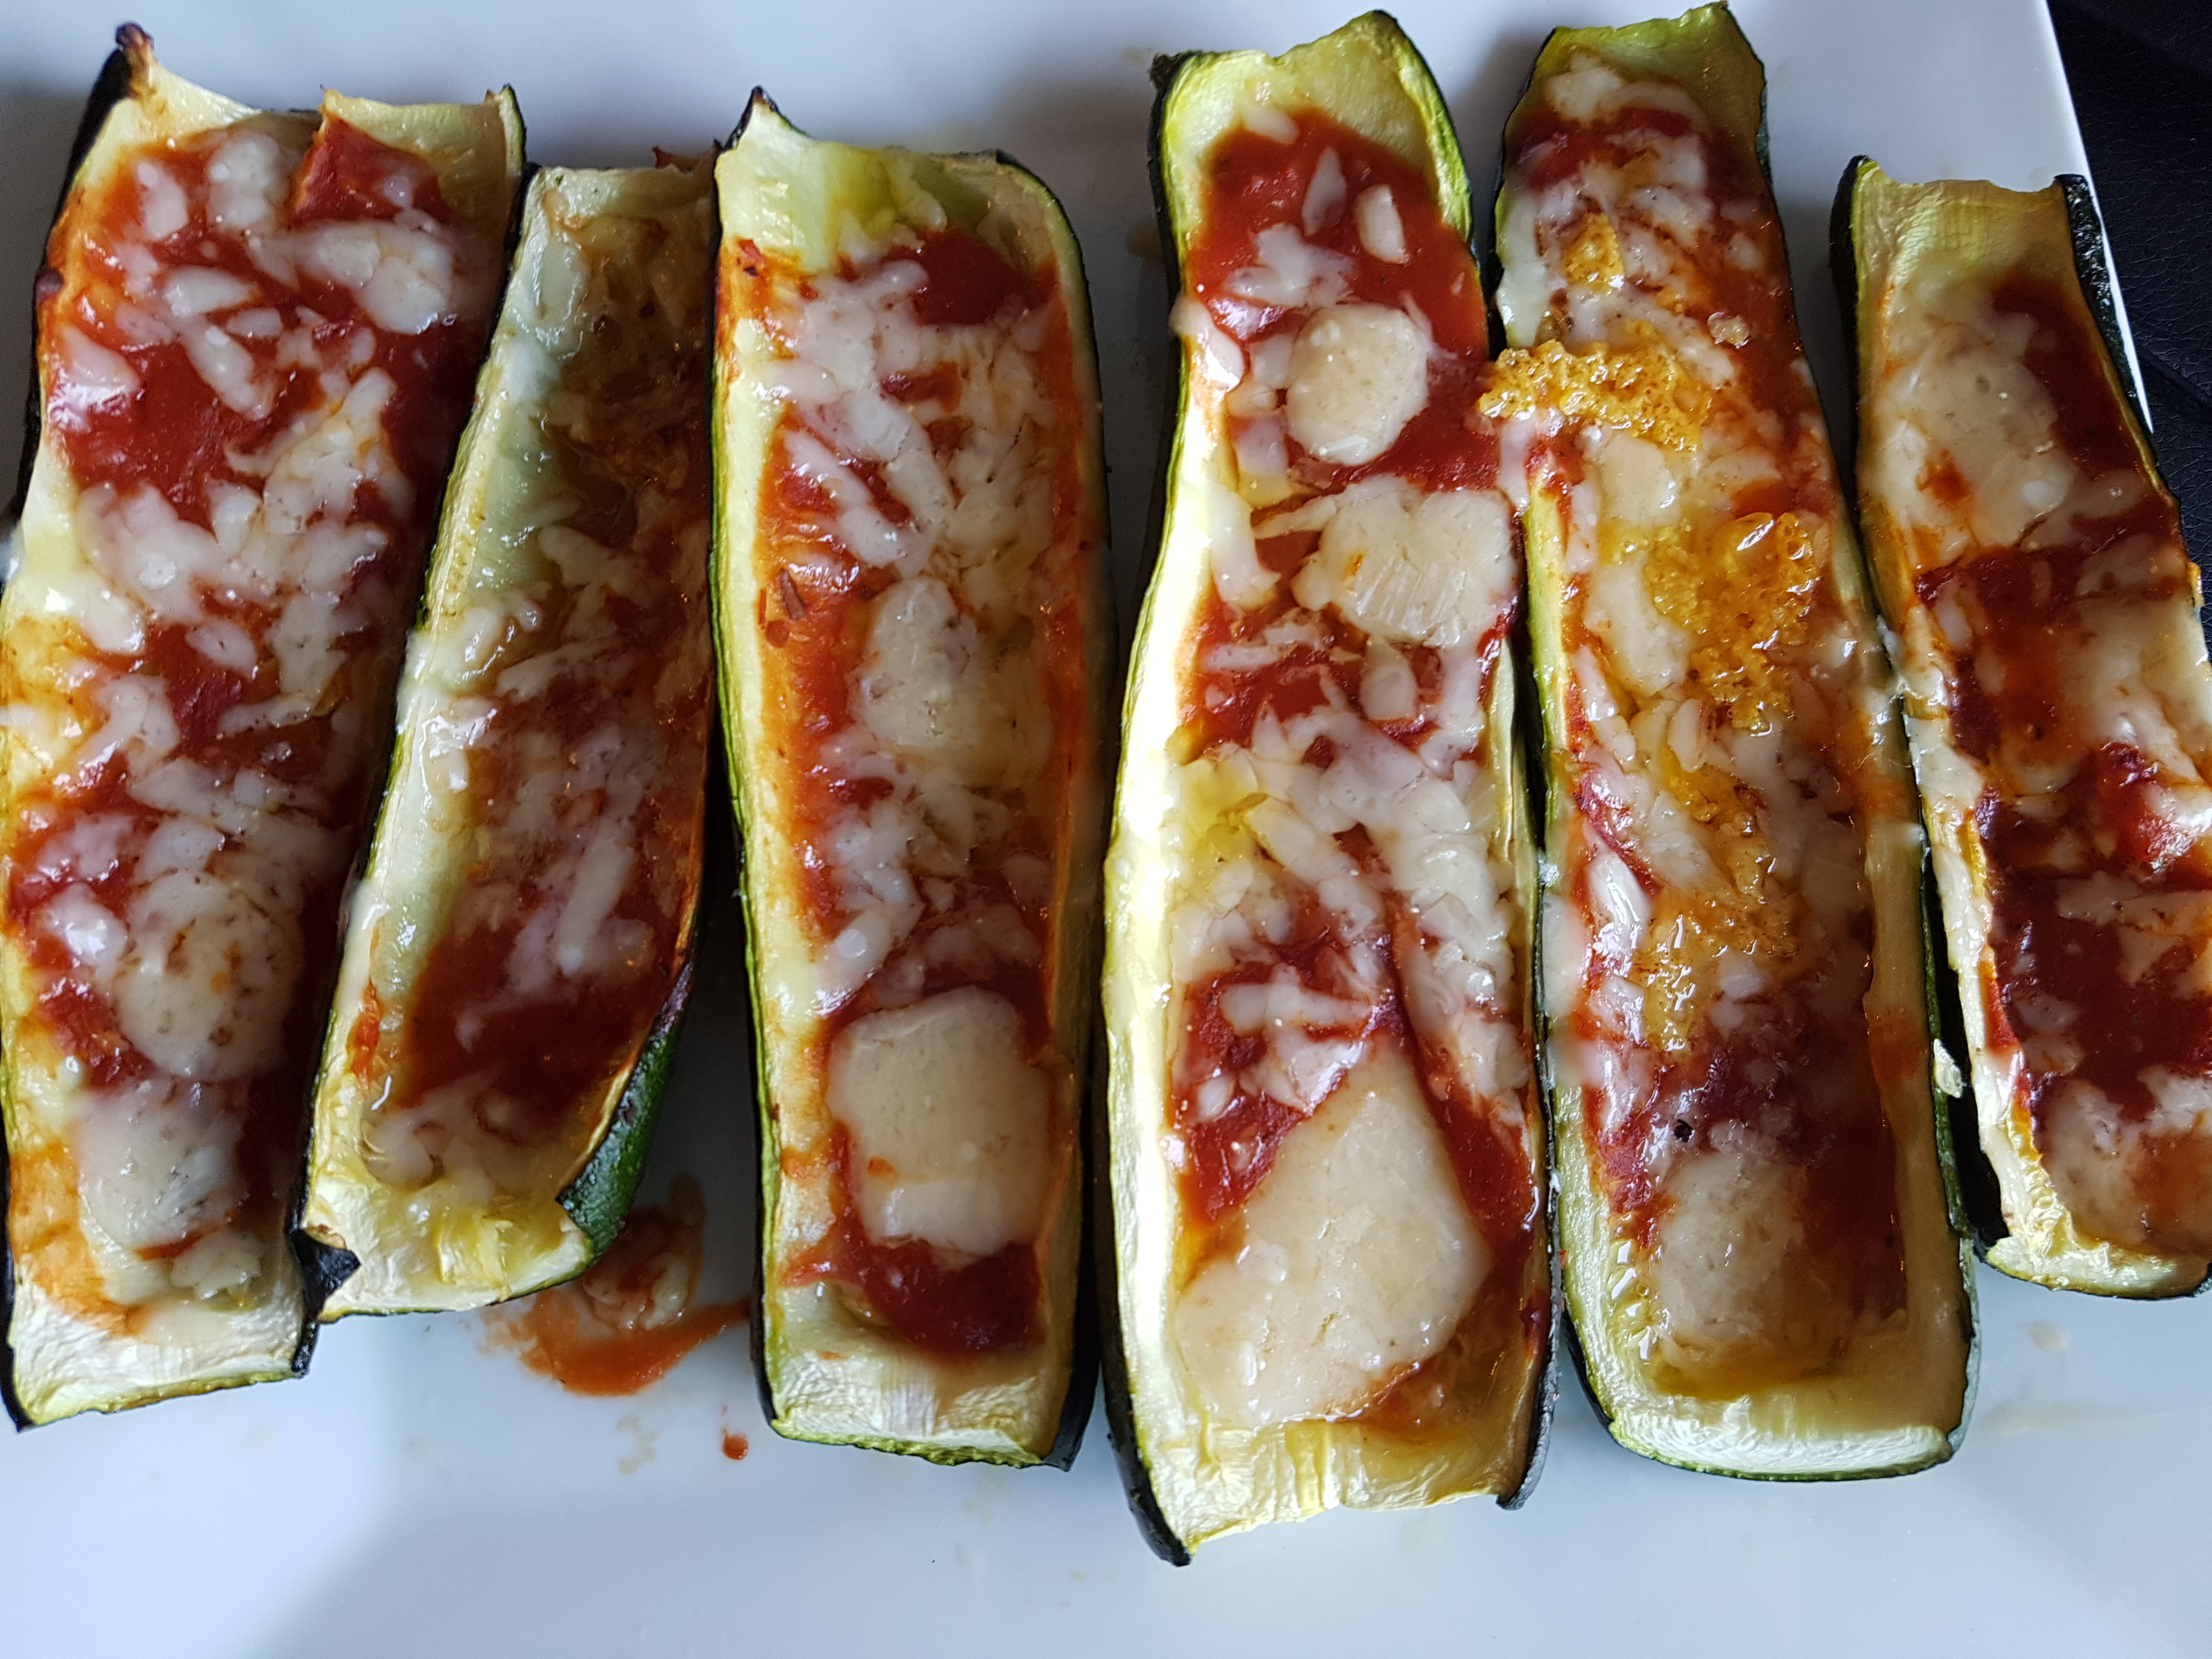
Zucchini Boats ..the original recipe by www.domesticsuperhero.com can be found here). please note: I improvised a lot!

1. Take 4 zucchinis and scoop out the inside to make a “boat”

2. Spread some pizza sauce in the “boat”

3. Sprinkle with shredded cheese and oregano.

Bingo – you have a side dish for the salmon.

FINAL RESULT

dinner - zucchini

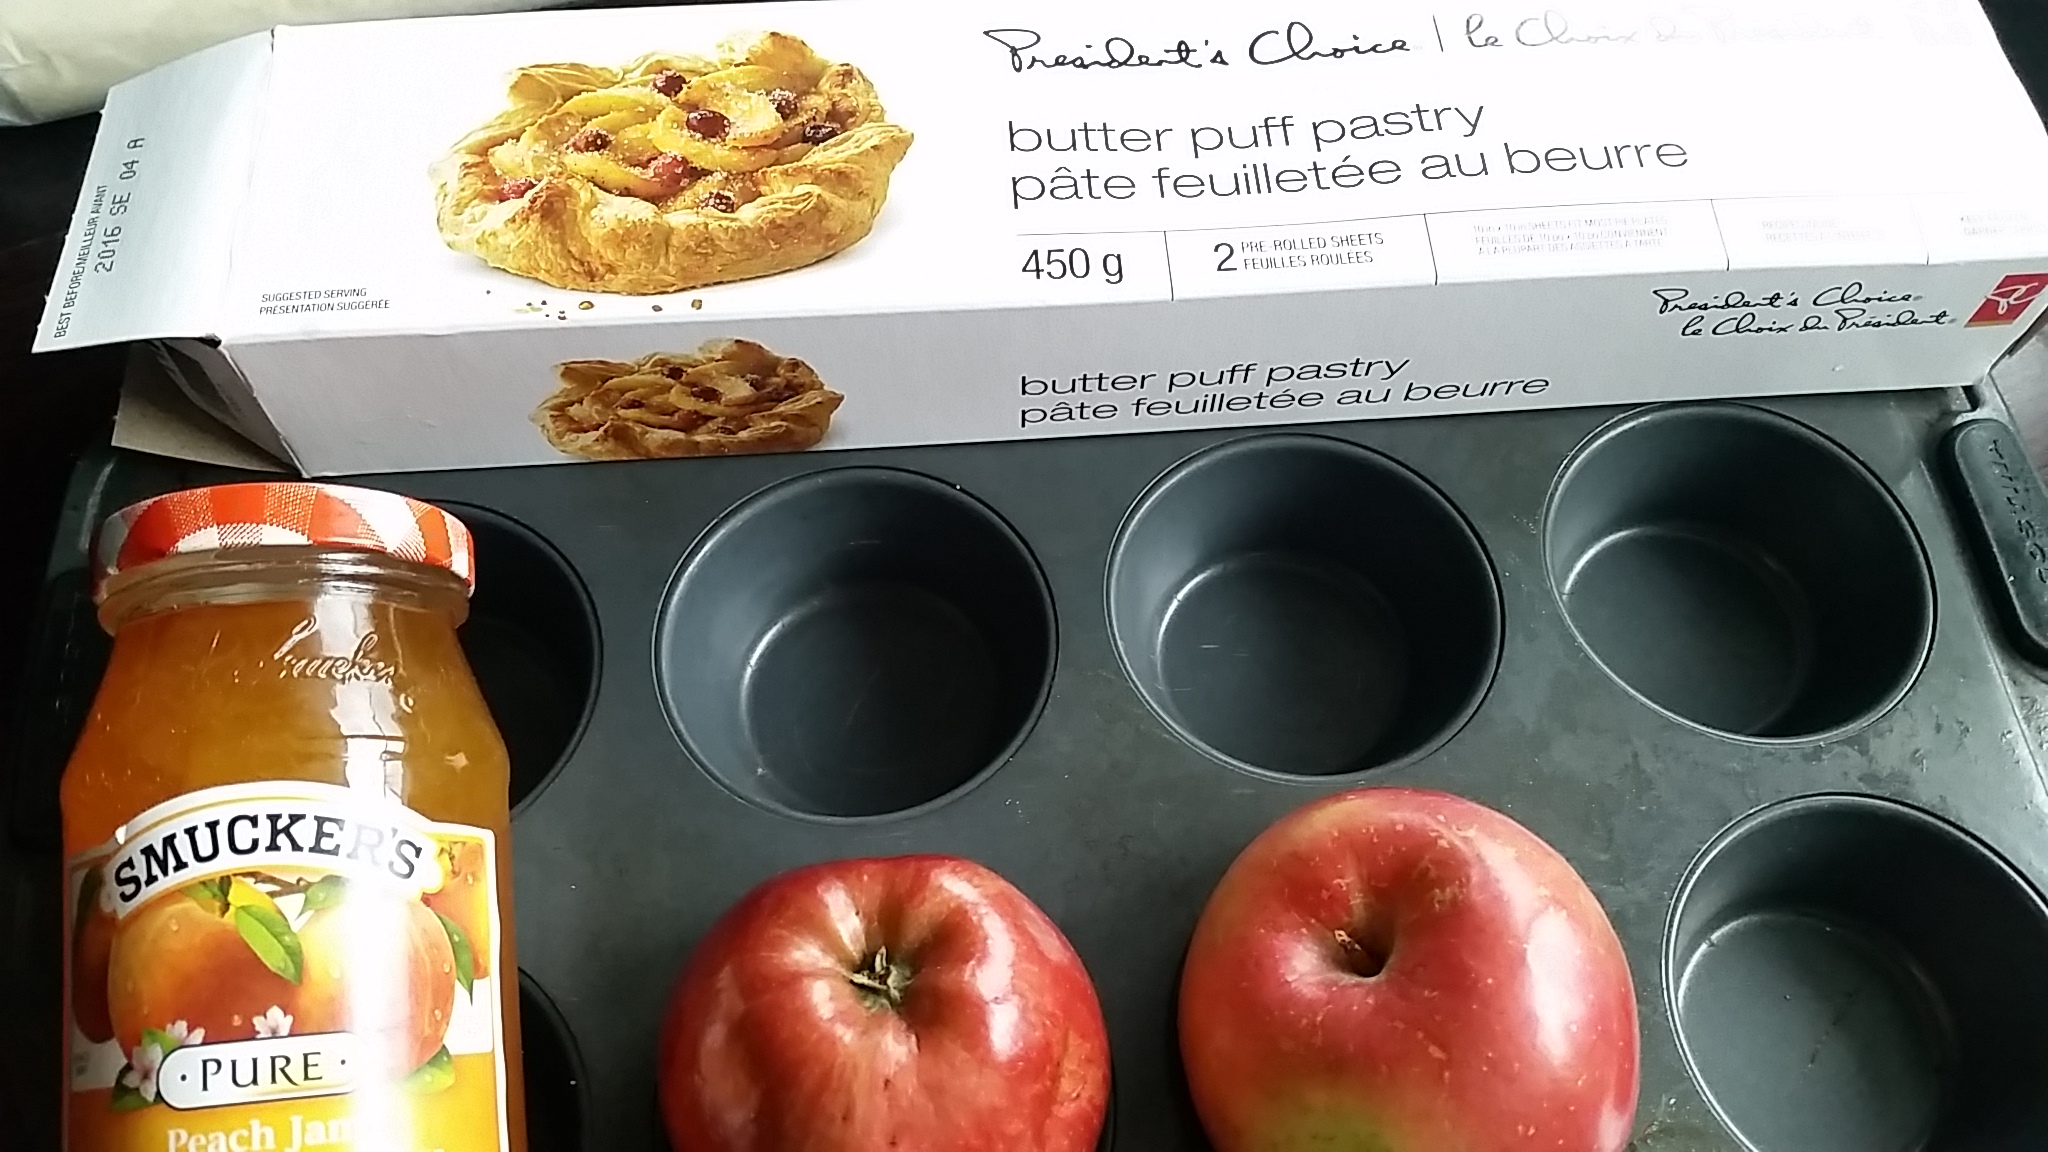
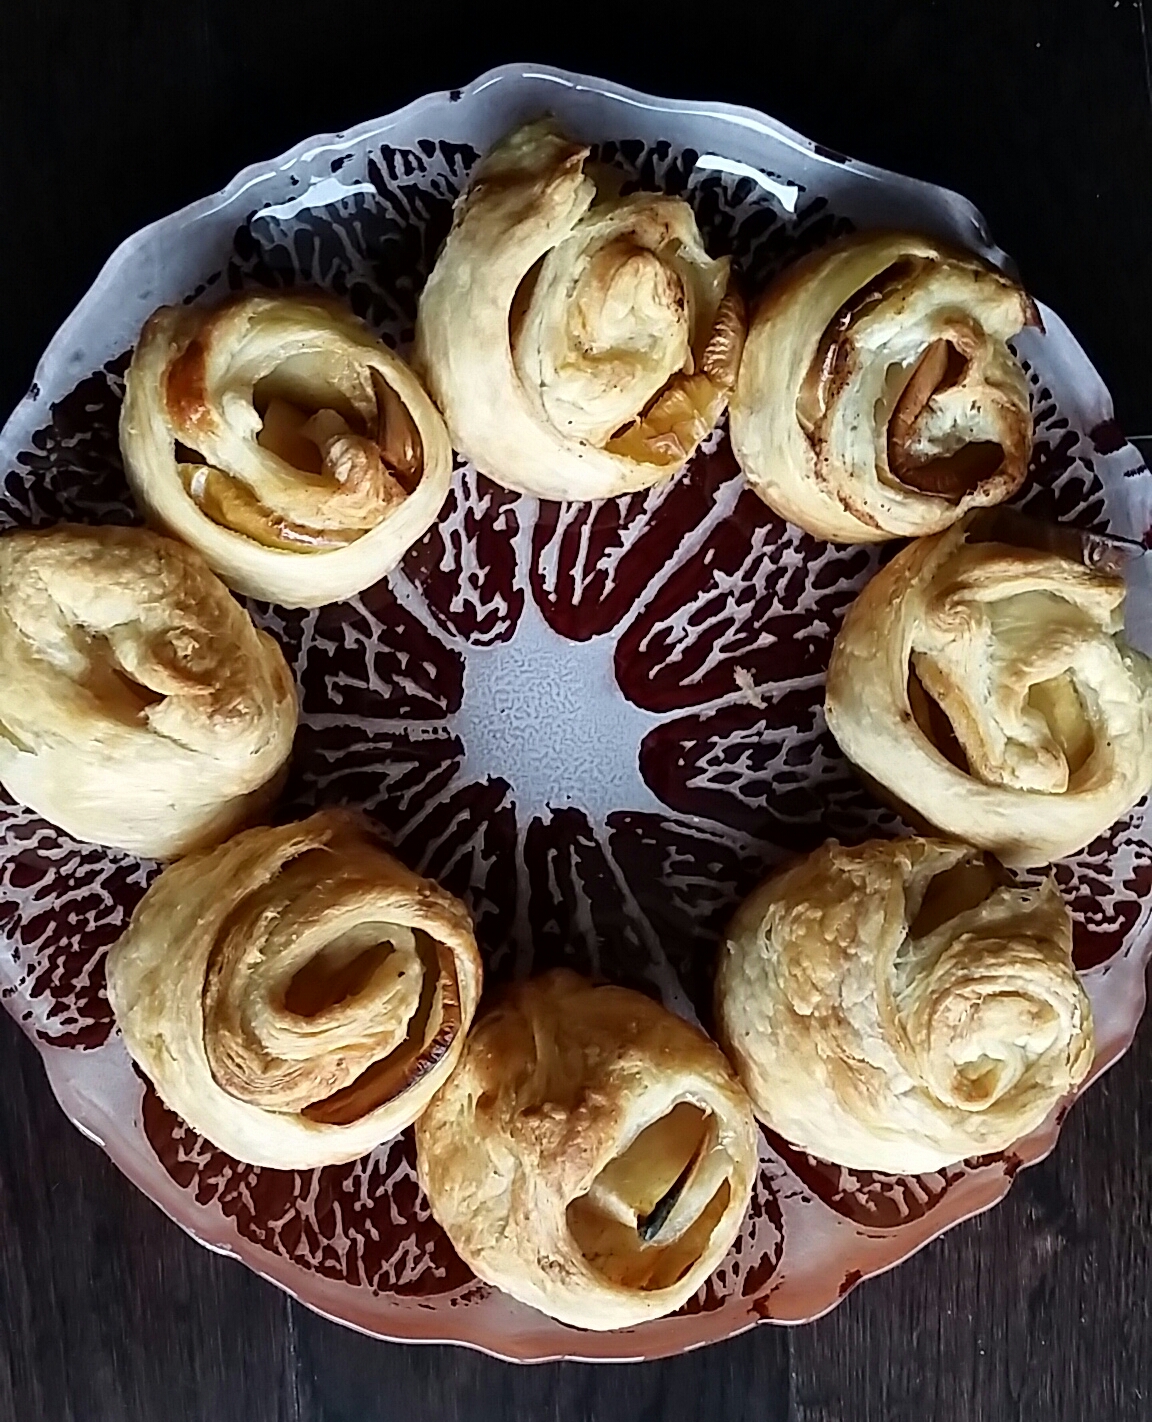
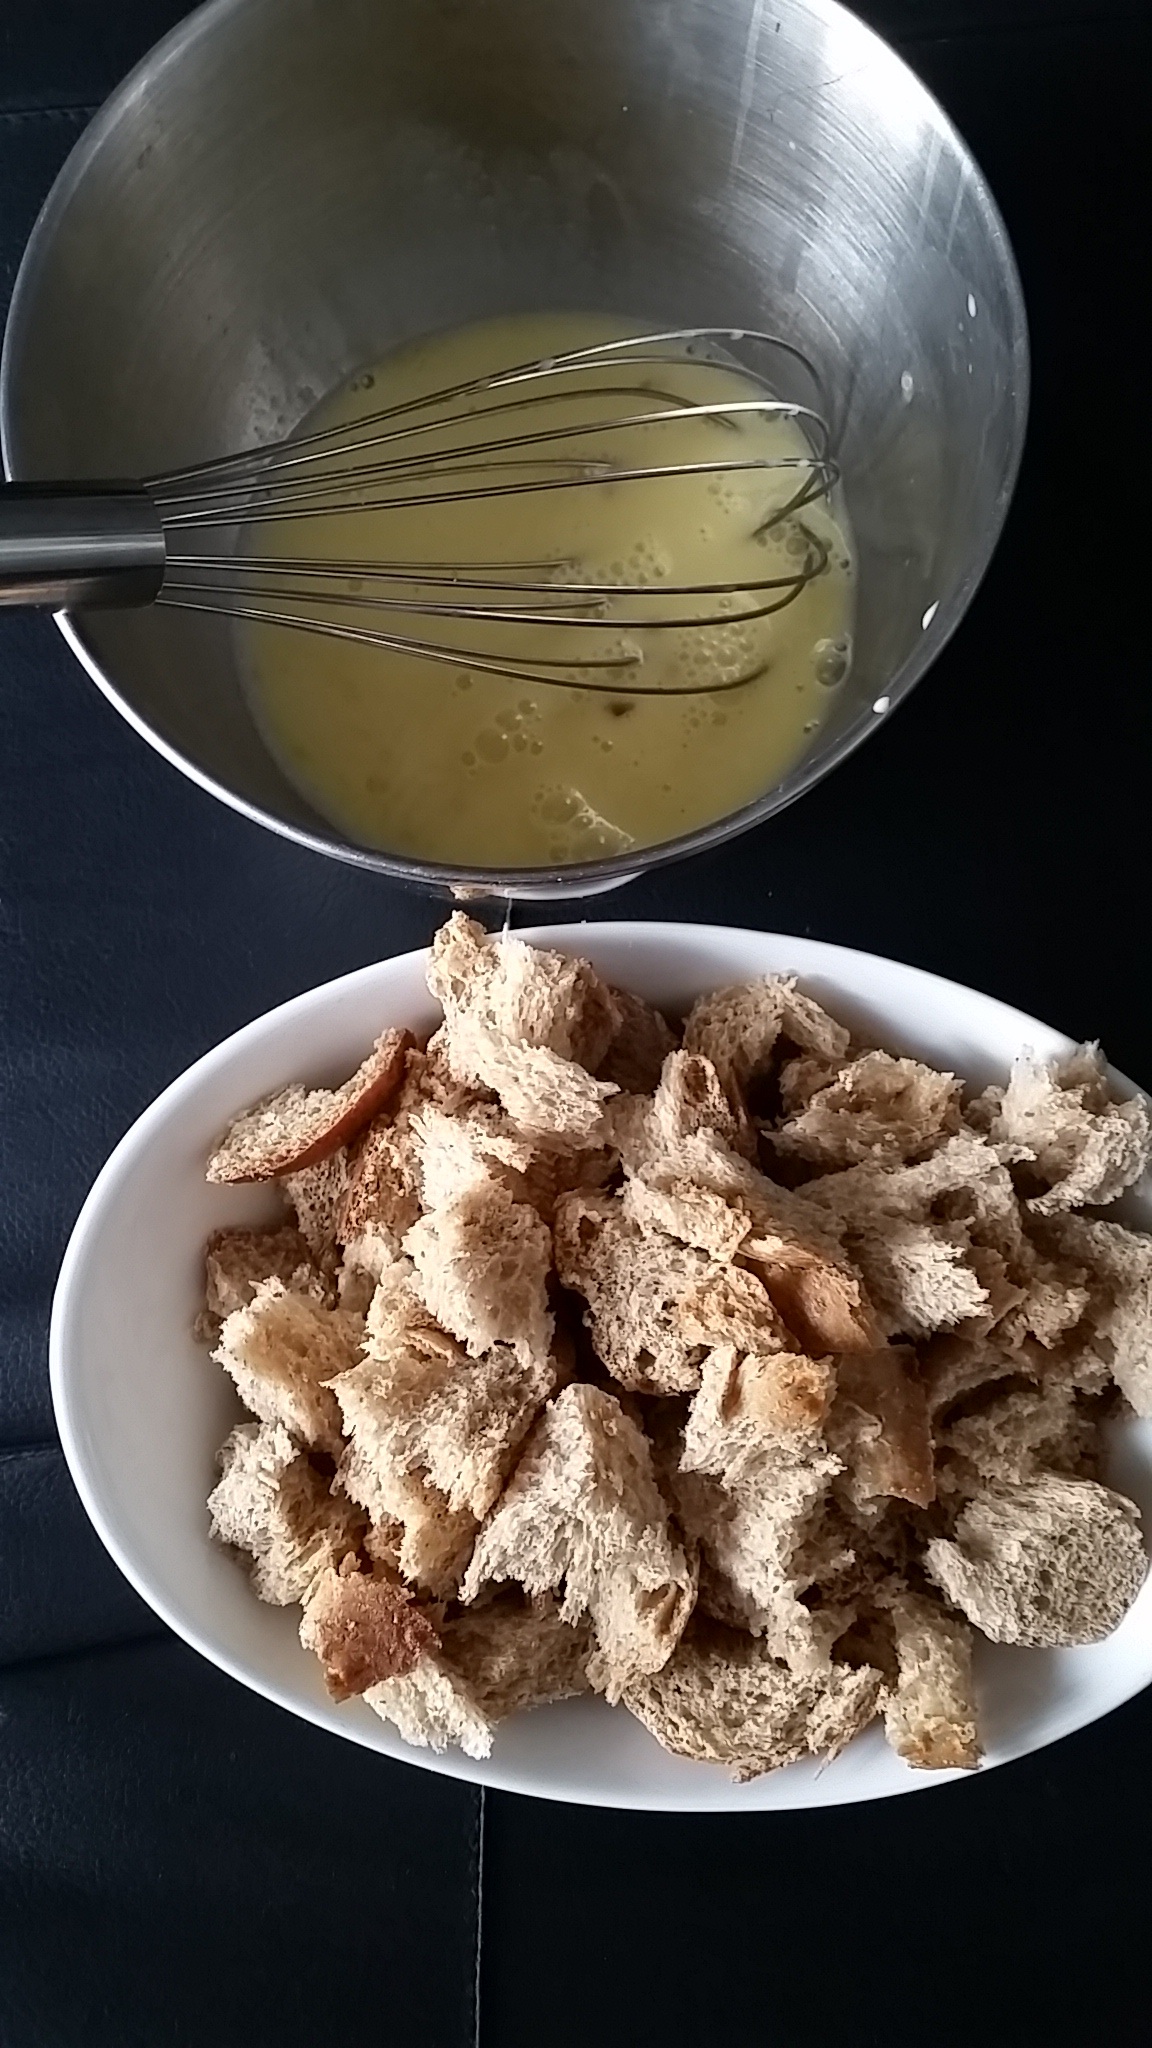
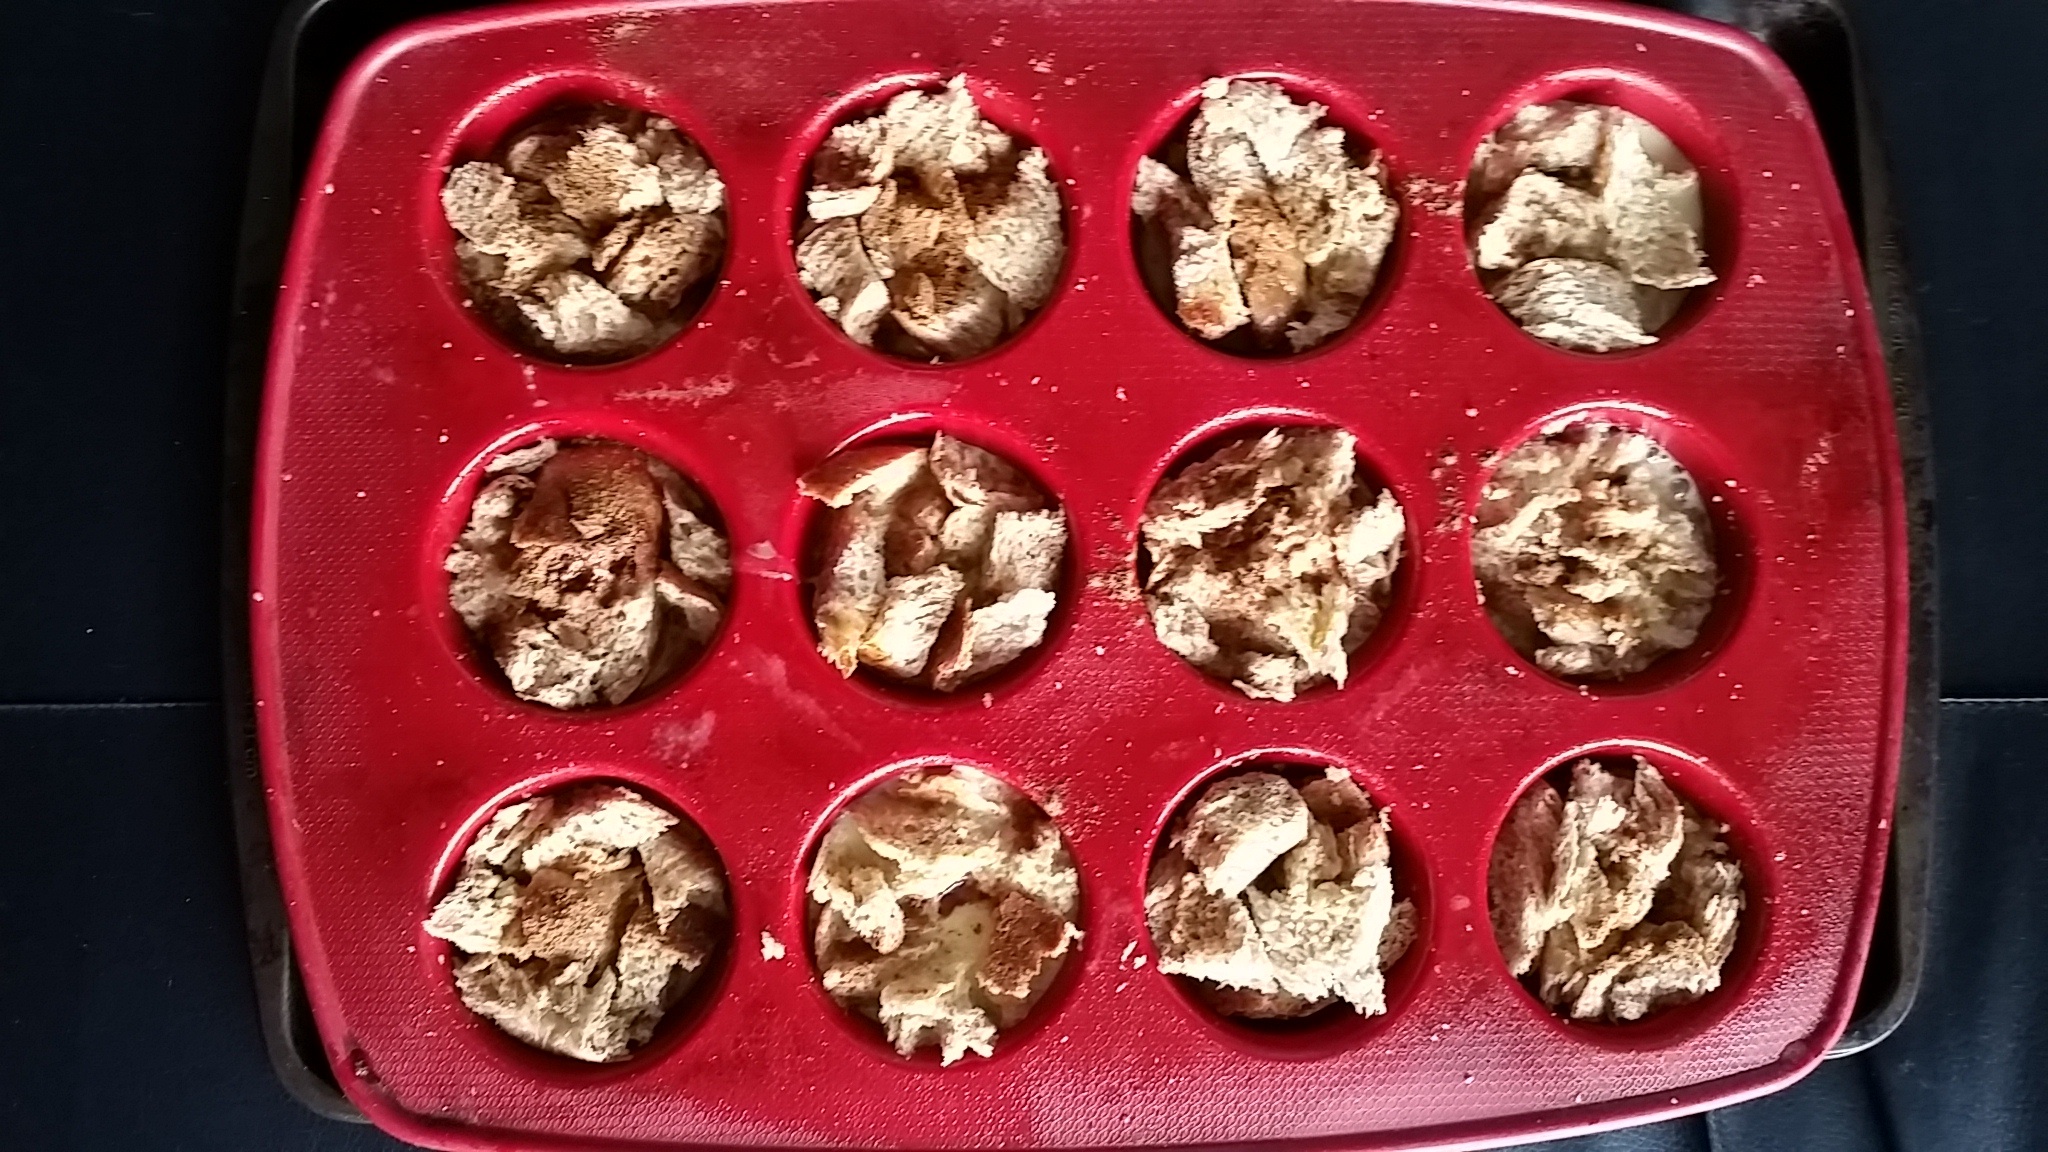
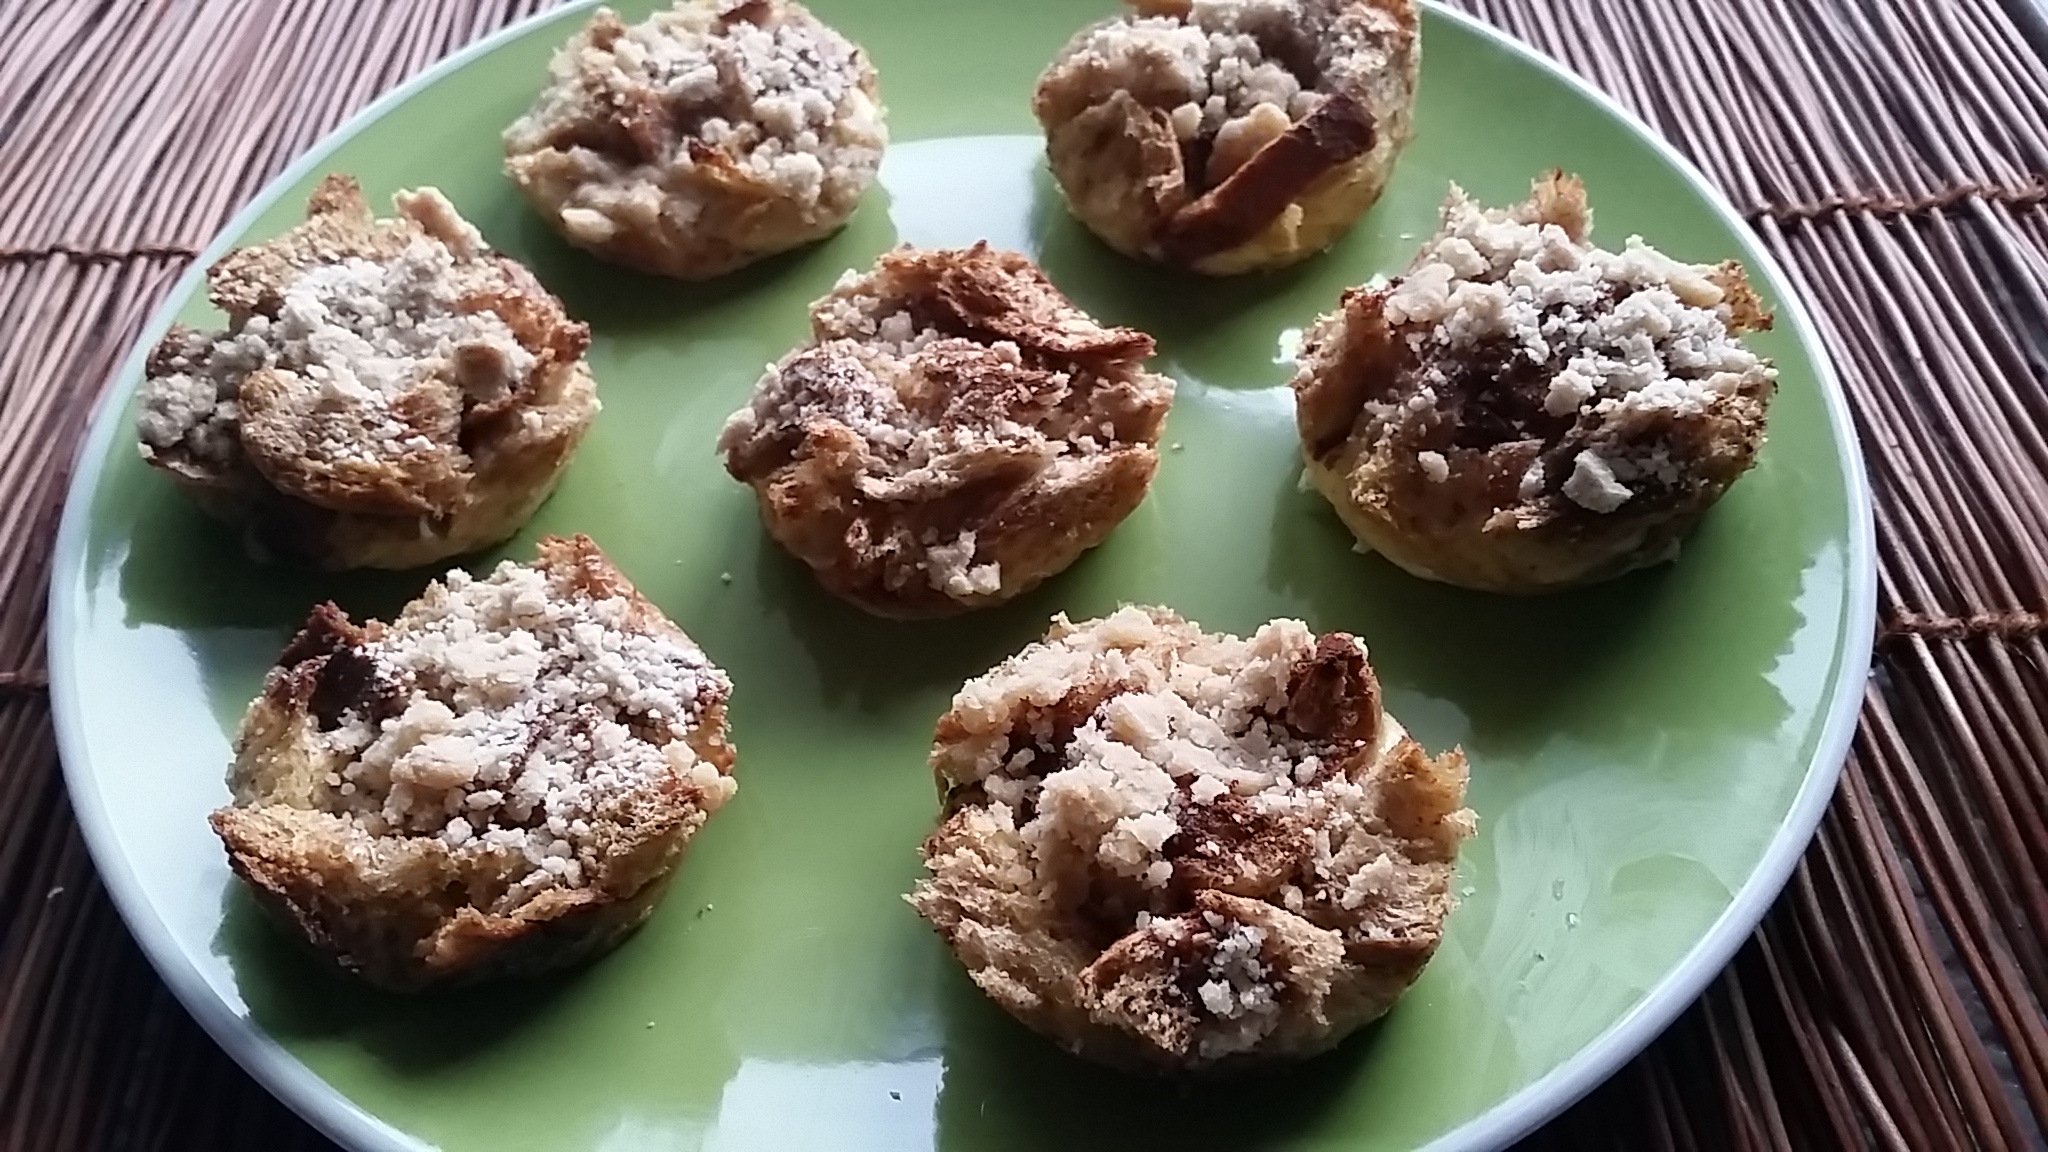
As for dessert….Apple Pie Bites:

It really was a simple recipe (um ….3 ingredients)  but I messed up the directions and it looked NOTHING like it was suppose to. However my guests did not notice as they didn’t see the original recipe.

The original recipe from www.cakescottage.com can be found here . (please click on the link so you can see what it was SUPPOSE to look like)
dinner - dessert
 Happy Cooking!


Share this:
Share this page via Email Share this page via Stumble Upon Share this page via Digg this Share this page via Facebook Share this page via Twitter

, , , , , , , , ,

Jun
06


Remember the roasted cauliflower recipe that I blogged about a few weeks ago? Well, there was no way I was going to eat that whole cauliflower by myself. Therefore I needed to figure out what to do with it.

So I went on Pinterest and found a Cauliflower Potato Salad – without the Potatos!! I thought to myself – PERFECT.

Here’s the recipe: (adapted from www.nelliebellie.com)

Ingredients:

1 roasted cauliflower or steamed cauliflower

2 hard boiled eggs, grated

1/4 cup of mayonnaise

3 ribs of celery, diced

Fresh parsley or dill (fresh herbs will make a huge difference)

cauliflower -ingredients

Directions:

1. Roast or steam the cauliflower. Click here for the Roasted Cauliflower recipe)

2. Grate the cauliflower till you have 2 cups

cauliflower - grated 2 cups

3. Combine the grated cauliflower, grated hard boiled eggs and celery together with the mayo.

4. Add salt and pepper and fresh herbs – to your taste.

FINAL

cauliflower - final

This is a fantastic alternative to potato salad.

It’s also perfect for someone like me who is trying to cut down on carbs.

T’is the season to embrace salads, don’t you think?


Share this:
Share this page via Email Share this page via Stumble Upon Share this page via Digg this Share this page via Facebook Share this page via Twitter

, , , , , , , , , , ,

Dec
15


The recipe for “Baked Apple Roses”  seems to be all over the internet these days.

I mean, the recipe was  e-v-e-r-y-where: on my facebook feed, on Pinterest, etc etc.

“Baked Apple Roses” appealed to me for these three reasons:

1. It didn’t require a lot of ingredients

2. It looked simple to assemble

3. The final results looked gorgeous

Here’s what you need to make this fast and simple dessert.

Ingredients:

-2 apples

-juice from half a lemon

-1 sheet of PC Butter Puff Pastry (my new fave)

-3 tbsp. Peach or Apricot Jam/Preserves mixed with a bit of water

roses - ingredients

Instructions: (taken from Tip Hero)

1. Preheat Oven to 375 degrees

– Put apple slices in microwave safe bowl. Fill bowl with a bit of water and juice from half a lemon. Use enough water to make sure apple slices are covered by water. Microwave for 3 minutes. This will soften the apple slices and make them more pliable for rolling up. (AN IMPORTANT STEP)

– Next. grab a sheet of puff pastry. Flour your board and roll out the puff pastry enough to make 4 strips at 3 inches wide. (I actually took out a measuring tape for this step. Seriously)

– In a bowl mix your favorite fruit preserves with a couple tablespoons of water. Then spoon out the preserves in the center of the strip of puff pastry.

– Next place the apple slices long ways halfway on the strip. Keep adding slices until you reach the end. Then fold the puff pastry over the bottom of the apple slices. (sorry for the crappy photo but it’s winter and I can’t always cook/bake before 4:30 pm. #foodbloggerproblems)

roses - apples on dough

– Roll up the puff pastry and place in a greased muffin tin.

– Bake the apple roses for 35-45 minutes.

– Pull out of oven and let cool for 5 minutes.

FINAL RESULT!!

roses - final

They didn’t come out exactly like the ones I’ve seen on Pinterest or Tip Hero (my new obsession), however I was pretty happy with the results!!

Happy Baking.

Share this:
Share this page via Email Share this page via Stumble Upon Share this page via Digg this Share this page via Facebook Share this page via Twitter

, , , , ,

Oct
13


I think I hosted a brunch three times in six weeks. But thanks to Pinterest I didn’t serve the same thing over and over again. All I did was punch in the word “BRUNCH” and a ton of photos came up which provided just the right amount of inspiration.

The last brunch I made consisted of: Cheesecake Stuffed Strawberries, Crustless Quiche, Baked Cinnamon French Toast, Baked Granola Cups, and a cheese platter. Needless to say, no one left hungry!

brunch - cheeseplatter

Plus, one of my guests brought this DELICIOUS baked brie.

brunch - brie

Here’s one of the recipes that I found on Pinterest and was an instant hit with my guests:

CHEESECAKE STUFFED STRAWBERRIES (original recipe can be found on www.thegirlwhoateeverything.com)

Ingredients:

A container of strawberries

6 tablespoons of soft cream cheese ( a little goes a long way)

1 tsp of vanilla

1 or 2 graham crackers that I smashed into little crumbs!! (again – a little goes a long way)

Instructions:

1. Using a sharp knife, dig a cavity into the top of the strawberry.

2. Using a sharp knife, also take off the bottom of the strawberry so it stands up nice and pretty

3. Mix the cream cheese and the vanilla

4. Carefully spoon the cream cheese mixture into the cavity of the strawberry.

6. Sprinkle the graham cracker on top.

FINAL RESULT

brunch - strawberrycheesecake

Happy Cooking!!


Share this:
Share this page via Email Share this page via Stumble Upon Share this page via Digg this Share this page via Facebook Share this page via Twitter

, , , , , , ,

Jan
13


On Sunday morning, I made a perfectly good lookin’ French Toast to serve to my daughter. However I was still staring at half a loaf of challah and then said to myself: “Vicky…now is the time to try that recipe for Individual French Toast Muffins that you saw on Pinterest 3 years ago!!”.

french toast - rebecca

Here’s the recipe that I used from the website: Two Peas and Their Pod

INGREDIENTS:

1 loaf French bread, cut or torn into 1/2 inch cubes  (I used half a loaf of a whole wheat challah)
2 1/2 cups milk
6 large eggs
1/2 cup granulated sugar
1 tablespoon vanilla extract
1 teaspoon ground cinnamon

For the Cinnamon Streusel Topping:

1/4 cup cold butter
1/4 cup light brown sugar
1/4 cup all-purpose flour
1/8 teaspoon ground cinnamon
Pinch of salt

Butter and Maple Syrup, for serving, optional

DIRECTIONS

1. In a medium bowl, whisk together the milk, eggs, sugar, vanilla, and cinnamon.

french toast - bread and eggs

2. Grease a 12 cup muffin tin. Add a handful of bread cubes to each muffin cup. Carefully pour egg and milk mixture evenly over each muffin tin. You may need to press down on the bread cubes after you pour a little mixture and then pour more. Pour slowly or you will have a mess. Cover the muffins with plastic wrap and refrigerate for 2 hours or up to overnight. (I refrigerated it for 2 hours)

french toast - muffin

3. When ready to bake, preheat the oven to 350 degrees F. To make the cinnamon streusel, in a small bowl, combine butter, brown sugar, flour, cinnamon, and salt. Mix together with your hands, until you have a crumbly mixture. Remove the muffins from the refrigerator and sprinkle the muffins evenly with the streusel topping.

4. Bake for 25 minutes or until tops are golden brown. Let muffins cool for 5 minutes. Remove from pan and serve with butter and maple syrup, if desired.

FINAL PRODUCT

How cute? I can’t wait to serve these at a brunch one day soon. I have a feeling they will be a hit!

french toast - final2

Happy Brunching!!


Share this:
Share this page via Email Share this page via Stumble Upon Share this page via Digg this Share this page via Facebook Share this page via Twitter

, , , , , , , ,

Jul
04


Sometimes I’ll have a salad or a great kale stir fry and even though I’m full…I will be craving something “extra”. Do you know what I  mean?

Here’s my list of how I satisfy those cravings:

-grab a bowl of cereal (I generally have 6 boxes in my kitchen even though I live in an apartment with my daughter part time). These days Multi-Grain Cheerios + Ancient Grains with 5 Whole Grains has my attention seeing as there’s the bonus of ancient grains (Kamut, Spelt and Wheat).


7223030_GM_Cheerios

-grab a packet of seaweed

-grab a frozen choc chip cookie from my freezer

-find a piece of chocolate and dip it into peanut butter

However the other day, I was happily clicking my way thru Pinterest and discovered a recipe with Cheerios that only requires 4 ingredients to make. I love these types of recipes …especially in the summer when I rarely turn on the oven.

I grabbed the Cheerios and within no time at all – I had a sweet, crunchy snack to add to my list when Im craving something “extra”.

RECIPE FOR 4 INGREDIENT  CHEERIO SNACK BARS (taken from My Little Celebration)

INGREDIENTS

2-3 cups of Cheerios….try using the new Multi-Grain Cheerios + Ancient Grains

1/4 cup peanut butter (I used Kraft Natural..Crunchy)

1/4 cup sugar (Im going to try and reduce this next time)

1/4 cup honey (I used agave)

DIRECTIONS

1. In a small saucepan, melt the sugar and the honey – over medium heat.

2. Remove from heat and add the peanut butter and continue to stir

3. Add the cheerios

4. I had these cute little pans to put it in….but you could put it in a small loaf pan, a small dish…anything really.

pan

5. Pop it into the fridge for an hour and then cut up into squares!

final

I have no doubt that I can add these snacks into my freezer so that they are handy!!

Before you start making these amazing snacks, I’d love to talk more about Ancient Grains. I’d love to know….

A) How do you incorporate ancient grains into your lifestyle? (cereal, in your bread, muffins, etc)

B)  What’s your favourite ancient grain? (spelt, whole wheat, kamut,)

Look forward to hearing from you….

PS This is a sponsored post, however all opinions are my own.

Share this:
Share this page via Email Share this page via Stumble Upon Share this page via Digg this Share this page via Facebook Share this page via Twitter

, , , , , , , , , ,

Sep
03


I’m always looking for new fish recipes, seeing as I haven’t had any meat in my kitchen for the last two decades!!

Lately I’ve been using Panko Crumbs but I was getting bored of using them so I went over to Pinterest to get some inspiration. (which I’ve been doing a lot of lately).

I found a Popchips Recipe Board and saw that one recipe featured  Popchips crusted baked buffalo chicken tenders! I said to myself: “hmm..bet I could recreate this with fish”. So I did. Bye Bye Panko Crumbs. Hello Popchips!!

Here’s what you need:

pop chips - ingredients


INGREDIENTS

2 pieces of sole, thawed

2 egg whites

2 small bags of Popchips (I used the nacho cheese flavour)

a few dashes of Tobasco Buffalo  Sauce (optional)

DIRECTIONS:

1. In a food processor, pulverize the Popchips. Add a few dashes of Tobasco Buffalo Sauce for additional flavour (optional)

pop chips - cuisinart

2. Put out two plates: one for the Popchips. One for the egg whites. Dip the fish into the egg whites and then dip into the crushed Popchips until well coated.

pop chips - two plates

3. In a heated frying pan, add some oil. (I used coconut oil for my first time…yay for coconut oil)

4. Place the fish into the frying pan and cook for a few minutes.

FINAL RESULT

pop chips - final

Hope you get a chance to snack on some Popchips soon or use them in a recipe like I did!! These chips will soon become a favorite. Promise.

Share this:
Share this page via Email Share this page via Stumble Upon Share this page via Digg this Share this page via Facebook Share this page via Twitter

, , , , , , , , ,

Aug
15


Who is MomWhoRuns and What Does She Do? T’is the big question. So here is the answer.

questionmark

Who Is MomWhoRuns?

I seriously should have called myself “MomWhoEats” but years ago when I first started blogging with Urbanmoms, I was a mommy blogger. I then noticed how much I loved sharing recipes, reviewing restaurants and have slowly morphed into a food blogger.  I still write about other topics…as long as I think it’s of interest to my dear readers (yes..thats you)

I have truly embraced the journey of blogging. Soon it will be 4 years since I first started blogging and I’m seriously hoping to launch a new “look”. Stay tuned. It’s about time!

What Do I Do? 

For many years I was a food sales rep. Then I saw a niche market to tweet for restaurants that didn’t have time to tweet nor did they have the skills. It was a tough sell many years ago, but these days everyone knows that they need to be using Social Media.   My services have expanded to Facebook, Pinterest, Instagram as well as blogger outreach. I even have two clients in Ottawa. (which I think is pretty cool). I call myself a Social Media Consultant (not an expert).

Oh yeah – I’ve also given dozens of twitter lessons over the years for those who want to handle their own accounts. It’s all good. I can’t complain.

One day there will be a formal website called Hire Me To Tweet!! One day….

One can often find me, tweeting from a coffee shop. If you see me and my MacBook…please say hi.

Hope this blog post gives you a better idea of who I am and what I do.

Cheers,

ps Many thanks to @ledolci who inspired me to write this blog post after a quick chat we had this week.
 

Share this:
Share this page via Email Share this page via Stumble Upon Share this page via Digg this Share this page via Facebook Share this page via Twitter

, , , , , , , , ,

Mar
08


Thanks to Pinterest (and not twitter for a change) I bought a Belkin iPad Kitchen Mount Holder. I saw a picture of it on Pinterest- clicked to find out more and then went on Amazon to buy it.

It was THAT simple.

Here’s what motivated me to buy it:

a) no assembly required. That’s right – no screws, no bolts…Nothing!!

b) this gadget will ensure that my iPad wont get filthy when I cook/bake as it’s suspended in the air and not sitting on the counter.

c) I will now be able read recipes on my iPad while I cook/bake and not have to bring  my MacBook into the kitchen.

d) I now have my playlist right at my fingertips in the kitchen. I believe music and cooking go hand and hand.

Seriously… this was a good investment.

I now have 3 Belkin products…a Belkin cover for my iPhone, a Belkin cover for my iPad and now a Belkin Kitchen Mount for my Ipad. I guess you could say I am brand loyal.

I am happy.

What tech gadget have you bought lately? Do share.


Share this:
Share this page via Email Share this page via Stumble Upon Share this page via Digg this Share this page via Facebook Share this page via Twitter

, , , , ,

Feb
26


I’ve posted a recipe before that was less than 140 characters, but I think that this recipe takes the cake. HA HA.

You know when you want just a “little something” but you don’t want to make an entire cake? Here’s the solution to your problem. Naturally I found this recipe on Pinterest..which is my latest addiction.

Here’s what you need:

Two boxes of Betty Crocker cake mix. Please note, that one of those boxes MUST be Angel Cake.

Here’s the recipe:

1. Mix the two boxes of cake mix into a zip loc bag.

2. Put 3 tablespoons of cake mix into a mug. Add 2 tablespoons of water. Stir.

3. Put the mug into a microwave and cook for 1 minute.

Voila – a perfect size portion of cake. Of course, I added the perfect size scoop of ice cream to make it even better!!

P.S. Store the mixture in an airtight container or just keep it in the zip loc bag for future “treats”.

Seriously…how awesome is this recipe? How awesome is Pinterest?

Disclosure: I am part of the Life Made Delicious Blogger program and I receive special perks as part of my affiliation with this group. The opinions on this blog are my own.

Share this:
Share this page via Email Share this page via Stumble Upon Share this page via Digg this Share this page via Facebook Share this page via Twitter

, , , , ,