Posts Tagged ‘Recipe’

Mar
31


The other day, I was in the mood to do some baking. Therefore I took a look at what was in the pantry and decided that I was going to make Oatmeal Raisin Cookies. Then I sat on the computer and googled “Oatmeal Raisin Cookies”. Naturally a whole bunch of recipes came up but one recipe from Sally’s Baking Addiction caught my attention.

I’ve used recipes from this website before and I really trust Sally’s Baking Addictions’ knowledge and recipes.

She always seems to do something to the recipe that makes the end result “that much better”.

Once again – her recipe for Soft & Chewy Oatmeal Raisin Cookies will now become my “go-to” recipe when I’m craving this cookie.

Recipe: Soft & Chewy Oatmeal Raisin Cookie (from Sally’s Baking Addiction)

Ingredients

1 cup (230g) unsalted butter, softened to room temperature
1 cup (200g) packed light or dark brown sugar
1/4 cup (50g) granulated sugar
2 large eggs 1
1 Tablespoon vanilla extract (yes, Tablespoon!)
1 Tablespoon molasses….(Um I didn’t have this in my pantry and the recipe still came out)
1 and 1/2 cups (190g) all-purpose flour (spoon & leveled)
1 teaspoon baking soda
1 and 1/2 teaspoons ground cinnamon
1/2 teaspoon salt
3 cups (240g) old-fashioned rolled oats
1 cup (140g) raisins
1/2 cup (64g) chopped toasted walnuts (optional)

Directions:

Cream the softened butter and both sugars together on medium speed in your mixer, until smooth. (about 2 minutes).

Add the eggs and mix on high until combined (about 1 minute). Scrape down the sides of the bowl as needed. Add the vanilla and molasses and mix on high until combined. Set aside.

In a separate bowl, toss the flour, baking soda, cinnamon, and salt together. Add to the wet ingredients (this is important that you get this step right) and mix on low until combined.

Beat in the oats, raisins, and walnuts (if using) on low speed. Dough will be thick, yet very sticky. Chill the dough for 30-60 minutes in the refrigerator (do the full hour if you’re afraid that the cookies will spread too much) This is an important step!

Preheat oven to 350°F (177°C). Line two large baking sheets with parchment paper or silicone baking mats. (Always recommended for cookies.) Set aside.

Roll balls of dough (about 1.5 tablespoons of dough per cookie) and place 2 inches apart on the baking sheets. Bake for exactly 10 minutes until very lightly browned on the sides. The center will look very soft and undone but that’s OK.

Remove from the oven and let cool on baking sheet for 5 minutes before transferring to a wire rack to cool completely. The cookies will continue to “set” on the baking sheet during this time.
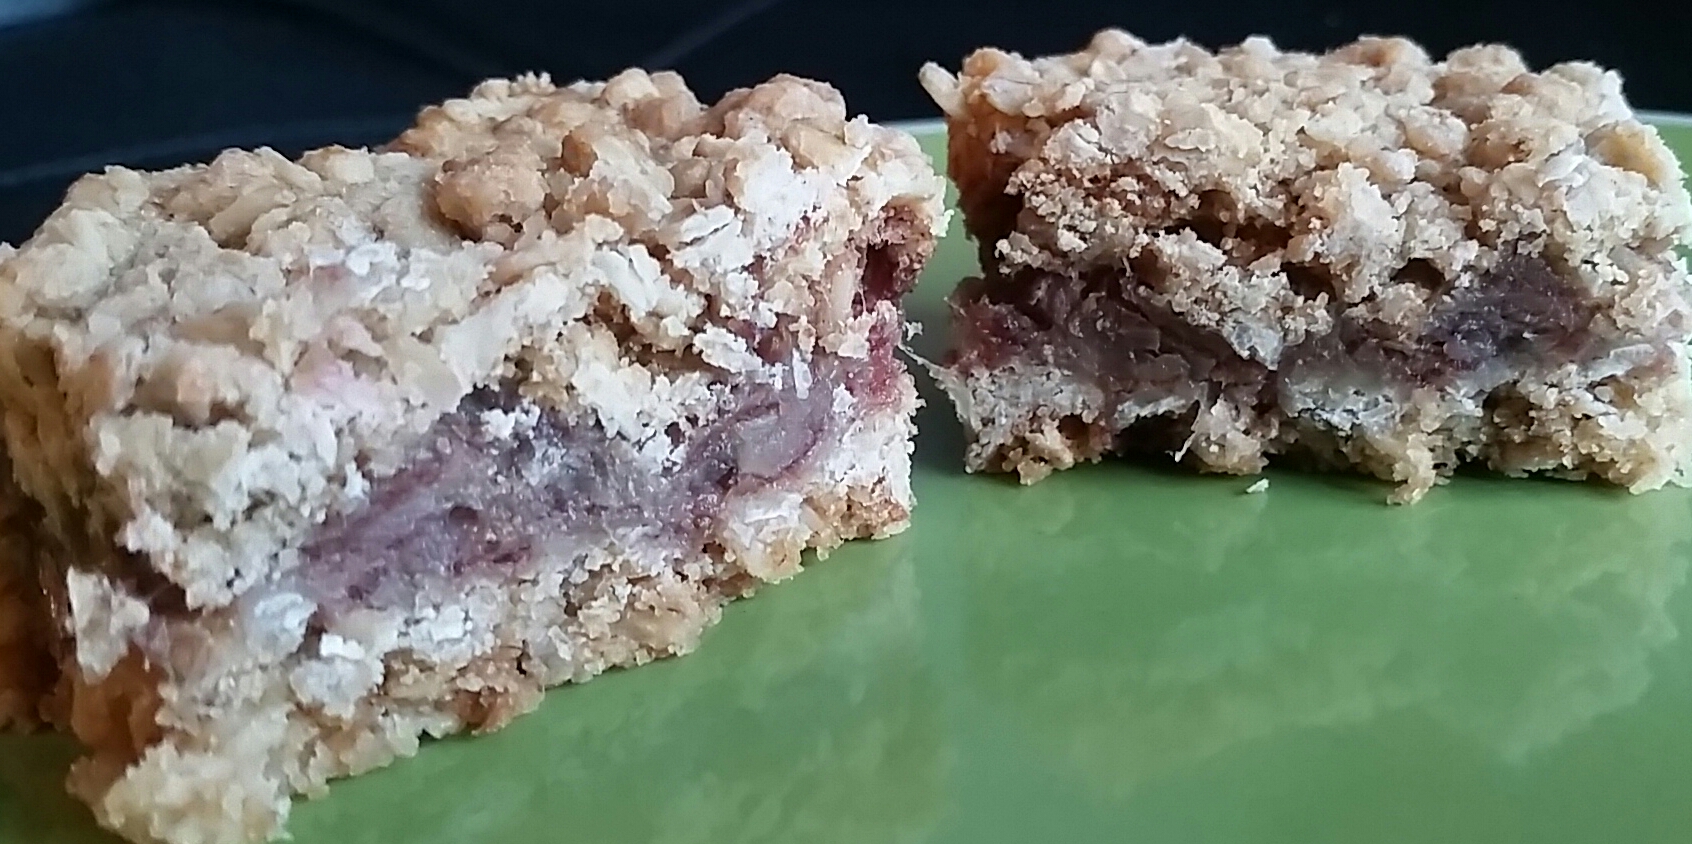
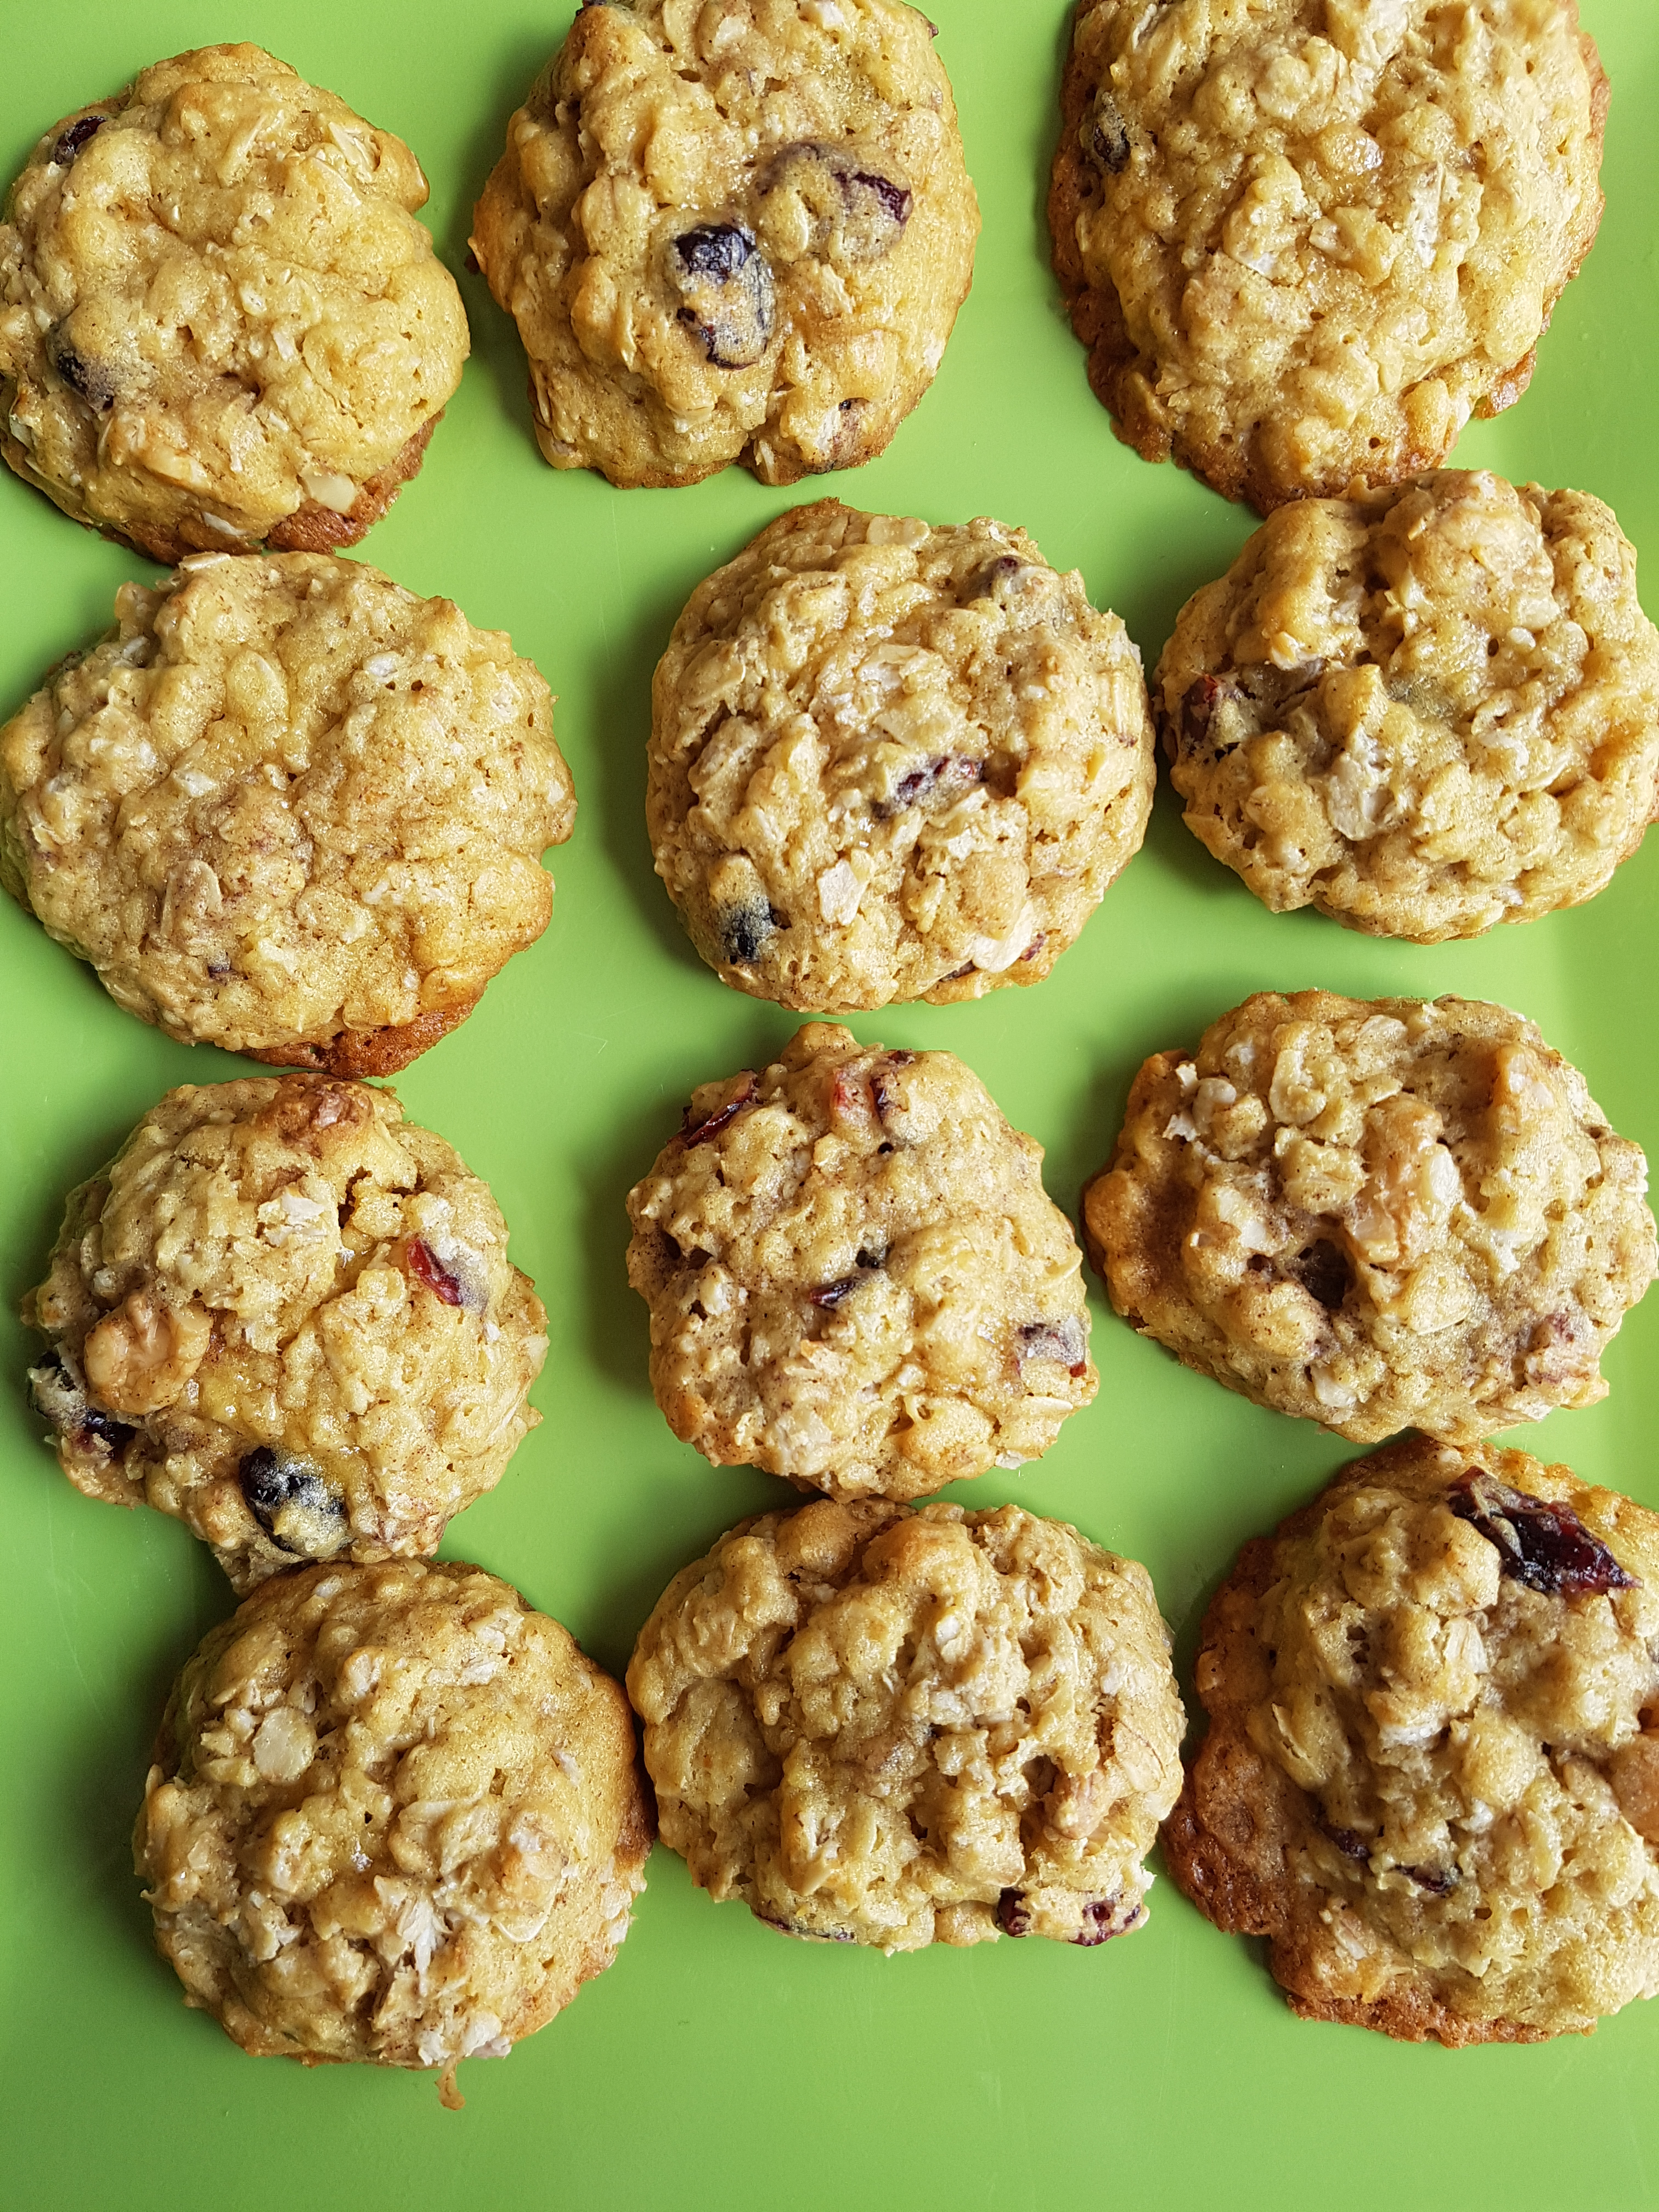
FINAL PRODUCT

oatmeal cookies

More tips from Sally’s Baking Addiction:

Room temperature eggs preferred. Good rule of thumb: always use room temperature eggs when using room temperature butter.
Soak your raisins in warm water for 10 minutes before using (blot very well to dry them) – this makes them nice and plump for your cookies. OR even try them with Raisinets!

Happy Baking!


Share this:
Share this page via Email Share this page via Stumble Upon Share this page via Digg this Share this page via Facebook Share this page via Twitter

, , , ,

Mar
27


I first discovered NuPasta at a food show a few years ago, and I’m pleased to say that they keep growing and growing. i.e you can now find them at more and more retailers. This is what you need to know about NuPasta.

nupasta - packaging

-25 calories per package (210 grams)

-2% Fat, 2% Carbohydrate, Zero Cholesterol, Zero Sodium.

-Gluten Free, Kosher, Halal, Non-GMO and requires ZERO refrigeration.

Please welcome NuPasta and give them a huge round of applause.

Plus they are a Canadian company (more applause).

In no time at all, I made a beautiful, colourful dinner tonight (see recipe below).

nupasta - ingredients

Not to mention, it will agree with my stomach and not make me feel bloated or uncomfortable like regular pasta.

The key to their success is the fact that NuPasta is made with Konjac, which is a root vegetable native to East Asia and grown at 2,000 – 4,000 ft. above sea level.

Walnuts and Peas Pasta (recipe by Stephanie Joanne)

1 package of NuPasta (drained and rinsed)

2 cups frozen peas

1 large carrot, sliced and boiled

1 clove of garlic, minced

1/2 cup of toasted walnut halves

1 tablespoon of coconut oil

1/4 cup chopped fresh parsley

salt and pepper

parmesan (optional)

Instructions:

1. Drain and rinse NuPasta

2. Toast walnuts (on a baking sheet in a 350 degree oven for 5 minutes)

3, In a pot, add garlic to coconut oil on low heat. After 5 minutes, add carrots, peas, one package of NuPasta. Then add parsley, salt and pepper. Add walnuts when plating and parmesan (if desired)

Final

nupasta - final

Disclosure: I was compensated for this post, however all opinions are my own.

Share this:
Share this page via Email Share this page via Stumble Upon Share this page via Digg this Share this page via Facebook Share this page via Twitter

, , , , , ,

Feb
05


True story:

I was online searching for a new dessert recipe to try and came across a recipe called:  “Lemon Magic Cake”.

I got all excited and starting grabbing the ingredients out of my fridge and pantry.

BUT I  then realized:

-I didn’t have any lemons

-I couldn’ find my whisk attachment for the KitchenAid

-I didn’t read the recipe properly and kept the egg whites but threw out the yolks when I actually needed the egg yolks

-the recipe required an 8×8 pan and I didn’t own one. (can you believe this?)

TOTAL FAIL. REPEAT…. TOTAL FAIL

I was so determined to make something new and returned to the internet in search of a new recipe to try. I came across a recipe for Date Squares which for some reason I’ve never made before.  I checked to see if I had ALL the ingredients and indeed I had everything. (sigh of relief). I even ran out to the dollar store to buy an 8×8 pan.

In no time at all, I made a delicious desert. Trust me, I will make it again.

Here’s the recipe for Date Squares (taken from www.JoCooks.com)

For Filling
3 cups dates, pitted
1 cup water
1 tsp vanilla extract

For Crust
2 cups old fashioned rolled oats
1 cup all-purpose flour
¾ cup brown sugar
½ tsp baking soda
¼ tsp salt
⅛ tsp cinnamon
1 cup cold butter, cut into small cubes

INSTRUCTIONS
Preheat oven to 350 F degrees. Line a 9 inch baking pan with parchment paper. Set aside.

1. In a medium saucepan add the water and the dates and cook over medium heat for about 10 minutes, until there’s no water left. Add the vanilla extract to the dates and mix well. Let mixture cool.

2. Add the date mixture to a food processor and pulse until it turns into a paste. Set aside.

3. In a food processor add the remaining dry ingredients and the butter cut into small pieces and pulse until the butter is well incorporated into the mixture and crumbles.

4. Spread ⅔ of the crumb mixture on the bottom of the prepared baking pan and spread it evenly.

5.  Add the date mixture and spread it with a spatula. Add the remaining crumb mixture as the last layer and pat it using a spatula, do not press down too hard.

6. Bake for 35 to 45 minutes until golden brown then let cool completely. Place in the fridge for a couple more hours then take it out and cut into squares.

FINAL PRODUCT.

date square - finalHappy Baking!

Share this:
Share this page via Email Share this page via Stumble Upon Share this page via Digg this Share this page via Facebook Share this page via Twitter

, , , , , , , ,

Jan
10


Fact: I serve fish for dinner every week.

Fact: I have a rotation of about 4 different fish recipes, which in my opinion isn’t enough.

Fact: I have a new recipe that will now be added to my fish “recipe collection”. (insert – applause).

This recipe provided me with a COLOURFUL and TASTY dish that involved a few interesting steps. For example – the recipe asks  you to marinate the fish in buttermilk, which is not something I’ve seen before in a fish recipe. But trust me, this step is worth it

Baked Tilapia and Vegetable Casserole (adapted from Natasha’s Kitchen)

Ingredients:

Tilapia Ingredients:
2 lbs (about 6-10 count) Tilapia fillets, thawed
Olive Oil to saute
1 Tbsp ketchup (I used Chili Sauce for an added kick)
1 Tbsp mayo

Marinade Ingredients:
2 large eggs
1 cup buttermilk
2 Tbsp soy sauce
1/2 tsp Salt and 1/8 tsp Pepper

Vegetable Ingredients:
2 medium bell peppers (red, orange, or yellow)
2 medium/large carrots, julienned or grated
1 medium onion

DIRECTIONS:

1. Whisk together the marinade ingredients. Place the tilapia in a large ziplock bag along with the marinade mixture and marinate in the fridge at least 1 1/2 hours. (simple enough, non?)

fish - buttermilk

2. Slice onions into thin half circles, slice bell pepper into thin strips and julienne or grate carrots. (I forgot the carrots. Oops). In a large skillet over medium/high, heat 2-3 Tbsp oil and saute onions for 3 minutes or until softened. Add sliced bell peppers and carrots and saute another 4-5 min or until softened. Remove from pan and set veggies aside.

fish - fry veggies

3. Whisk together the ingredients for the sauce.

fish - sauce

3. Once  the fish is done marinating, drain and discard the marinade. In the same empty skillet over medium/high, add 2-3 Tbsp oil and saute fish lightly on the skillet just until golden on the outside (about 2 min per side). Be careful not to over cook the fish in fact it’s probably best that the fish isn’t entirely cooked.

4.  Layer the casserole dish with 1/2 of the vegetables on the bottom. Place fish over the vegetables. Brush the mixture of the ketchup/mayo on top of fish. Then add another layer of vegetables on top. Sprinkle the top with salt and pepper to taste then cover tightly with foil or lid and bake at 375˚F for 15 min.

FINAL PRODUCT

fish - final

Just so you know, I only share recipes that I would make again!

Oh ya – served a few vegetables dishes along with this fish casserole. Specifically, a tomato soup, kale salad, tabouleh salad and a sweet potato dish. There were lots of satisfied tummies.

Happy Cooking!


Share this:
Share this page via Email Share this page via Stumble Upon Share this page via Digg this Share this page via Facebook Share this page via Twitter

, , , , ,

Oct
20


T’is the season that pumpkins are everywhere!! I’m not complaining as I adore pumpkin pie but didn’t want to go thru the process of making crust. Know what I mean? So I went online (for a change) to see what other options are out there and naturally I was inspired.

I bought a can of Pure Pumpkin and made two recipes with it and still have some left!!

pumpkin pie can

Recipe #1…Pumpkin Pudding (for the original recipe please click on www.myrecipes.com). This recipe is super easy and only required 6 tablespoons of sugar. #loveit.

INGREDIENTS

6 tablespoons of sugar
2 tablespoons cornstarch
1 3/4 cups 1% low-fat milk
1 large egg
1/2 cup canned unsweetened pumpkin
1 teaspoon vanilla extract
1/2 teaspoon ground cinnamon
1/8 teaspoon salt
1/8 teaspoon ground nutmeg
Cooking spray
1/4 cup chopped walnuts (I left this out)
Dash of salt
1/4 cup heavy whipping cream
 DIRECTIONS
 1. Combine 6 tablespoons sugar and 2 tablespoons cornstarch in a medium saucepan over medium heat. Combine milk and egg, stirring well with a whisk. Gradually add milk mixture to sugar mixture, stirring constantly, and bring to a boil. Cook for 1 minute, stirring constantly. Remove from heat.

2. Combine pumpkin and the next 4 ingredients (through ground nutmeg) in a bowl, stirring well. Slowly add pumpkin mixture to milk mixture, whisking constantly. Place pan over low heat, and cook for 3 minutes or until thoroughly heated, stirring constantly (do not boil). Divide pudding evenly among 4 dessert bowls, and cover surface of pudding with plastic wrap. Chill.

4. Place cream in a bowl. Beat with a mixer at high speed until stiff peaks form. Top each serving with 2 tablespoons whipped cream and about 1 tablespoon nuts. (I omitted the nuts and simply sprinkled it with some whip cream).

FINAL RESULT pumpkin pudding

Recipe #2….Pumpkin Chocolate Chip Bread OR Muffins (taken from Sally’s Baking Addiction). I have used her recipes before and will continue to use her recipes! She always has some little tip that will make a difference ie. the addition of orange juice.

INGREDIENTS

  • 1 and 3/4 cups (220g) all-purpose flour
  • 1 teaspoon baking soda
  • 2 teaspoons ground cinnamon
  • 1/4 teaspoon ground nutmeg1
  • 1/4 teaspoon ground cloves1
  • 3/4 teaspoon salt
  • 2 large eggs
  • 3/4 cup (150g) granulated sugar
  • 1/2 cup (100g) packed light or dark brown sugar
  • 1 and 1/2 cups (340g) pumpkin puree (canned or fresh)
  • 1/2 cup (120ml) vegetable oil, canola oil, or melted coconut oil
  • 1/4 cup (60ml) orange juice
  • 2/3 cup (120g) semi-sweet chocolate chips2

DIRECTIONS:

  1. Adjust the oven rack to the lower third position and preheat the oven to 350F degrees. Lowering the oven rack prevents the top of your bread from browning too much too soon. Spray a 9×5 inch loaf pan with non-stick spray. Set aside.
  2. In a large bowl, whisk the flour, baking soda, cinnamon, nutmeg, cloves, and salt together until combined. In a medium bowl, whisk the eggs, granulated sugar, and brown sugar together until combined. Whisk in the pumpkin, oil, and orange juice. Pour these wet ingredients into the dry ingredients (follow this step carefully..it makes a difference) and gently mix together using a rubber spatula or a wooden spoon. There will be a few lumps. Do not overmix. Gently fold in the chocolate chips.
  3. Pour the batter into the prepared loaf pan. Bake for 60-65 minutes, making sure to loosely cover the bread with aluminum foil halfway through to prevent the top from getting too brown. The bread is done when a toothpick inserted in the center comes out clean with only a few small moist crumbs. This may be before or after 60-65 minutes depending on your oven, so begin checking every 5 minutes at the 55 minute mark or so. (my muffins took about 20 minutes to bake)
  4. Allow the bread to cool completely in the pan on a wire rack before removing and slicing. The bread will stay fresh in an airtight container (it tastes better on day 2!) at room temperature or in the refrigerator for up to 10 days. But it won’t last that long.
  5. Make ahead tip: Baked bread can be frozen up to 3 months. Thaw overnight in the refrigerator and bring to room temperature before serving.

Additional Notes:

  1. You can use 1/2 teaspoon pumpkin pie spice instead of these spices.
  2. Try using milk chocolate, white chocolate, dark chocolate, or even pecans/walnuts instead of the semi-sweet chocolate chips

FINAL RESULT: 

pumpkin muffins

HAPPY BAKING!!


Share this:
Share this page via Email Share this page via Stumble Upon Share this page via Digg this Share this page via Facebook Share this page via Twitter

, , , , ,

Oct
13


I think I hosted a brunch three times in six weeks. But thanks to Pinterest I didn’t serve the same thing over and over again. All I did was punch in the word “BRUNCH” and a ton of photos came up which provided just the right amount of inspiration.

The last brunch I made consisted of: Cheesecake Stuffed Strawberries, Crustless Quiche, Baked Cinnamon French Toast, Baked Granola Cups, and a cheese platter. Needless to say, no one left hungry!

brunch - cheeseplatter

Plus, one of my guests brought this DELICIOUS baked brie.

brunch - brie

Here’s one of the recipes that I found on Pinterest and was an instant hit with my guests:

CHEESECAKE STUFFED STRAWBERRIES (original recipe can be found on www.thegirlwhoateeverything.com)

Ingredients:

A container of strawberries

6 tablespoons of soft cream cheese ( a little goes a long way)

1 tsp of vanilla

1 or 2 graham crackers that I smashed into little crumbs!! (again – a little goes a long way)

Instructions:

1. Using a sharp knife, dig a cavity into the top of the strawberry.

2. Using a sharp knife, also take off the bottom of the strawberry so it stands up nice and pretty

3. Mix the cream cheese and the vanilla

4. Carefully spoon the cream cheese mixture into the cavity of the strawberry.

6. Sprinkle the graham cracker on top.

FINAL RESULT

brunch - strawberrycheesecake

Happy Cooking!!


Share this:
Share this page via Email Share this page via Stumble Upon Share this page via Digg this Share this page via Facebook Share this page via Twitter

, , , , , , ,

Sep
30

Breakfast Ideas!


Meal planning is a challenge! I admit that often when I’m running on a treadmill, I’m thinking about what I will be serving for dinner or making for lunch.

In particular I find breakfast can be challenging. Mostly cause I’m always running late!!

In fact, according to a recent survey from the Loblaws and President’s Choice® teams, 68 per cent of Canadian parents have less than 10 minutes to make their child’s breakfast on a weekday.

So here’s a suggestion, make this treat THE NIGHT before. Just like you might make lunches the night before too.

With just a few ingredients I discovered a fabulous breakfast idea:

Baked Granola Cups (taken from www.chocolatecoveredkate.com)

Ingredients: 

  • 1/4 cup PC® applesauce or mashed banana (I used both)
  • 1/4 cup agave or honey
  • 1/2 tsp pure vanilla extract
  • 1/2 tsp cinnamon
  • 1/4 tsp salt
  • 1 1/4 cup rolled oats
  • yogurt

cups - ingredients

Instructions

Grease a muffin tin or mini muffin tin, and set aside.

Whisk together the first three ingredients in a bowl.

In a separate bowl, stir together all remaining ingredients.

Combine the bowls, stirring until evenly mixed.

Portion the batter into the muffin cups, pressing up the sides. Put the muffin tray in the fridge for at least an hour.

Then preheat the oven to 330 F. Take the muffin tin out and press the sides very firmly again. Bake granola cups 12 minutes, take out and press the sides into the muffin tins again with a spoon. To prevent crumbling, let sit 20 minutes before attempting to remove from the tins. (an important step – TRUST ME). These can also be frozen and thawed, if desired.

cups - mashitup

Final Result!!

cups - final

Then take out your favorite yogurt, add some fruit and bingo – you have yourself a tasty and pretty healthy breakfast.  Seeing as I’m always late there’s a good chance I will be eating this in the car! As you can see from this stat, I’m one of the 28%!!

    • Twenty-eight per cent even said that they eat on the go (stop at fast food restaurant, ate the meal in the car, etc.) to ensure their children have a proper meal.

If you are looking for more great recipe ideas, please click here.  Loblaws and President’s Choice have put together  some delicious and nutritious recipes Canadian parents can cook in the time they actually have.

Disclosure: I was compensated for this post, however all opinions are my own

Share this:
Share this page via Email Share this page via Stumble Upon Share this page via Digg this Share this page via Facebook Share this page via Twitter

, , , , , , ,

Aug
24


I was tired of my standard salmon recipes, so I did some research on the internet and found a new recipe that appealed to me. I love how easy it is to find a new recipe these days. Long gone are the days where I use to sit at the kitchen table sifting thru 6 cookbooks. (or more)

The recipe only included a few ingredients and sure enough..I had most of them in my fridge and pantry.

salmon - ingredients

Here’s the official recipe for Garlic Panko Salmon (from www.primaverakitchen.comI used half of the recipe (errr..the ingredients) and then used my own method. Keep reading!!

Ingredients
  • For the Salmon
  • 518g salmon fillets (I bought a big slab of salmon from Costco)
  • Salt and pepper
  • 1 1/2 tablespoons of Dijon
  • 1 tablespoon of honey
  • For the Garlic Panko
  • 2 tablespoons olive oil
  • 4-6 cloves garlic, minced, depending on how garlicky you like it
  • ¾ cup panko crumbs
  • 1 tsp lemon zest
  • 1 teaspoon parsley, chopped (I used more…lots more)
  • Sea salt and fresh ground pepper
Instructions (according to momwhoruns!)
  1. Preheat oven to 375 F degrees.
  2. Spread the dijon mustard and honey onto the salmon.

salmon - fish

3. In my Cuisinart Food Processor – I whizzed up the parsley, lemon, garlic and panko bread crumbs.

cuisinart

4. Spread this mixture over the salmon

salmon - final5. Bake for 30-40 minutes (depending on the size of your salmon)

6. Serve Warm!

Happy Cooking.


Share this:
Share this page via Email Share this page via Stumble Upon Share this page via Digg this Share this page via Facebook Share this page via Twitter

, , , , ,

Jul
26


I had the opportunity to go on a tour with Foodies on Foot and visit an asparagus farm as well as a lavender farm! I don’t often get the chance to visit a farm but when the opportunity presents itself …I jump at the chance.

The asparagus farm was indeed a learning experience. I had no idea that asparagus grew like this. (see bottom left photo)

asparagus - farm

At the end of the day, we were given 11 pounds of asparagus. For about a week, I was pretty busy making asparagus soup, roasted asparagus, steamed asparagus etc.

I also made this delicious Spring Asparagus Tart that I discovered online. In no time at all, I had a pretty nice looking meal.

Here’s the recipe courtesy of Morgan Hass for Food Network Kitchens:

SPRING ASPARAGUS TART

INGREDIENTS:

1 tablespoon all-purpose flour, plus more for dusting

1 sheet frozen puff pastry, thawed (a 9 1/2- by 9-inch sheet from a 17.3-ounce package)

1 cup mascarpone

1 1/2 teaspoons kosher salt

1 large egg, beaten

1 lemon, zest finely grated (about 1 tablespoon)

1 tablespoon chopped fresh chives

1 tablespoon chopped fresh tarragon

1 pound pencil asparagus, woody bottoms trimmed off

1 tablespoon olive oil

Freshly ground black pepper

DIRECTIONS

Preheat the oven to 400 degrees F. Line a baking sheet with parchment paper.

Lightly flour the work surface and roll out the puff pastry to a 9- by 12-inch even rectangle.  Transfer to the prepared baking sheet. I used PC Butter Puff Pastry and was really pleased with the results. This is now by “go-to” puff pastry of choice!

asparagus - puff

Combine the mascarpone, 1 1/4 teaspoons of the salt, the flour, egg and lemon zest, and then fold in the chives and tarragon.  (I didn’t have this spice handy ). Spread over the puff pastry, leaving a 3/4-inch border.

Toss the asparagus with the olive oil in a bowl. Lay half of the asparagus in a neat row across the surface of the tart so the tips meet the edge. Do the same in the opposite direction with the remaining asparagus. (the fancy part)

Season with the remaining 1/4 teaspoon salt and some pepper. Bake until the border of the tart is deep golden and puffed and the top is lightly spotted golden brown, about 25 minutes. Let cool for 5 to 10 minutes and serve.

FINAL RESULT

asparagus - tart

Serve this tart with a few salads and you are good to go!!

asparagus - salads

To find out more information about Foodies on Foot, please visit their website www.foodiesonfoot.ca  or follow them on twitter @foodiesonfoot.


Share this:
Share this page via Email Share this page via Stumble Upon Share this page via Digg this Share this page via Facebook Share this page via Twitter

, , , , ,

Jul
10


I got tired of  making blueberry crisps, so I made a Blueberry Cobbler instead. (just like that) I searched online for a recipe and discovered that there’s LOTS of recipes out there….and they are all a little different!

After reading (err..scanning) thru many recipes I finally found one that suited my needs. This is code for …I had all the ingredients in the pantry/fridge.

It’s a winner. The blueberries become all goo-ey and the cobbler part was perfect.

Here’s the recipe:

Blueberry Cobbler (taken from www.wickedgoodkitchen.com)

Ingredients:

For the Blueberry Filling

6 cups of blueberries

1 cup of sugar (I used less)

2 teaspoons of grated lemon zest

3 tablespoons of all purpose flour

For the Buttery Biscuit Crumble Topping

1 cup plus 5 tablespoons of all purpose flour

6 tablespoons of sugar

1 1/2 teaspoons of baking powder

1/4 teaspoon of salt

6 tablespoons of unsalted butter, chilled and cut into bits

1 large egg, slightly beaten

1 teaspoon of vanilla

1 tablespoon of sugar

1/2 teaspoon cinnamon

Directions:

1. Preheat oven to 375 F. Lightly butter a pie plate, baking dish etc.

2. Prepare the blueberry filling: Place blueberries into the prepared baking dish. In a small bowl, combine the sugar and lemon zest. Add the flour and whisk until thoroughly combined. Sprinkle evenly over the berries and toss gently.


blueberry - filling

3. Prepare the buttery biscuit crumble: In a bowl, whisk the flour, sugar, baking powder and salt until well combined. Using a pastry blender, cut the butter into the flour mixture until it resembles a course meal with small pea-sized pieces of butter.  In a small bowl, whisk the vanilla into the beaten egg. Gently toss the egg and vanilla into the flour mixture until moistened and the dough starts to hold together.

blueberry - crumble

4. Assemble the cobbler: Sprinkle the biscuit crumble evenly over the fruit filling. Sprinkle with sugar and cinnamon (if desired).

5. Bake for 40 minutes.

blueberry - final

**I promise that your kitchen is going to smell delicious and the blueberries will be bubbling away.

This recipe was so good that I’ve made this cobbler twice in one week.

Sadly I never have ice cream in my freezer but I bet this blueberry cobbler would be absolutely perfect with a scoop of ice cream!!

blueberry - plate

Happy Baking.


Share this:
Share this page via Email Share this page via Stumble Upon Share this page via Digg this Share this page via Facebook Share this page via Twitter

, , , , ,