Posts Tagged ‘Recipe’

Oct
12


Often when I bake or cook, I find myself posting a photo of the “final result” on Facebook. I then receive comments like “Recipe, please!!”.

Then it occurs to me that I should blog about these recipes and not just post photos of the final result. Here’s two recipes that I tried recently that are definitely worth making!

Recipe #1: I saw this recipe somewhere on the internet (for a change) and decided it would make a great vegetable side dish for a meat meal that was being served over the Jewish New Year. Several of my facebook friends also made it and we all had winning results

green-beans

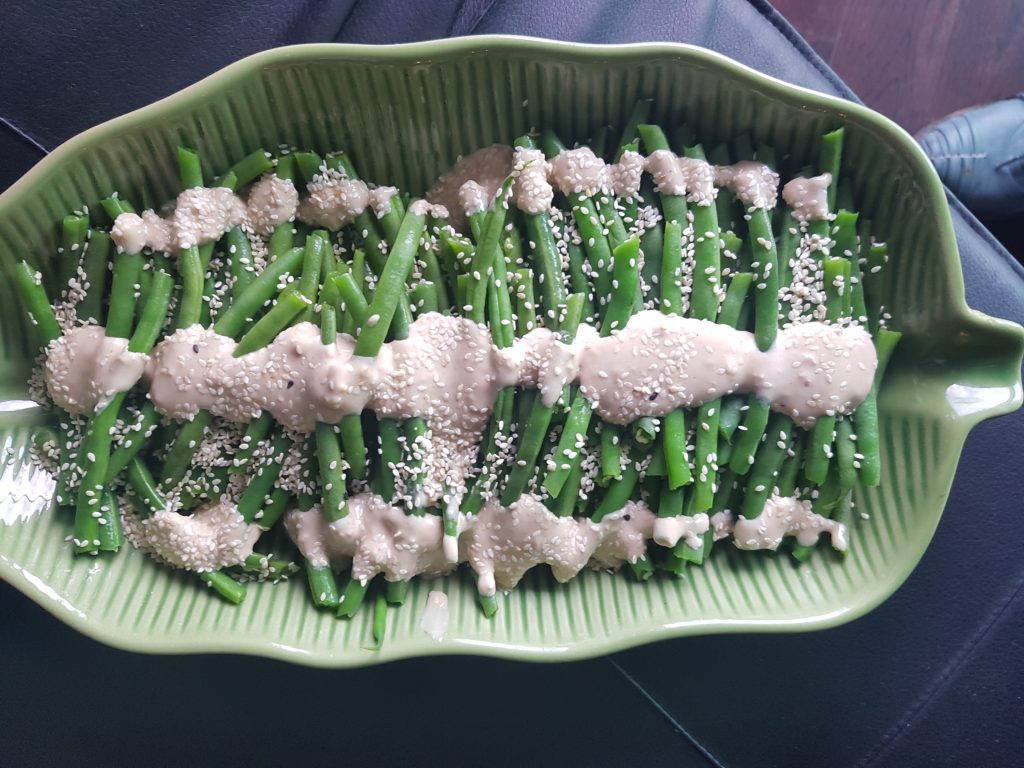
Green Bean with Honey Tahini Glaze (recipe taken from www.MyJewishLearning.com by Leah Koenig)

Ingredients
1 Tablespoon Tamari or soy sauce
2 Tablespoons honey
2 Tablespoons tahini (sesame paste)
Kosher salt and freshly ground black pepper
1 Tablespoon olive oil
1 lb trimmed green beans
1 Tablespoon minced garlic
2 teaspoons orange juice
1 teaspoon finely grated ginger

Directions
Preheat oven to 425. Spread beans in a 9×13-inch baking dish; drizzle with olive oil and sprinkle with salt and pepper to taste. Toss to coat beans evenly. Roast for 10 minutes.

Meanwhile, whisk together the tahini, honey, tamari, garlic, orange juice, and ginger in a small bowl.

Remove beans from oven. Pour honey-tahini mixture over beans and toss to coat evenly. Return beans to oven and roast for 10-12 additional minutes, until brown and starting to shrivel. Transfer to serving plate and sprinkle with additional salt and pepper to taste.

PS I steamed the green beans and then poured the tahini glaze over them and it was still delicious.

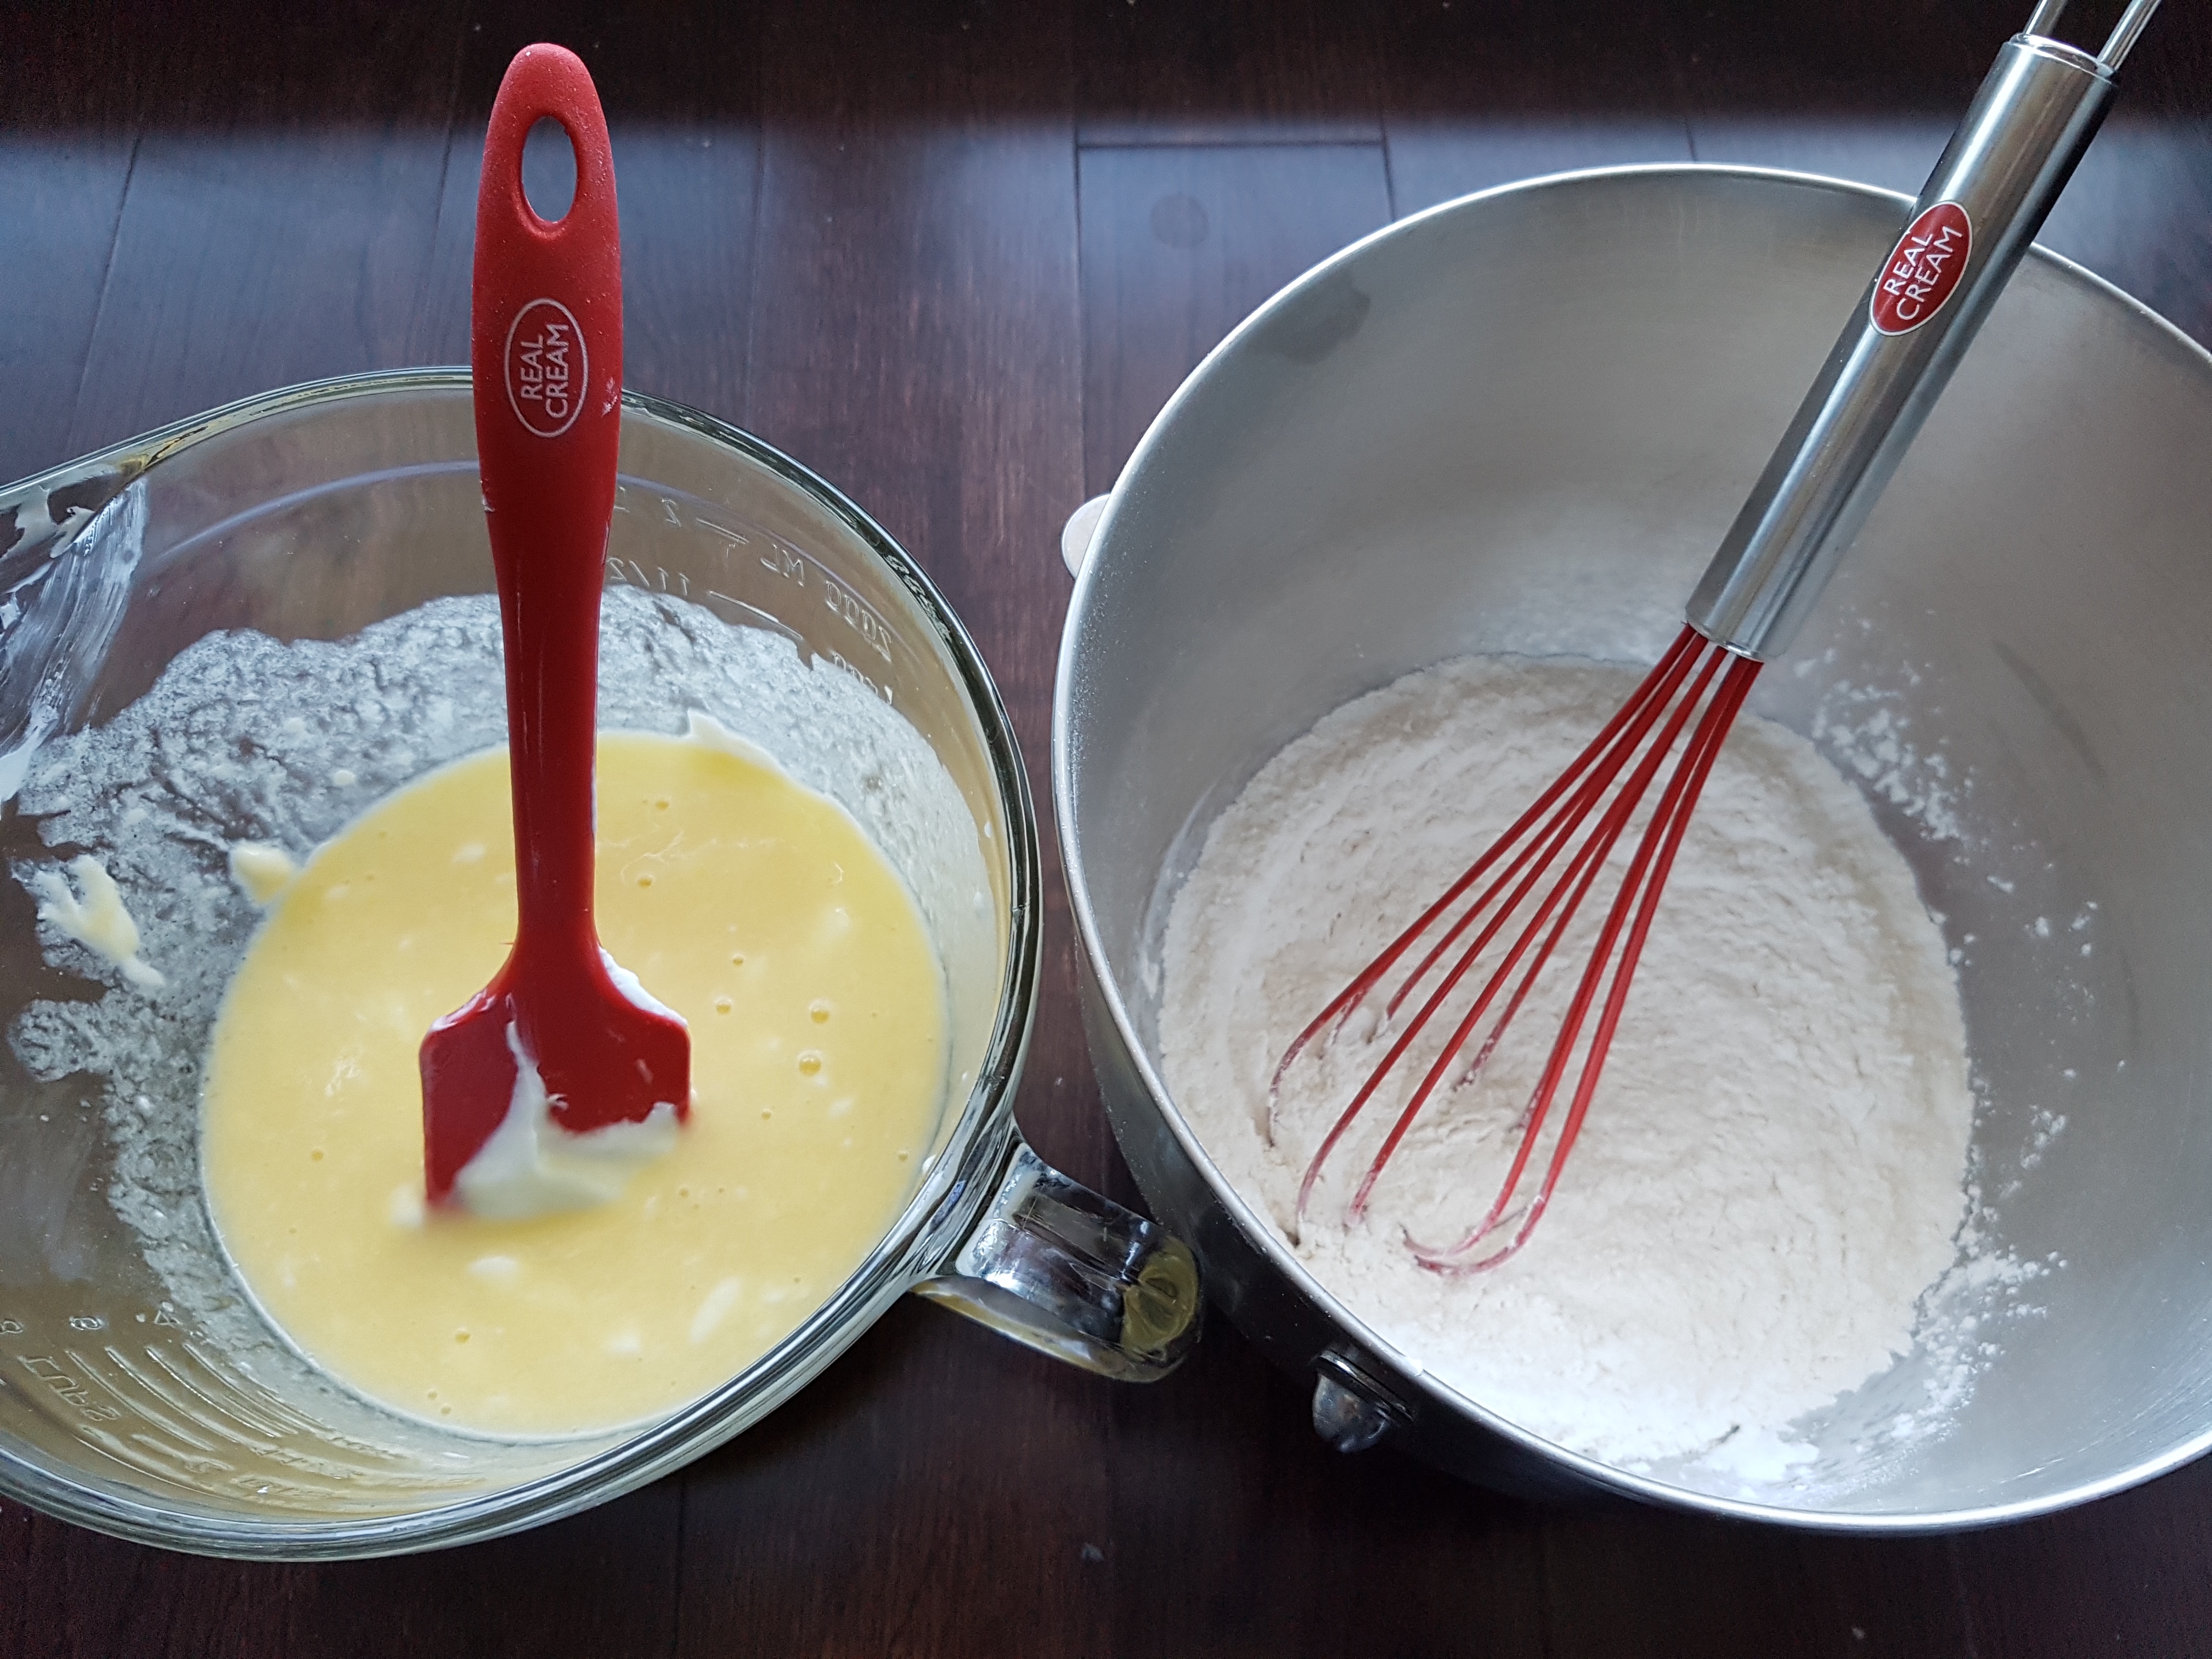
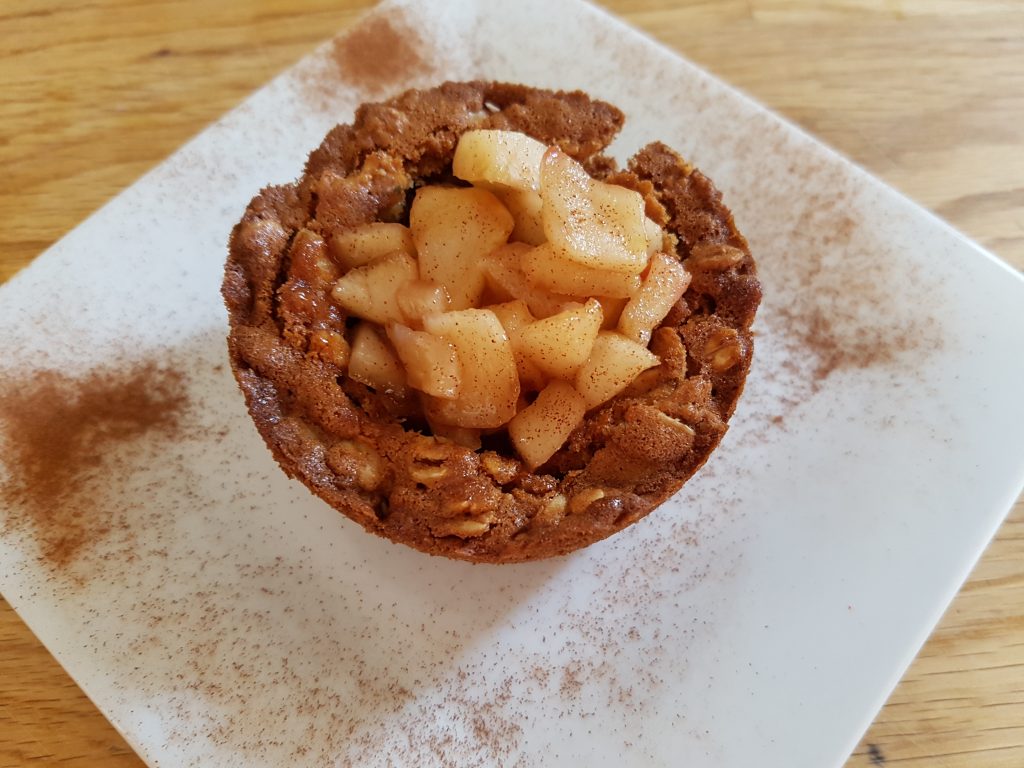
Recipe #2: Apple Crisp Cookie Cups (original recipe on this video by www.delish.com). This video showed up so many times on my facebook feed that I just had to try it. Guess what? I will be making it again!!

recipes-oatmeal-cookie-cup

This week, I’m going to make something I’ve never made before. Once again, I found it on Pinterest.

So stay tuned for a more detailed blog post about my experience making Salmon Wellington!


Share this:
Share this page via Email Share this page via Stumble Upon Share this page via Digg this Share this page via Facebook Share this page via Twitter

, , , , , , , , ,

Sep
29


Yes – it’s true. I made chicken soup for my very first time.

How did this happen? The answer is simple: My kitchen has been dairy since 1990. Therefore I made the chicken soup in my boyfriends’ kitchen.

What inspired me? Several things: a) the Jewish New Year is around the corner b) the temperatures are cooling outside and c) there was a 3 day sale for fresh whole chickens at Longo’s!.

To be honest, it was my first time even buying a whole chicken.

As for the recipe: I did my research online and chatted with several friendly chefs. (um, I harassed at least 3 people). LOL

I decided to try two recipes:

Recipe #1 – How to Make Roasted Brown Chicken Stock, from www.simplebites.com

I chose this blog post as she is a respected food blogger (that I’m pretty sure I met many years ago) and I loved her 7 tips that she included in her blog post. Click here.

Here’s the recipe for Roasted Brown Chicken Stock – taken from Simple Bites.

Ingredients
10 chicken carcasses (I was nervous and only bought 3 and then reduced the recipe)
3 gallons cold water, approximately
2 large onions, peeled
1 large leek, washed (oops forgot this ingredient)
4 sticks of celery, washed
2 medium carrots, peeled
2 bay leaves
6-8 garlic cloves (00ps – forgot this ingredient too)
1/2 teaspoon whole black peppercorn
Handful of fresh parsley
2 springs of fresh thyme
2 tablespoons tomato paste (optional)

Instructions

Preheat oven to 350° F.
Do not rinse the bones, but place them directly in a large oiled roasting pan.  I brushed them with tomato sauce for more flavour and colour.

simple-bites-roasting
Roast the bones, turning once with a sturdy pair of tongs, until the bones caramelize, approximately 1 1/2 hours. Do not let them burn, or your stock will be bitter. (easy peasy)

Roughly chop the onion, leek, celery and carrots and toss them with a little oil.
Place them in another oiled roasting pan or sheet, and roast alongside the bones until lightly caramelized, approximately 25 minutes.

simple-bites-veggies
Remove bones from oven and transfer to a large stock pot. There will be a pool of fat at the bottom of the pan which you can drain off before deglazing the pan, or you can add it to your stock. It will only add more flavor to the final product.

Add a few cups of cold water to the roasting pan to deglaze it, and use a solid spatula to lift off the remaining food particles on the bottom of the pan and all the flavor they bring. Add mixture to the pot with the bones.

Add roasted vegetables herbs, garlic, peppercorns and bay leaves to the pot of bones. Fill pot up with cold water until the ingredients are just barely submerged and place on stove burner.

simple-bites-pot
Bring stock to a boil — and reduce heat immediately. Simmer slowly for 6-8 hours, occasionally skimming excess oil or scum off the top. You don’t need to babysit it much, just make sure it is at a temperature where it will will simmer, but not boil.
Using a sturdy Spider Skimmer, dip into the large pot and fish out the bones.

When you have fished out all the large ingredients, strain the broth through a fine sieve into a sturdy bucket or another pot. ( I chose to keep the veggies)

If you have the time and patience, strain the stock a second time through a cheesecloth to further remove impurities. (I didn’t do this)

Final Result…the bowl on the right!!

simple-bites-final

Next week, I will share Recipe #2 wth you to explain how I made the bowl on the left.

Stay tuned!!

Share this:
Share this page via Email Share this page via Stumble Upon Share this page via Digg this Share this page via Facebook Share this page via Twitter

, , , , ,

Aug
11

Meatballs….


I had a packet of ground beef hanging around in the freezer from TruLocal and wanted to do something with it besides making a hamburger. So I decided that meatballs might be a good idea. Believe it or not, this was my first time making meatballs!

I then headed over to Pinterest and selected the recipe where I didn’t have to buy anything for the recipe. Am I the only one who does this? LOL. I love cooking but hate having to go get the ONE item I might be missing for a recipe.

Here’s what I made:

Incredible Baked Meatballs (Original Recipe Found Here)

Ingredients:
1 lb hamburger
2 eggs, beaten
1⁄2 cup milk
1⁄2 cup grated parmesan cheese
1 cup panko breadcrumbs or 1 cup breadcrumbs
1 small onion, minced
2 garlic cloves, minced
1⁄2 teaspoon oregano
1 teaspoon salt
fresh ground pepper
1⁄4 cup minced fresh basil

Directions:

1. Mix all ingredients with hands.
2. Form into golfball sized meatballs.
3. Bake at 350 degrees for 30 minutes.

Before I knew it I was making those golf sized meatballs.

meatball - oven

And 30 minutes later I was eating these delicious baked meatballs.

meatball - finalHappy Cooking!

Share this:
Share this page via Email Share this page via Stumble Upon Share this page via Digg this Share this page via Facebook Share this page via Twitter

, , , , , ,

Jul
13


I read a blog post this week from Glimmer Life and had a good chuckle when I read the following line:  “I basically designed my whole house around inspirational pics on Pinterest”. I left a comment on her facebook page that my entire menu is curated from Pinterest. Seriously.

Here’s a few recipes I tried last week that I found on Pinterest!

Pesto Salmon and Italian Vegetables in Foil Packets (click here for the original recipe by www.cookingclassy.com

1 lb of trimmed and washed Green Beans

4 pieces of Salmon

Pesto (I made my own – click here for an easy recipe)

Directions:

1. Cut tin foil into 4 large squares.

2. Take a handful of green beans and place it in the middle of the square.

3. Take the salmon and place it on top of the green beans.

3. Spread the pesto over the salmon.

4. Wrap the packet up and bake in a 350 degree oven for 30 minutes

FINAL

dinner - salmon

Zucchini Boats ..the original recipe by www.domesticsuperhero.com can be found here). please note: I improvised a lot!

1. Take 4 zucchinis and scoop out the inside to make a “boat”

2. Spread some pizza sauce in the “boat”

3. Sprinkle with shredded cheese and oregano.

Bingo – you have a side dish for the salmon.

FINAL RESULT

dinner - zucchini

As for dessert….Apple Pie Bites:

It really was a simple recipe (um ….3 ingredients)  but I messed up the directions and it looked NOTHING like it was suppose to. However my guests did not notice as they didn’t see the original recipe.

The original recipe from www.cakescottage.com can be found here . (please click on the link so you can see what it was SUPPOSE to look like)
dinner - dessert
 Happy Cooking!


Share this:
Share this page via Email Share this page via Stumble Upon Share this page via Digg this Share this page via Facebook Share this page via Twitter

, , , , , , , , ,

Jun
26


Today I hosted a brunch for the first time in a long time. It was a delight to put together the menu as I had seen a recipe on my facebook feed that inspired me (one of those sponsored posts!!).

I didn’t think it would turn out so I tested the recipe during the week to ensure that is was “guest worthy”. Guess what? It worked and was indeed guest worthy.

It’s a freakin’ brilliant recipe. The star of the recipe is …WONDER BREAD (believe it or not) and your rolling pin.

brunch - rolling pin

All you need is just a few ingredients and bingo you will have your main course!!

brunch - ingredients

Here’s the recipe for Cinnamon Toast Roll Ups (original recipe here)

8 slices of WONDERBREAD
1/2 cup Ricotta Cheese (I added a touch of cream cheese too)

1/2 cup granulated sugar

1 tbsp ground cinnamon

3/4 cup butter, melted

DIRECTIONS

Preheat oven to 350 degrees.

1. Trim crusts from bread and flatten each slice with a rolling-pin.

2. In a medium bowl, combine Ricotta Cheese with a touch of cream cheese and stir until smooth.

3. In a separate bowl, combine granulated sugar and cinnamon; set aside.

4. Spread about 2 tablespoons of Ricotta Cheese mixture on each slice of bread. Roll up, jelly roll style. Dip in melted butter, then in cinnamon-sugar.

4. Place on a baking sheet lined with parchment paper. Bake for 20 minutes or until golden brown.

Final Results

brunch - final

I served this along with:

-A gorgeous salad. (hint it was worth the visit to Wychwood Barns Farmers Market to pick up the edible flowers and the gorgeous salad mix)

brunch - salad

-Spiralized cucumber salad

brunch - cucumber

-Mozzarella, Basil and Tomato with a Balsamic Glaze (that I made myself. Thank. You. Very. Much!!

brunch - tomatoes

-Baked oatmeal cups (oops can’t find the photo)

-Watermelon Skewers dipped in Campari

brunch - watermelon

-Baked eggs in a bun!!

brunch - baked eggs

As for refreshments: I served Campari in Soda with the cutest straws that I picked up at Michaels. By the way, I can’t remember the last time I went into Michaels but I clearly need to go more often. I could have bought a lot more than just the straws!!

brunch - drinks

More recipes in upcoming upcoming blogs K?. I promise.

Happy Brunch-ing

Share this:
Share this page via Email Share this page via Stumble Upon Share this page via Digg this Share this page via Facebook Share this page via Twitter

, , , , , ,

Jun
06


Remember the roasted cauliflower recipe that I blogged about a few weeks ago? Well, there was no way I was going to eat that whole cauliflower by myself. Therefore I needed to figure out what to do with it.

So I went on Pinterest and found a Cauliflower Potato Salad – without the Potatos!! I thought to myself – PERFECT.

Here’s the recipe: (adapted from www.nelliebellie.com)

Ingredients:

1 roasted cauliflower or steamed cauliflower

2 hard boiled eggs, grated

1/4 cup of mayonnaise

3 ribs of celery, diced

Fresh parsley or dill (fresh herbs will make a huge difference)

cauliflower -ingredients

Directions:

1. Roast or steam the cauliflower. Click here for the Roasted Cauliflower recipe)

2. Grate the cauliflower till you have 2 cups

cauliflower - grated 2 cups

3. Combine the grated cauliflower, grated hard boiled eggs and celery together with the mayo.

4. Add salt and pepper and fresh herbs – to your taste.

FINAL

cauliflower - final

This is a fantastic alternative to potato salad.

It’s also perfect for someone like me who is trying to cut down on carbs.

T’is the season to embrace salads, don’t you think?


Share this:
Share this page via Email Share this page via Stumble Upon Share this page via Digg this Share this page via Facebook Share this page via Twitter

, , , , , , , , , , ,

Jun
03


I’m been a fan of cereal since I was a kid.

True stories: I have fond memories of my sister and I, spilling Raisin Bran on the counter and then picking out the raisins.

I also remember that I would often invite my high school friend over after school to have a bowl of Life cereal and then watch Days of Our Lives.

I also have a strong memory of Weetabix. It was one of those pure cereals that would absorb the milk just perfectly.

weetabix - box1

At a recent Weetabix Lunch and Learn, I found out that Weetabix has a manufacturing plant in Cobourg, Ontario where it produces Weetabix and Alpen.

Here’s some cool facts:

Alpen has a cereal with NO SUGAR ADDED. Something tells me that this would appeal to a lot of people.

weetabix - alpen

Weetabix has only 2 grams of sugar per serving and contains 4 simple ingredients. How awesome is that?

weetabix - 2 gram

If you are looking to increase your daily fibre intake, then these two cereals should be in your cupboard!!

Here’s a recipe that was served at the event that I thought I would share:

Weetabix Adult Mac and Cheese (recipe credit: Jeremy Parsons, 360 Gourmet)

Ingredients:

2 1/2 cups of Macaroni

3 cups 18% Cream

1 cup of shredded Gruyere

1 cup of shredded Cheddar

1 cup of shredded Pecorino

Salt and Pepper to taste

CRUST

2 Weetabix

3 tbsp garlic butter

 DIRECTIONS

1. In a non stick sauce pan, add cream and shredded cheese stirring constantly until well combined.

2. Add salt and pepper to taste and keep well heated and reduce so the sauce will stay on a spatula

3. Cook pasta.

4. Combine the pasta and the cream sauce.

5. Spoon into greased ramekins

6. Melt butter and shred Weetabix into the melted butter

7. Sprinkle the “crust” over each ramekin.

8. Place under broiler until brown. (5 minutes)

weetabix - mac

For more information about Weetabix:

Facebook: https://www.facebook.com/WeetabixNA

Discolour: This is a sponsored blog post, however all opinions are my own

Share this:
Share this page via Email Share this page via Stumble Upon Share this page via Digg this Share this page via Facebook Share this page via Twitter

, , , , , , , , ,

May
16


One of my foodie friends finally launched a personal blog (www.onmytabletoday.com) and to celebrate this occasion I decided to make the first recipe he posted!

It was easy to make and a huge hit with my guests.

Here’s the recipe for Roasted Cauliflower with a Tahini Glaze (recipe from www.onmytabletoday.com)

Ingredients:

1 Cauliflower
4 Tbsp Olive oil
salt and pepper

For the glaze:
4 Tbsp Tahini
2 Tsp Garlic, minced
1 1/2 Tbsp Honey
2 Tbsp Sambal Oelek (Spicy Sauce) – I chose not to make mine spicy
4 Tbsp Hot water (to adjust glaze’s consistency)

Instructions:

1. Take the largest pot you own and fill it with water. Add some salt and let it come to a boil.

2. Immerse the cauliflower in the salted boiling water for no longer than 6-7 minutes. (ps I got distracted and boiled the cauliflower to death and had to go out and buy another cauliflower). USE A TIMER.

3. Once you remove the cauliflower from the boiling water, massage  it all over with olive oil and salt and pepper.

4. Broil the cauliflower for 5 to 7 minutes. (use a timer as you don’t want to burn it). Check on it every once in a while!!

4. Prepare the glaze and then massage the glaze all over the cauliflower (this is the fun part)

6. Broil the cauliflower once again for another 6-7 minutes. (till it gets brown) USE A TIMER.

7. Top with pomegranate seeds and serve immediately.

Naturally it was such a hit that I decided to buy another cauliflower and try another recipe that I found online.

cauliflower - pom

Roasted Cauliflower with Lemon Tahini Sauce – (original recipe from the Vegetarian Times)

1 large head cauliflower, cut into 1-inch florets (about 1 ½ lb.)
4 tsp. olive oil, divided
2 cloves garlic, minced (about 2 tsp.)
2 Tbs. tahini
1 Tbs. lemon juice
¼ tsp. salt
1 Tbs. chopped parsley
1 tsp. toasted sesame seeds

1. Preheat oven to 425 degrees.

2. Toss cauliflower with 2 tsp. olive oil, and season with salt. Spread on large cookie sheet, and bake 12 to 15 minutes, or until cauliflower is fork-tender and slightly browned.

3. Meanwhile, heat remaining 2 tsp. olive oil in small saucepan over medium heat. Sauté garlic in oil 1 to 2 minutes, or until fragrant. Stir in tahini, lemon juice, 5 Tbs. water, and salt. Simmer over low heat 1 to 2 minutes. Remove from heat.

4. Spoon over the cauliflower or broil for 5 minutes. You don’t have to put it back in the oven- but I did and it was delicious. Sprinkle with parsley and sesame seeds, and serve.

cauliflower - lemon

Happy Cooking!!


Share this:
Share this page via Email Share this page via Stumble Upon Share this page via Digg this Share this page via Facebook Share this page via Twitter

, , , , , ,

Apr
29


When I saw this recipe on the internet, I knew I wanted to make it.  It looked stunning and it didn’t require a million ingredients. Plus I knew it would be the perfect side dish for my salmon.

Here’s the recipe for a Zucchini  Rose Tart (adapted from www.Buonappa.net)

Ingredients:
1 roll puff pastry

Filling:

1 cup ricotta cheese
2 eggs
1/4 cup Parmesan cheese

1/4 cup mozzarella cheese
a lot of  fresh oregano, fresh rosemary or fresh thyme!

Decoration:
4 multi color carrots (purple, orange and yellow)
2 zucchini
tart - veggies

Instructions:

1. Roll out the puff pastry and place it in the bottom of a greased oven proof baking dish. However,  I was using this recipe for Passover so I covered the bottom of my serving dish with Matza.

If you are using puff pastry, bake in the oven (with weights) at 350 for 20 minutes. Lets cool

tart - matza

2. Mix together in a bowl: eggs, ricotta cheese, parmesan, mozzarella cheese, and fresh herbs (this made all the difference, I promise you).

tart - mixture

3. Spread the mixture over the puff pastry (or matzo in my case)

3. For the vegetables: peel the carrots and split in half. Then take your peeler and peel long ribbons. Do the same with the zucchini but don’t peel them. Then place all the ribbons in 2 cups of water and put them in the microwave for 5 minutes. DRAIN.

tart - ribbons

4. Now for the fun. Roll up each ribbon and then place into the filling (which will acts as a “cement). This take TIME. Make sure you have enough TIME and enough RIBBONS. It took more time and more ribbons than I thought but it was SO worth it.

5. Brush with olive oil (which I forgot to do. Oops)

5. Bake at 375 degrees for 45 minutes

Full disclosure: I swore a few times while making this but I will make it again. It was really worth it.

FINAL

tart - final

I served this dish along with:

-Salmon with balsamic onions

-Roasted Cauliflower with a Tahini Glaze

– Beet salad with mint/feta cheese

-Spinach salad with blood orange and pecans

Happy Cooking!

Share this:
Share this page via Email Share this page via Stumble Upon Share this page via Digg this Share this page via Facebook Share this page via Twitter

, , , , , , , , ,

Apr
05


I’m not sure what the stats are but I know that many Canadians are lactose intolerant, gluten-free or have a peanut allergy. Myself included. I’ve been lactose free for about 8 years now and I carry around lactose pills with me everywhere (purse, kitchen, car, pockets) so that I can continue to enjoy dairy products (which I love).

Sometimes it can be hard to know where to shop and how to choose products and ingredients that have the quality and flavours you crave. For many Canadians, this means that meal-planning has become predictable, routine and, well, bland.

However, the President’s Choice® team is dedicated to helping all Canadians find freedom in “-free” products, by showing consumers they can explore new and unexpected flavours and embrace culinary trends, no matter their dietary needs.

I’m loving this initiative that President’s Choice® has launched and recently noticed this giant poster at Loblaws.

loblaws - poster

While grocery shopping, I picked up some PC® SKYR which is lactose free and has more protein in in than traditional greek yogurt. #fact.

loblaws - skyr

Then I went home and made a delicious French Yogurt Cake using the PC® SKYR. Guess what? I can enjoy this cake WITHOUT taking a lactose pill. HOORAY. HOORAY.

Here’s the recipe for French Yogurt Cake (courtesy of BonAppetit)

Ingredients:
1 1/2 cups all-purpose flour, plus more for dusting
2 teaspoons baking powder
3/4 teaspoon kosher salt
1 cup sugar
1 tablespoon finely grated lemon zest
3/4 cup whole-milk Greek yogurt
1/2 cup vegetable oil
2 large eggs
1/2 teaspoon vanilla extract

Directions:

1. Preheat oven to 350°. Coat pan with vegetable oil spray. Dust with flour; tap out excess.
2.Whisk 1 1/2 cups flour, baking powder, and kosher salt in a medium bowl.
3. Using your fingers, rub sugar with lemon zest in a large bowl until sugar is moist. Add yogurt, oil, eggs, and vanilla extract; whisk to blend. Fold in dry ingredients just to blend.

loblaws - 2 bowls

ADORE recipes that only requires two bowls.

4. Pour batter into prepared pan; smooth top. Bake until top of cake is golden brown and a tester inserted into center comes out clean, 50–55 minutes.

loblaws - final

For more information;

Website: www.PresidentsChoice.ca

Hashtag: #CompromiseFree

Disclosure: I was compensated for this blog post however all opinions are my own  

Share this:
Share this page via Email Share this page via Stumble Upon Share this page via Digg this Share this page via Facebook Share this page via Twitter

, , , , , , , ,